
Homemade essentials - DIY crayons, play doh, baby wipes & more. Via: sueniosencantados.com Crayons, play doh, bubble mix, baby wipes … if you feel like you’re constantly refilling your toddler consumables, why not save yourself a trip to the shops and make your own?
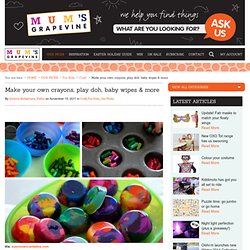
Here are 15 ideas for cheap and cheerful everyday essentials. (Above: recycle old crayons into fun shapes. Get the tutorial here). Via: havingfunathomeblog.blogspot.com Easy peasy bath paints: combine shaving foam with food dyes. Via: rustsunshine.blogspot.com Play doh is a kiddie winner every time, so why not whip up this homemade recipe on a rainy day. Via: blog.wantingwhatyouhave.com If there’s one item that gets a daily workout more than any other, it’s the humble baby wipe. Via: instructables.com Fun for craft, and yummy for eating! Via: greenkitchenstories.com These DIY fruit roll-ups put supermarket snacks to shame! Via: smashedpeasandcarrots.blogspot.com This simple bubble mix recipe makes the ambitious claim of creating the BEST BUBBLES EVER! sueniosencantados blog. Mini Marshmallow Shooters (or Pom Pom Poppers) A few months ago, when I was first introduced to Pinterest, I came across this idea from Real Simple.
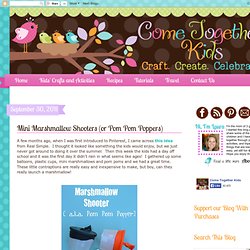
I thought it looked like something the kids would enjoy, but we just never got around to doing it over the summer. Then this week the kids had a day off school and it was the first day it didn't rain in what seems like ages! I gathered up some balloons, plastic cups, mini marshmallows and pom poms and we had a great time. These little contraptions are really easy and inexpensive to make, but boy, can they really launch a marshmallow! Here's how we made ours ( I made a few small changes from the original idea) You'll need: * plastic cups (ours were 9 oz) * balloons ( ours were 12") * mini marshmallows (or pom poms) * scissors (not pictured) And here's what you need to do: Make-your-own "Lava" Lamp. I'm embarrassed to even admit how much time I've spent on Pinterest this summer.
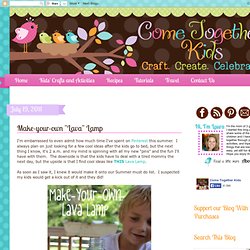
I always plan on just looking for a few cool ideas after the kids go to bed, but the next thing I know, it's 2 a.m. and my mind is spinning with all my new "pins" and the fun I'll have with them. The downside is that the kids have to deal with a tired mommy the next day, but the upside is that I find cool ideas like THIS Lava Lamp. As soon as I saw it, I knew it would make it onto our Summer must do list. I suspected my kids would get a kick out of it and they did! Here's how we did it: 1. 2. ** NOTE ** We liked watching the water layer "sink" to the bottom, but we had to wait awhile for the bubbles to disappear for the next step.
Easy Kite Making Instructions for Preschool Kids. 16.7K Flares Twitter 27 Facebook 110 Google+ 2 StumbleUpon 15.7K Pin It Share 899 899 Reddit 0 LinkedIn 0 inShare0 Filament.io 16.7K Flares × Spring is a great time to fly kites.
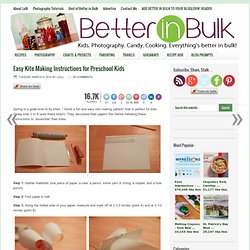
I found a fun and easy kite making pattern* that is perfect for kids (today kids 2 to 9 used these kites!). They decorated their papers first before following these instructions to “assemble” their kites: Step 1: Gather materials (one piece of paper, a ruler, a pencil, some yarn or string, a stapler, and a hole punch) Step 2: Fold paper in half Step 3: Along the folded side of your paper, measure and mark off at 2 1/2 inches (point A) and at 3 1/2 inches (point B) Step 4: Take two corners of your paper and staple them together at point A.
Step 5: Punch a hole at point B Step 6: Tie a long piece of yarn through the hole you’ve just punched. Step 7: Fly your kite on a windy day. Step 8: Expect lots and lots of laughs, “Wows!” These simple kites were so easy to make, and even easier to fly. . © 2010 – 2013, Lolli.