
Crafts. Crafts & DIY. General crafts. She's Crafty: DIY Multi-Chain & Ribbon Necklace. Due to the resounding success of her last She’s Crafty, my friend Pandora from Accessory Source is back with another lovely necklace DIY tutorial that would make a fantastic christmas present for a friend or relative!
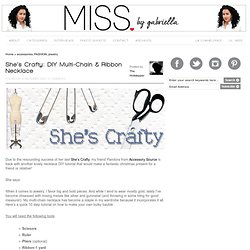
She says: When it comes to jewelry, I favor big and bold pieces. And while I tend to wear mostly gold, lately I’ve become obsessed with mixing metals like silver and gunmetal (and throwing in some bling for good measure!). My multi-chain necklace has become a staple in my wardrobe because it incorporates it all. Here’s a quick 10 step tutorial on how to make your own bulky bauble. You will need the following tools: ScissorsRulerPliers (optional)Ribbon-1 yardTwo jump rings (the size of a nickel). Supplies I chose a mix of metals in various colors and sizes and a few strands with rhinestones. All of my materials were purchased at Toho Shoji.
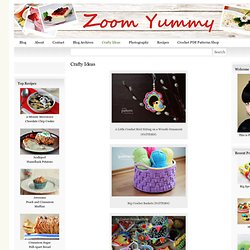
Cut your first strand of chain to 12 inches Step 1: Cut your first strand 12 inches long. Hang your chains from longest to shortest. Craftgawker. Most favorited. Crafty Ideas. A Little Crochet Bird Sitting on a Wreath Ornament (PATTERN) Big Crochet Baskets (PATTERN) Big Crochet Christmas Party (PATTERN) Big Crochet Flower Party (PATTERN) Blue Mittens BO and LISSA – Miniature Teddy Bears Brown Slippers Clay Fun for Kids Colorful Crochet Christmas Star Ball (PATTERN) Colorful Crochet Floor Cushion (PATTERN)
General crafts. Crafty. Most favorited all-time. Crafts. Dream a Little Bigger Craft Blog. It must have something to do with spring cleaning that makes me want all new rugs.
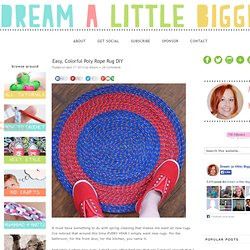
I’ve noticed that around this time EVERY YEAR I simply want new rugs. For the bathroom, for the front door, for the kitchen, you name it. And while I adore new rugs, I don’t very often find any that are “unique” enough that I want to spend my hard earned money on them. So instead, I decided to DIY up some fun new floor pieces and this is one of my favorites! For this project you will need: First take your rope and fold it in on itself like seen above. Wrap the rope around and around using a healthy amount of hot glue every step of the way.
Probably the most important bit when working on your rug is to try and glue down while it is sitting on a flat surface. Keep going until you get the size you’re going for. And because no post could be complete without at least one cat photo bombing things, Max says hi. See where I link up. You may also want to check out: DIY Blog. An occasion for dispensing confetti doesn’t present itself too often, so why not do it with appropriate aplomb?

As if we didn’t already know that black-and-white, bold graphics, and a dash of sparkle are a surefire route to a memorably festive visual statement, along come these confetti poppers—a DIY project — Continue reading Talk about a gem of a DIY project! This shimmering, beautifully faceted holiday ornament, which we discovered on the unfailingly industrious site, A Beautiful Mess, was fashioned at home with the help of standard craft staples: balsa wood, X-Acto knife, gold paint—and, yes, a dose of motivation which (we admit) — Continue reading We were immediately struck by the moody prettiness of this Christmas tree, only to find that we were fooled by a terrific home-made optical illusion—and the most artful no-fuss tree we’ve seen in a while.
As illustrated on Almost Makes Perfect, the beauty of opting for this tree is that — Continue reading Oh man, it’s here. True Blue Me & You: Doable Unique DIYs. I LIKE BIG BUTTONS DIY. When I opened my first store in NYC, way back when, I decorated the store with huge plywood cutouts of buttons, needles and spools of thread.

I then took cord and wrapped the spools, threaded the wooden needles and made a criss-cross in each button.....and then spray painted the entire "wood collage" gold! It looked amazing. If I had Krylon's Glitter Blast back then, I would have used that instead. These huge frisbee buttons would look terrific in any room in your house. Especially if you're creative! Frisbee Button DIY Here's the DIY video! You'll need: Frisbees Drill with large drill bit Krylon Glitter Blast Krylon Fusion in a color that matches your Glitter Blast Yarn Drill four "button holes" in your frisbee Make sure to do this on some scrap wood! Spray paint your button with the Krylon Fusion and let dry for 15 minutes Coat your button with Krylon Glitter Blast and let dry for 15 minutes Make your stitches using yarn in a color you like Tie a knot in the back to keep the stitching in place.