
Create realistic masking tape and tape up images to your website or blog. How to Create Scotch Tape in Photoshop. Welcome to PhotoshopStar.com!
If you find this site useful, you might want to subscribe to our free newsletter for updates on our new Photoshop Tutorials and Articles. Are you interested in learning how to make realistic Scotch tape by using Photoshop tools? If yes, then I will teach you how. I got this effect by experimenting. Final Image Preview Resources Annestown Scenery Step 1 First of all create a new document sized 600 x 400 pixels. Step 2 Open a photo and copy it to your canvas.
Apply Layer > Layer Style > Blending Options to this layer. Step 3 Now we are going to create the Scotch tape. Remove the selection with Ctrl+D. Gently erase the edges to achieve a similar result to that shown below. Set the opacity to 22% for the current layer. Time to add some defects to make our Scotch tape look realistic. Looks better now, doesn’t it? Step 4 To finish off creating this Scotch tape effect, duplicate the layer using Ctrl+J and change layer mode to Overlay for the copied layer. Final Image. Create a realistic torn paper effect with coffee stains in Photoshop. Create a realistic torn paper effect with coffee stains in Photoshop Posted by Richie on Thursday, February 11, 2010 · 30 Comments Torn paper can be a key element in accomplishing a authentic collage look. With the help of Photoshop’s Brush tool, we can practically achieve anything. There are not much tutorials on the web which tells you how to create the torn paper effect.
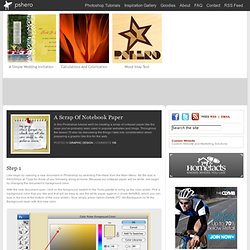
A important aspect in creating elements in design is to add realism into them. Step 1: A Scrap Of Notebook Paper. Step 1 Lets begin by opening a new document in Photoshop by selecting File>New from the Main Menu.
My file size is 540x300px at 72ppi for those of you following along at home. Because our notepad paper will be white, lets begin by changing the document’s background color. With the new document open, click on the foreground swatch in the Tools palette to bring up the color picker. Pick a background color that you like and that will be easy to see the white paper against (I chose #e9dfb8, which you can type in the box at the bottom of the color picker).
Step 2 Lets go ahead and assume that we’re going to use this scrap paper to hold a note to our readers in the sidebar of our imaginary blog. Create a new layer by clicking the Create New Layer icon at the bottom of your layers palette. Step 3 Now it’s time to create the initial shape of the paper. Choose the Rectangular Marquee tool from the Tools palette by pressing the M key, then drag out a rectangular selection onto the stage. Step 4.