
Recycle Reuse & Repurpose – Glass Jar Photo Frames. In South Africa, recycling is way of life that not very many people incorporate into their daily routine.
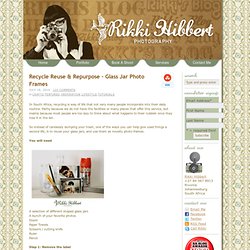
Partly because we do not have the facilities or many places that offer this service, but mainly because most people are too lazy to think about what happens to their rubbish once they toss it in the bin. So instead of carelessly dumping your trash, one of the ways you can help give used things a second life, is to reuse your glass jars, and use them as novelty photo frames. You will need A selection of different shaped glass jars A bunch of your favorite photos Doom Paper Towels Scissors / cutting knife Ruler Pencil Step 1: Remove the label After speaking to several people in search for the best method to remove the gluey sticky mess left behind when attempting to soak off labels on glass jars, I have discovered the secret is… Doom.
Step 2: Measure the Jar Step 4: Place photo into the jar Slightly roll the photo, with the image facing outwards, and insert it into the jar upside down. Gift Ideas for Poor Creative Souls (9) Posted by: Cathy on Sep 18, 2011 Tagged in: Untagged I like this idea because you can make it so personal.
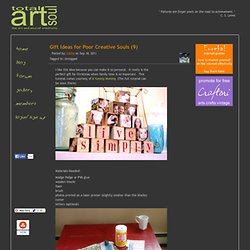
It really is the perfect gift for Christmas when family time is so important. This tutorial comes courtesy of A Yummy Mommy. (The full tutorial can be seen there) Materials Needed: Modge Podge or PVA glue wooden blocks foam brush photos printed on a laser printer (slightly smaller than the blocks) cutter letters (optional) Cut all you scrapbook paper out to fit the squares and cut your pictures out. You then use your foam brush to apply a thin layer of Modge Podge to the block and apply the paper and the photos in whatever arrangement you desire.
Apply another thin layer of Modge Podge. It is very important that you let the blocks dry completely between all steps. Lightly sand the corners and edges (I use a 120-180 grit sandpaper) Now use a tiny teeny amount of the paint and rub it on all the edges and corners. And there you have it! Make: A Photo Clip Frame « DIY Maven. Confession: I am compelled to take pictures of flowers and insects.
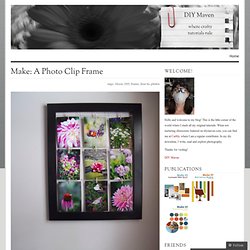
Problem: I don’t usually choose these to send to the printer. Solution: a photo clip frame. Credit: I saw something very similar to this at Pier 1 a few weeks ago and decided it would be a perfect way to display a bunch of my flowers and bugs; I also decided that I had everything on hand to make one…so I did. The original costs 28 bucks; mine cost 0 bucks. No kidding! Unbeknownst to me, this project actually started at the end of last summer when my boo and I were out taking our nightly constitutional and came upon a box sitting in a neighborhood yard.
What I used for this project: Drill/Dremel1mm drill bit (or roughly the same size at the largest wire used)1mm (19 gauge) wire.33 wirewire cutterpenciltape measurepliersandpaper, paint, brush18″ x 20″ wooden picture frame How I made it: I sifted through my stash of frames and settled on one of the 18 x 20′s. I sanded it down and gave it a couple coats of white semi-gloss.