
Woven Finger-Knitting Hula-Hoop Rug DIY. Here we go!
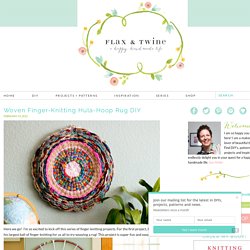
I’m so excited to kick off this series of finger-knitting projects. For the first project, B proffered his largest ball of finger-knitting for us all to try weaving a rug! This project is super-fun and easy to do. The rug was made on a hula hoop loom, using an old t-shirt for the warp and a massively huge ball of finger knitting for the weft. I based this project on an incredible t-shirt hula hoop rug I saw on the Disney Family Fun site, where they used strips of t-shirts for the weft.
August 2011.
This Glue Chart Guides You Through Which Glue to Use Where. Louie's Loops: Taking Crocheting to the Future. So I'm somewhat, okay a lot of, a nerd.
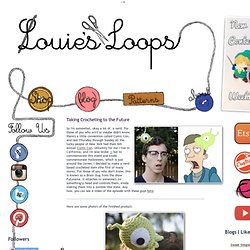
For those of you who arn't or maybe didn't know, there's a little convention called Comic Con, and last Thursday through Sunday all the lucky people of New York had their 6th annual Comic Con. Unluckily for me I live in California, and I'm also broke :) but to commemorate this event and kinda commemorate Halloween, which is just around the corner, I decided to make a nerd based crocheted item (the first of many more). For those of you who don't know, this is known as a Brain Slug from the show Futurama.
It attaches to someone's (or something's) head and controls them, kinda making them into a zombie like state. Any how, you can see a video of the episode with these guys here Here are some photo's of the finished product: Materials:-Lion Brand Cotton Ease Lime Green-Size US-G/4.00 mm Crochet Hook-White Felt-Small (about 1/4-1/2") Black Button-A little bit of stuffing *First make a tiny ball of yarn separate from the main ball for the antennae. Converting Needle Knit Patterns to Loom Knitting. Needle knitting alternates between the right side and the wrong side of the pattern facing the knitter. Circular knitting is the exception to this rule, therefore circular knitting patterns can be used just as they are for the round loom.
Google Image Result for. DIY Dimensional Paper Flowers / Other Projects. Difficulty Rating: Intermediate Flowers are definitely a crafting staple.
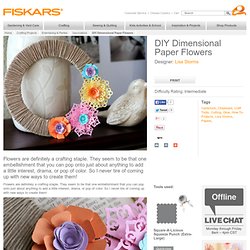
They seem to be that one embellishment that you can pop onto just about anything to add a little interest, drama, or pop of color. Paper Flower Tutorial. I came across these incredible paper flowers and I just had to make them (then made like 100, I loved them so much) Now, I’ve created a tutorial to share the love!
Perfect adornments for gifts, cards and even wall art! Art project using these, here! Ucreate Parties: Gift Wrap: Rolled Flower Gift Topper. With the holidays coming up, I've been browsing the web for some unique and different gift wrap ideas.
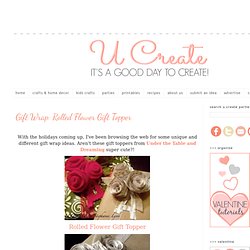
Aren't these gift toppers from Under the Table and Dreaming super cute?! Rolled Flower Gift Topper. Super-Easy Sequin Flowers. This is a sweet little project that I created one day when I was making my mini presents last Christmas!

This is kind of a knock off, but they are so cute! Sequin Flowers are super easy to make! All you need are: Some flower sequins (in different sizes) a bead or another shaped sequin, smaller than the others Green wire or floral wire (as long as its green and can fit through the holes of the sequins!) Wire pliers Scissors. Make a gift bow from a magazine page. In gift wrap emergencies when you've got the present but need some wrapping, here's an idea for turning a magazine page into a bow.
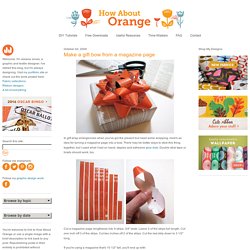
There may be better ways to stick this thing together, but I used what I had on hand: staples and adhesive glue dots. Double stick tape or brads should work, too. Cut a magazine page lengthwise into 9 strips, 3/4" wide. Leave 3 of the strips full length. Cut one inch off 3 of the strips. If you're using a magazine that's 10 1/2" tall, you'll end up with: 3 strips, 10 1/2" x 3/4" 3 strips, 9 1/2" x 3/4" 2 strips, 8 1/2" x 3/4" 1 strip, 3 1/2" x 3/4" Twist each strip to form a loop at both ends and staple it in the center. Layer the three longest pieces on top of each other, spacing them evenly and securing each with a glue dot.
Use other papers, like a map of your city. Paper Vase/Basket? Pics! Decoupage Glass Vase.
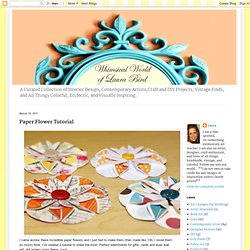
Easter eggs dyed with silk ties. I've wanted to try this method for a couple years now and finally just got up off the couch to do it!

It's really just as easy as dying eggs the regular way, the only extra step you need to do is scrounge up old silk ties from your local thrift store. I decided to empty my eggs so that I could keep them for years to come. Using a small nail and hammer, I simply poked a hole in the top of the egg and another in the bottom. Then I used a straightened out paper clip to stick inside and break up the yolk a bit and then blew the egg out into the sink. Here's a good note: a bigger hole in the bottom makes it much easier for the egg to come out. The ties need to be 100% silk so make sure you look at the tag on the back.
These are the ties I ended up with. First cut off a piece of the tie big enough to cover your egg (usually the bottom of the tie). Next, using an old men's under shirt, cut squares large enough to cover your egg.
Silk-Dyed Eggs {aka TIE-Dyed!} I posted this tutorial a few years ago and it has become somewhat of a tradition to bring it back every year!
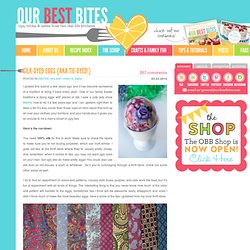
One of our family Easter traditions is dying eggs with pieces of silk. I saw a cute lady show Martha how to do it a few years ago and I ran upstairs right then to steal a tie! It’s way cooler than those cups of neon liquid that end up all over your clothes, your furniture and your hands plus it gives you an excuse to rid a man’s closet of ugly ties. Here’s the run-down: