
Spooky Arduino Projects #4 – Musical Arduino « todbot blog - Nightly. The notes for the fourth and final class are up on the Spooky Arduino class page.
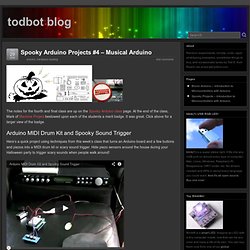
At the end of the class, Mark of Machine Project bestowed upon each of the students a merit badge. It was great. Click above for a larger view of the badge. Arduino MIDI Drum Kit and Spooky Sound Trigger Here’s a quick project using techniques from this week’s class that turns an Arduino board and a few buttons and piezos into a MIDI drum kit or scary sound trigger. Hardware. Building a Doodle Bot kit from DAGU - Nightly. Doodle Bot is a very simple beginners robot that can write messages using white board markers, jumbo chalk or crayons.
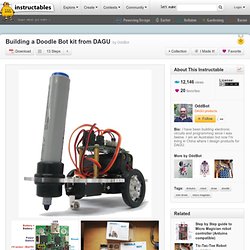
The kit comes with all parts including an Arduino compatible controller and a screwdriver. You will need to supply 4x AAA batteries and a suitable USB cable to program the robot. A large, full colour manual is included to make assembly easy. Quadbot. ArduIMU quadcopter part III - DIY Drones - Nightly. Hi all, I have a new drone in the family...
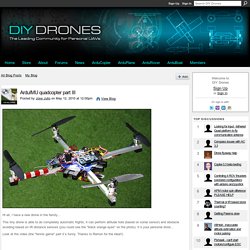
This tiny drone is able to do completely automatic flights, it can perform altitude hold (based on sonar sensor) and obstacle avoiding based on IR distance sensors (you could see the "black stange eyes" on the photo). It´s your personal droid... Look at the video (the "tennis game" part it´s funny. Thanks to Ramon for the idea!!) There are some new features in this thrid part... For outdoor configuration: Project Power Wheels - Ardurover endeavor. - DIY Drones - Nightly. For the month my father-in-law and I have been working on a Power Wheels conversion to RC+Rover+Drive by wire.
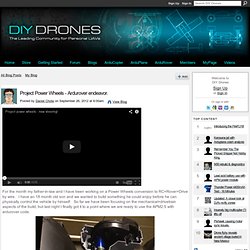
I have an 18 month old son and we wanted to build something he could enjoy before he can physically control the vehicle by himself. So far we have been focusing on the mechanical+drivetrain aspects of the build, but last night I finally got it to a point where we are ready to use the APM2.5 with ardurover code. I am going to be heavily modifying the ardurover code to support local "drive by wire" via analog inputs. The steering wheel assembly now drives a 10k ETI pot, and the throttle controls a linear motion 10k pot (pictures will be posted on the blog shortly). I would really like to hear some suggestions as to where I should implement the output channel insertion code.
My project blog is here at: I would love to hear some feedback on this. Fun with electronics, arduino and programming - Nightly. My Arduino And Electronics Website Electronics, arduino and programming This is my website of electronics things, arduino projects and random experiments.
Remember that this site is work in progress. Bits will be added to it regularly, so keep checking for updates. "Chopsticks" the Spider Robot — DIY How-to from Make: Projects - Nightly. Make: Projects This robot was created with disposable bamboo chopsticks, Polymorph and an Arduino-compatible controller.
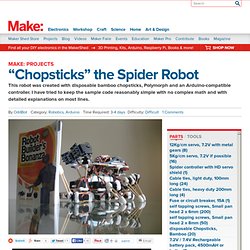
I have tried to keep the sample code reasonably simple with no complex math and with detailed explanations on most lines. Multi-limbed robots such as hexapods can be very complex and expensive. This is a relatively cheap and simple 8-legged robot made with chopsticks, Polymorph and an Arduino-compatible controller. Most of the servos cost under $8 if you shop around. The construction is pretty easy but takes time as you often have to hold parts in position and wait for the Polymorph to cool. This project will show you how to make an 8-legged spider robot. I used two pan/tilt kits fitted with IR compound eyes for close-range object tracking. Assemble your wheels - Nightly. USB Biofeedback Game Controller - Nightly. Building upon our last tutorial, which taught you how to build a muscle sensor, we've decided to give you a project that really showcases the power of our muscle (EMG) sensors.
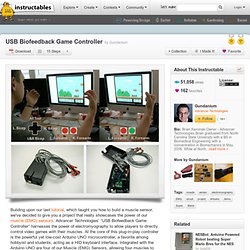
Advancer Technologies’ “USB Biofeedback Game Controller” harnesses the power of electromyography to allow players to directly control video games with their muscles. At the core of this plug-in-play controller is the powerful yet low-cost Arduino UNO microcontroller, a favorite among hobbyist and students, acting as a HID keyboard interface. Integrated with the Arduino UNO are four of our Muscle (EMG) Sensors, allowing four muscles to act independently or in combination with each other to control over four buttons. In our setup, we elected to use a six button setup with the left forearm controlling the B button (RUN/ATTACK), the right forearm controlling the A button (JUMP), the left bicep controlling the LEFT button, the right bicep controlling the RIGHT button, and combinations for UP and DOWN. or.
Ard-e: The robot with an Arduino as a brain - Nightly. How to create an open source Arduino controlled robot for under $100. Hopefully after reading this instructable you will be able to take your first step into robotics. Ard-e cost about $90 to $130 depending on how much spare electronics you have lying around. Final Code - Nightly. /**************************************************************************************************************** * Program for a simple light Seeking Robot. * created by: Anuj * (c)copyright * * Robotic base should include differential drive. * * Physical setup: * Two LDRs connected to ground and Analog pin 1(Right) and Analog pin 2(left) * base of NPN Transistors on pins 11(right) and 12(left). * * ******************************************************************************************************************/ // Using Arduino Duemilinove // Pin definitions - attaches a variable to a pin. const int RightMotor = 2; // This pin is used to enable or disable the Right motor.
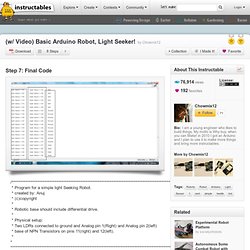
Connected to the base of an NPN transistor. const int LeftMotor = 3; // This pin is used to enable or disable the Left motor. // Variable definitions // the setup() method runs once when the program is run. When the // Arduino is reset, the setup() will be executed once again. void setup() {