
Frank Gehry-style titanium scales – BBB3viz. I had to come up with a titanium scale material for a recent project, so I thought I’d share a few tips about how I went about creating an entirely texture-based mat versatile enough to be used in a variety of project.
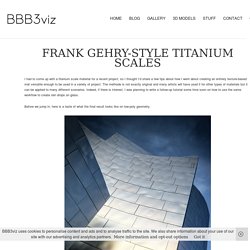
The methode is not exactly original and many artists will have used it for other types of materials but it can be applied to many different scenarios. Indeed, if there is interest, I was planning to write a follow-up tutorial some time soon on how to use the same workflow to create rain drops on glass. Before we jump in, here is a taste of what the final result looks like on low-poly geometry. I will be using 3ds Max and Vray here, but the basic philosophy can be applied to all 3D apps and renderers. The first step is to create the base geometry that will be used to generate the displacement map. When subdivided (here two levels of Turbosmooth), the plate looks nicely distorted.
Now render and save the ZDepth and the Alpha passes.
3DS MAX Mental Ray. Second Picture is devoted to original tutorials about 3D graphics, Photoshop, Photography and Web Design.
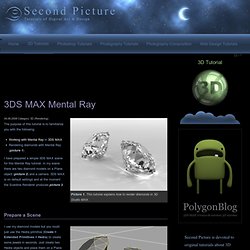
Picture 1. This tutorial explains how to render diamonds in 3D Studio MAX. 04.08.2008 Category: 3D (Rendering) The purpose of this tutorial is to familiarize you with the following: Vray. Tutos V-ray et 3dsMax en francais par Matt Guetta. Imaginez ne plus jamais faire de « Chamfer Edges »… et ben c’est le but de ce tuto !
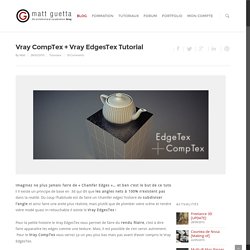
Il existe un principe de base en 3d qui dit que les angles nets à 100% n’existent pas dans la realité. Du coup l’habitude est de faire un ‘chamfer edges’ histoire de subdiviser l’angle et ainsi faire une arete plus réaliste, mais plutôt que de plomber votre scène et rendre votre modé quasi in-retouchable il existe le Vray EdgesTex ! Pour la petite histoire le Vray EdgesTex vous permet de faire du rendu filaire, c’est à dire faire apparaitre les edges comme une texture. Mais, il est possible de s’en servir autrement. Pour le Vray CompTex vous verrez ça un peu plus bas mais pas avant d’avoir compris le Vray EdgesTex.
On va commencer par le plus simple le rendu filaire. Pour la scene on va faire tres tres simple,une bonne vieille teapot (15cm) sur un socle, un Vray Plane (pour rappel c’est un plane infini) et deux Vray lights. Et voila pour le rendu filaire. Et c’est la que ça devient intéressant. . . Bitmap Blur is EVIL! I see it all the time and see all kinds of ways around getting rid of 'it' IT is how your textures get all blurry in the distance and things just don't look quite right and there's a way to END it!
Originally added to avoid 'ringing' or flickering in distant textures, these settings haven't been updated in MAX since... well I have no Idea, likely version 2-3. Bitmap blur global override or script? Ink & Paint Primer. Hello everyone, I was putting together my Monday Movie last week, and I realized that the 3dsMax Ink n Paint material is pretty robust.
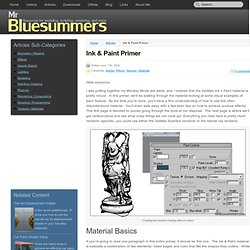
In this primer, we’ll be walking through the material looking at some visual examples of each feature. By the time you’re done, you’ll have a firm understanding of how to use this often misunderstood material. You’ll even walk away with a few keen tips on how to achieve unusual effects! This first page is devoted to quickly going through the tools at our disposal.
3ds Max Reference: Arch & Design Material (mental ray): Tips and Tricks. [CG Textures] - Textures for 3D, graphic design and Photoshop! DM Multimedia - Studio 3DS Max Tips and Tutorials - Full Tutorial - Arch and Design Metals. Quick Links 3D Tutorials Latest e92 bmw Latest Capri MKIV Latest Escort MKII 3D Studio Max Studio Texturing - Simple, Quick and Dirty metal using mental ray Arch & Design Material Using mental ray Arch & Design's glossy reflections it is possible to create very realistic blurred metal surfaces, but as these become less and less glossy, and more blurred, they will require more and more samples (or adjusted fast [interpolate] settings) to prevent artefacts.
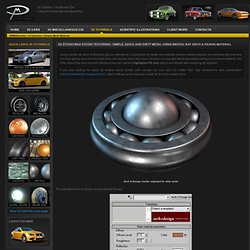
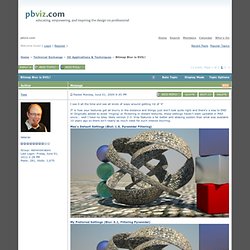
If you are looking for ways to texture shiny metals with mental ray you can't do better than Zap Anderson's own explanation ( Zap's settings were used as a base for the dirty metals here. Arch & Design shader adjusted for dirty metal The standard Arch & Design is adjusted as follows: Reflection is set to 1.0 - this directly controls the strength of the FG reflection (and the specular effect). Glossiness can be set to control the spread of the reflections / specular effect. Adjusting the reflectivity and glossiness levels are the key here. Creating Normal Maps In Photoshop. [CG Textures] - Creating a rope texture Creating textures is not always a linear process.
![[CG Textures] -](http://cdn.pearltrees.com/s/pic/th/cg-textures-11694393)
Most of the time you create a texture in your paint program of choice, and place it on your object in your 3D package. Sometimes it can be very useful to start in the 3D package to create a base for the texture. A rope texture is a good example. Rope is hard to photograph because it is round and generally very twisty. Here is a picture of some steel cable, which looks very much like rope: In this tutorial I show how to make a rope texture from scratch. Start with a simple polygon cylinder: Radius: 0.1 units Height: 50 units 9 sides 50 height subdivisions Soften the normals and remove the top and bottom faces The cylinder will be twisted so it needs enough subdivisions for the deformation to work. Create a guide circle with a radius of 0.5 units: Copy and move the cylinders around the inside of the circle.
Here is how it looks in the 3D viewport Delete the guide circle and combine all cylinders into one object.