
How to Draw Gesture. The Fear of Values. The Fear of Values by teaching_kids_art , January 31, 2009—12:00 AM Topics: Drawing, Mistakes, art education, fear, shading, teaching, teaching art, values The title of this article might suggest that I__™ll be exploring some kind of compelling Freudian doctrine concerning moral phobias.
I__™m afraid, however, that my topic is nowhere near as intriguing and will entirely circumvent discussing either the id or the ego. This is a blog about teaching kids art, and thus the values of which I speak are the light and dark variants of tone. Beginning drawers are exceedingly timid creatures who often only make their initial progress in the tiniest of steps. I find that in the early weeks of a class I must choose my words ever so carefully when providing constructive criticism. However, once they start to recognize actual improvement in their own work, the pace of progress takes on a more confident stride. ~Michael Mize. Top 10 skills children learn from the arts. Still Life Techniques - Pencil Drawing. Still Life Pencil Drawing Still Life is the best subject in art for learning and teaching the skills of drawing and painting.
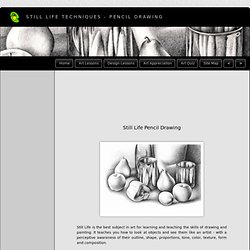
It teaches you how to look at objects and see them like an artist - with a perceptive awareness of their outline, shape, proportions, tone, color, texture, form and composition. Our step by step still life lesson will teach you the drawing techniques used to create the still life above which was done with a 2B pencil on cartridge paper. You can see an animated version of this lesson in our Still Life Pencil Slideshow. Steps 1 to 4: These steps demonstrate how to draw the shapes and proportions of the still life objects using line. Steps 5 to 8: These steps illustrate how to render the three dimensional form of the still life using tone. Art Materials for our Still Life Pencil Drawing For this still life lesson you will need: a 2B pencilan eraser an A3 sheet of stiff cartridge paper, or a paper of similar quality around 180+gms.
Looking at Art: Seeing Questions. Pinterest. Pinterest. Pinterest. Tumblr_lmy2lpIuRA1qgryo2o1_500. Looking at Art: Seeing Questions. How to draw an Eagle tutorial. Sketch Study – How To Draw An Awesome Eye. Step 1: Blank Slate Let me start by saying that everyone’s style is different.
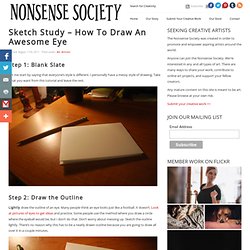
I personally have a messy style of drawing. Take what you want from this tutorial and leave the rest. Step 2: Draw the Outline Lightly draw the outline of an eye. Step 3: Add More Outlines Draw a circle for the iris, the tear duct, the upper eyelid crease, and the edge of the lower eyelid. Make sure the iris is not dead center. Step 4: Outline the Pupil and Highlights Most eyes have a reflection of the light source. Step 5: Add Texture To Iris Every eye has a unique pattern, so add yours.
Step 6: Darken Around Iris and Around Pupil Using the same stroke style as step 5, you should darken the edges. Drawing Faces (redux) Head. 550726_399345106775538_996250764_n.jpg 680×960 pixels. Visual References. 251802_427924997250882_1458003614_n.jpg 575×289 pixels. 487331_427925017250880_546450789_n.jpg 575×655 pixels. Homework 02- Realistic Portrait. The Proportions of the Head and Face. Proportions of the Head - Illus. 1 Although the proportions of a head will vary from person to person and change slightly with age, there are some basic principles you can follow to improve your drawing.
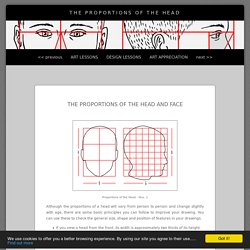
You can use these to check the general size, shape and position of features in your drawings. If you view a head from the front, its width is approximately two thirds of its height. If you view a head from the side, its width is approximately seven eighths of its height. PORTRAIT DRAWINGS step by step instructions. Drawing a portrait of yourself, or of someone you know, is the most difficult of all subjects to draw in my experience as an Artist and an Art Teacher.
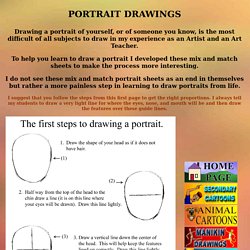
To help you learn to draw a portrait I developed these mix and match sheets to make the process more interesting. I do not see these mix and match portrait sheets as an end in themselves but rather a more painless step in learning to draw portraits from life. I suggest that you follow the steps from this first page to get the right proportions. I always tell my students to draw a very light line for where the eyes, nose, and mouth will be and then draw the features over these guide lines. Eyes for mix and match portraits. Noses for mix and match portraits. Portraits and Portraiture: Setting and Symbolism.