
NKS5 Essential Media Toolkit for Photoshop CS5+ Digital Brushes. [CG Textures] - Textures for 3D, graphic design and Photoshop! The Textures Resource. [CG Textures] - Textures for 3D, graphic design and Photoshop! UVMapper - UV Mapping Software. Multi UV sets / Textures in Maya. Mirror uvs. View Full Version : mirror uvs Rudity with cylindrical mapping for a face you sorta can.
I cylindrical map the face. Then take all the uv's on one side of the face, scale them on -x untill it looks the same size as the other side. Then I move it over top of the other side.. scale and move again untill it looks like its half a face. I dunno if this is the accepted way or if there is an easier way, but its what I do and it works.. :) womanonfire wondering if anyone else has another suggestion?
18th_Devil well if its symmtrical u could just overlap the UVs. just flip the uvs and overlap them. its that easy :thumbsup: or u can try to mirror it if u want to do more work :rolleyes: but i haven't figured that one out yet :annoyed: beaker If your model is asymetrical(you modeled one half and then mirrored it and attached it). Ah, i see! Waboflex Say you've got your UV's laid out nicely on the left half of a face, and you've mirrored and attached the geometry.
Wabo. GrafOrlok Mmm. Abominable Cheers :) The Secrets of Realistic Texturing. In this tutorial you will discover: The fundamentals of texturingHow to use CrazyBump to generate texture mapsHow to make a realistic cobblestone material I realized that there aren’t too many tutorials out there that explain the different texture types.
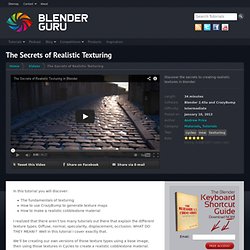
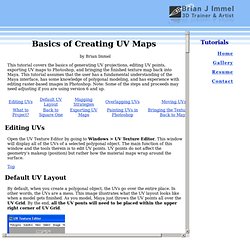
Diffuse, normal, specularity, displacement, occlusion. WHAT DO THEY MEAN!? Well in this tutorial I cover exactly that. We’ll be creating our own versions of those texture types using a base image, then using those textures in Cycles to create a realistic cobblestone material. Finished Result This tutorial covers how to create the cobblestone street material. Download the Finished .blend. Basics of Creating UV Maps. By Brian Immel This tutorial covers the basics of generating UV projections, editing UV points, exporting UV maps to Photoshop, and bringing the finished texture map back into Maya.
This tutorial assumes that the user has a fundamental understanding of the Maya interface, has some knowledge of polygonal modeling, and has experience with editing raster-based images in Photoshop. Creating Displacement , Normal & Bump Map - 3dtutorialzone.com. This tutorial will teach you the differences of displacement and bump maps and normal maps and how to assign them to a shader and a model.
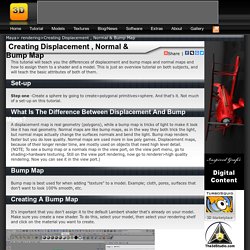
This is just an overview tutorial on both subjects, and will teach the basic attributes of both of them. Set-up Step one -Create a sphere by going to create>polygonal primitives>sphere. And that's it. Not much of a set-up on this tutorial. Saving an image as TGA with transparency. Low Poly Game Asset Creation - Fire Hydrant in Blender and Unity 3D. Create Low Poly, Game Ready Assets in Blender and Unity 3D!
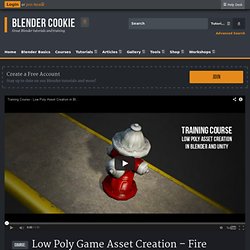
Through this Blender and Unity tutorial you will learn how to create low poly assets for games. Over the course of this tutorial you will learn the high poly and low poly modeling techniques needed to create the fire hydrant subject matter. You will learn how to unwrap the UVs of the final low poly model and how to bake out normal maps, ambient occlusion and texture maps. Note: it came to our attention that some serious mistakes were made in the normal map baking tutorial, video #6. Maya User's Guide: Edit UVs > Layout. ZBrush to Maya Displacement map. Displacment maps.
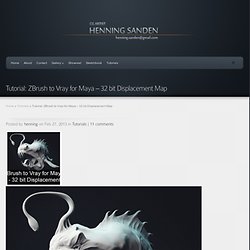
Maya. Combined, the two words sends shivers down the spine of any CG artist. It’s a topic I’ve spent countless hours trying to wrap my head around. In this tutorial we’ll look at a reliable way to use 32 bit displacement maps in Vray for Maya generated in ZBrush. The advantages of using a 32 bit map vs a 8 0r 16 bit are two in particular: - You dont have to worry about fiddling with the displacement amount, as long as your Zbrush and Maya model are the same size. with 32 bit maps, the displacement amount will replicate your Zbrush model as closely as it can automatically. Really Dumb Question about Specular Maps in Maya... Baking color (diffuse) maps from high poly to low poly in Maya. Normalmap_deepeninga.jpg (1664×861) Normalmaps for the Technical Game Modeler. Normalmaps for the Technical Game ModelerBy Ariel Chai, 15th of June 2010, all rights reserved.
*Article is constant work in progress*This article is aimed towards technical modeling (such as weapons vehicles, pros, etc), and is made to give an overview of common normalmap issues, walkarounds and solutions. This article assumes knowledge of UV's, and the core idea of what normalmaps are. Theory : Implementation :2.1 Obtaining Clean Results Using Hybrid mapsNormalmaps are baked differently depending on object's smoothing. The renderer goal is to compensate for the smoothing, so the lowpoly with the applied result will be as close as possible to the highpoly version.