
How To Drill A Hole In A Glass Jar. The other day, I wrote about attempting to drill through glass and I finished up the project this weekend. I think it turned out beautifully — I love the idea of bottled light! These would be pretty by a wintery window or under an entry table. I like the way the gold paint makes the bottom of the bottles look misty and glow-y, even during the daytime. I’ve got a ton of images and DIY instructions below if you’d like to try this too. For tools and supplies, I started at my local True Value. I started with these apple juice bottles from Whole Foods. Next, I used my handy scraper tool to take off the label. Once the bottle was clean and label free, it was time to drill through the glass. [UPDATE: Hah! Next we painted. I used a disposable sponge brush and Liquid Leaf paint — but any metallic enamel paint should work.
Once the paint was dry (it dries very quickly), we started stuffing the lights in. How To Stencil & Write On Glass. {yay for thursday!}
You know, sometimes its the little things in life that make the difference. And I think its the same with crafts. Those small touches and personalization-s make a huge difference! For example, the I {heart} You votive candle holders below {also part of my V-day mantel!} Those votive holders just wouldn’t be nearly as interesting without the I {heart} U. seriously! Supplies: 3D Gloss Enamel by DecoArt in Red, glass, paper. How To Cut Glass With String.
I posted a picture about 1 week ago on Instagram, Facebook and Twitter of me cutting glass using just string.

I got LOT’S of requests for a tutorial on how I DID THIS! So here it is. FINALLY! You will be able to learn how to cut glass. Ultra Quick & Cheap Resin Casting. 12 Easy Image Transfer Methods for DIY Projects. Transfer Images Onto Wood. You can transfer printed images and text onto wood with this tutorial.
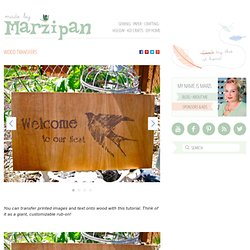
Think of it as a giant, customizable rub-on! How to: images printed with a LASER PRINTER spoon or knife untreated, unpainted wood You’re going to need to buy acetone for this project. You need to print your images on a LASER PRINTER. (I have also tried this project with copied images using a Xerox machine. Cut out your images, and lay them face down on untreated, unpainted wood.
Pour the acetone directly on top of the paper. If you’re looking for great free clipart, I recommend checking the graphics fairy. Check to see that your image is transferring properly. Wait a few minutes for the wood to dry, then coat it with a layer of clear protective sealant. The Easiest Way To Make Resin Jewelry. We’ve all seen cool resin pendants at jewelry shops, boutiques, and on fashionistas everywhere.

And while we know this is something you can do at home, we weren’t totally down with what seemed like a really complicated process. Well, turns out it is easier than we thought… but still has more steps than most of our tutorials. If you’ve always wondered if you could make resin jewelry in the comfort of your home, the answer is yes. You just need a few simple tools, all available on our favorite online craft store, Amazon ;) While you get your “fillers” together, place the resin and hardener bottles in a bowl of hot water. This helps the resin mix nicely, and helps avoid air bubbles. We’ve got repurposed jewelry, flowers and twigs found outside, sprinkles (yes, sprinkles!) Use your resin mold to organize your fillers.
Now it’s time to mix the resin! Or sacrifice a cheap plastic measuring cup, and pour the resin mix into a condiment bottle for easy pouring. Casting Resin Tutorial - Flickr. Make your own for free (ion foot spa)part 2 instructions inside!!!!pictures at Ionic Foot Bath (MessageID: 1186002) The schumacher maintainer 1.5 amps 6/12 dc volts $18 at walmart the decive at work does the exact same as the spa that i went to whic i paid $30 dollars for a 30 mins seesion. the platic bin is 1 ft by 18 inches.Also use a a garbage bag each time u use it. legs are 12 icnh by 1/2 each one. the top arm is 1/2 inch by 3 1/2 inch long the body part is a rectangle 6inch by 2 3/4 inches.
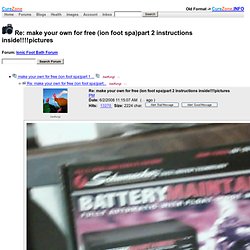
So 2 leags and 1 arm for each piece and u make 2 pices one for postice and one for negative. cute into platic and glue legs into it and make sure that there is a quater of a inch gap between space between plastic and stainless sheet metal. 1/2 inch wide i made mine work great!!!!!! The two stainless meatl plates do not touch each other. one to 2 teaspoon of Sea Salt with minerals and let it desolve before u start the battery charger. Well everyone now you can make you own spa under 60 bucks and works just as good as the 1000 dollars ones to 2000.I know i used one. Yahweh the father and the messiyah is yahshua. Make your own for free (ion foot spa)part 1 instructions inside!!!! at Ionic Foot Bath (MessageID: 1185982)