
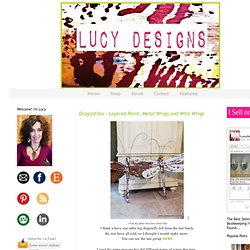
The Original Table Leg Dragonflies with Ceiling Fan Blade Wings. This post has been crazy popular over the internet, and these are the originals!

I created dragonflies with the spindles and table legs for the bodies YEARS ago. At that time I was making them with wire wings wrapped in hand painted canvas. The addition of ceiling fan blades for the wings was my latest idea...read on! The bodies of the dragonflies are table/furniture legs and spindles. 10 DIYs FOR KIDS. Sharpie Tie-Dye. You have to do this project.

I saw this on Happy Things. She saw it on Steve Spangler Science. 217 Free Do It Yourself Deck, Porch and Patio Furniture Project Plans.
Candy Bar Supplies. Packing Tape Image Transfers. I love image transfers.
It’s something I’m always using in my journals but there are so many other fun uses for them. All you need to make a transfer is a photocopy of an image or words and packing tape. You can also use printouts from a laser printer or magazine pages. Inkjets will not work because they are not heat based toner. So take some photos to the copy machine or tear some pages out of your favorite magazine to get started. First, take a strip of packing tape and place it over the images you want to transfer: Then use the back of your scissors or the side of your fingernail to make sure the tape is adhered firmly: Next, dip the tape and paper into a bowl of water to wet the back: Using your fingers, start to rub off the paper from the back of the tape: Like magic….your image is left behind on the tape!
I like to use the transfers to wrap special letters before I mail them. It’s like having custom tape: Another idea is to take a small canvas and use the images for artwork: A library of free craft ideas from toddler to teenager. Hair bows. LoveIt. Resene Paints - Inspiration, Ideas, Stencils and Paint Charts for Children. Strongwilled, excitable and opinionated - today's kids know just what they want so to simplify choice for kids and their parents alike, Resene presents KidzColour - a range of hues and metallics designed for kids of all ages.
Colour options have been tested with various aged kids giving a range focused on bright bold, full chroma hues and metallics - perfect as a statement by themselves or combined with another equally bold hue for an invigorating scheme. Resene Paints - Inspiration, Ideas, Stencils and Paint Charts for Children. Resene Paints - Inspiration, Ideas, Stencils and Paint Charts for Children. Resene Paints - Inspiration, Ideas, Stencils and Paint Charts for Children. Lucy Designs: More Table Leg Dragonflies. Click any photo twice for a closer look I think a have one table leg dragonfly left from the last batch, the rest have all sold, so I thought I would make more.
You can see the last group HERE I used the same process but did different types of wings this time... Lucy Designs: The Original Table Leg Dragonflies with Ceiling Fan Blade Wings. Funky Garden Path Designs. ShareThis So you are keen to put a garden path into your garden.

Funky Junk Interiors: My pallet garden walkway. This little project began in July 2011, HERE.
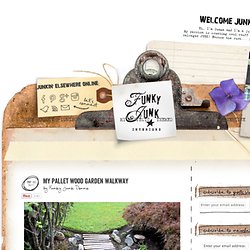
Creating a pallet wood garden walkway came to mind one day. The yard was getting a major revamp with the help of my wonderful neighbours. Shrubs were being pulled, new soil was hauled in, and I desired a pathway… from the driveway to the lawn. Right where all these overgrown shrubs were. Let’s dig! These reclaimed pallet or crate boards (not sure what they are) had been packratted (sp?)
A level pathway was dug lower than the driveway, then the boards were placed into position. It really couldn’t have been a simpler project. The boards were left loose so they could be lifted up whenever the desire for weeding was needed. There were lots of rocks to be had in the old garden so they were placed randomly, filling in for the lack of plants.
So we went and bought plants of the rock garden variety. Friday Flowers: Garbage Flowers. As mentioned earlier, these garbage flowers festoon the bars on the front windows of my basement apartment.
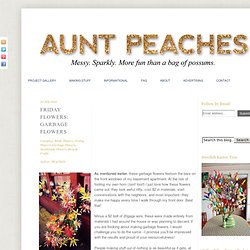
At the risk of tooting my own horn (toot! Toot!) I just love how these flowers came out; they look awful nifty, cost $2 in materials, start conversations with the neighbors, and most important--they make me happy every time I walk through my front door. Beat that! Minus a $2 bolt of 20gage wire, these were made entirely from materials I had around the house or was planning to discard.
People making stuff out of nothing is as beautiful as it gets, at least in my book. Friday Flowers: Garbage Flowers. Friday Flowers: Garbage Flowers. Friday Flowers: Garbage Flowers. Day 254 - Sun Medallion. Is the sun out and shining for you today?
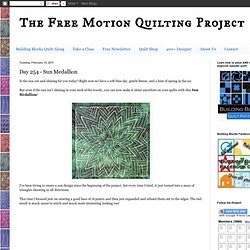
Right now we have a soft blue sky, gentle breeze, and a hint of spring in the air. But even if the sun isn't shining in your neck of the woods, you can now make it shine anywhere on your quilts with this Sun Medallion! How to paint and indoor/outdoor rug. « DIY Maven. All home improvement stores sell big indoor/outdoor rugs.

They’re cheap and they’re not attractive–dare I say ugly? Well, here’s a way to make one of those utilitarian things look fabulous. What you need: One indoor/outdoor rug. Drink Can Craft. Here's a sample of what you can make using simple tools like scissors and a small blade screwdriver for adding texture. Edit: In answer to a couple of questions the edges aren't sharp and don't need to be filed or sanded. But if you were making something with corners then that would be a little sharp. So just stick to curved things or cut just the slightest curve on any corners you do have. Bottle Butterflies! To prepare your bottle for being turned into a butterfly, first wash the label off.
I do this by soaking it in my sink with some dish detergent, and then picking any bits off that don't come right off. If there is still a thin strip of gluey goo stuff, don't worry about it. Cut around the top of the bottle to get the top off-all you want to use is the straight part of the bottle-no curves. Do the same to the bottom. Water Bottle Chandelier. I’ve wanted to make this chandelier for a few years now so it was especially fun for me to make this project. I first saw water bottle flowers on Magpie Design Studio’s amazing chandeliers. Then I saw a display in Anthropologie a few years ago that used them. They are so easy to make and I love that you are reusing the plastic water bottles. This would be perfect for a party or even just for your living room!
See full instructions and more photos after the jump. Click through for full instructions and photos. Materials Needed: Plastic Bottles (the cheap thin ones are easiest to work with), Spray Paint, 2 Metal Rings, Scissors + Exacto Knife, A Thin Gauge Wire. Step 1: Cut Bottles in half and cut varying sizes and shapes of petals out of the top and the bottom. Drink Can Craft. Free stained glass patterns/glass pattern 272. Patterns. Mosaic patterns by Brett Campbell Mosaics. Origami For Everyone. T-shirt-art.jpg 2,000×2,000 pixels. Untitled-2.jpg.