

RaspberryPi @Homelabs » RaspberryPi the Arduino Development Tool. Not really too much to say here.
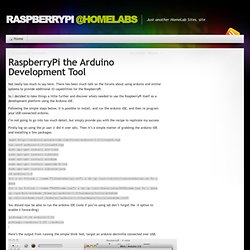
There has been much talk on the forums about using arduino and similar systems to provide additional IO capabilities for the RaspberryPi. So I decided to take things a little further and discover whats needed to use the RaspberryPi itself as a development platform using the Arduino IDE. Following the simple steps below, it is possible to install, and run the arduino IDE, and then re program your USB connected arduino. I’m not going to go into too much detail, but simply provide you with the recipe to replicate my success Firstly log on using the pi user (I did it over ssh). Wget tar zxvf arduino-1.0-linux64.tgz sudo apt-get install avr-libc sudo apt-get install libftdi1 sudo apt-get install avrdude sudo apt-get install openjdk-6-jre sudo apt-get install librxtx-java cd arduino-1.0 for i in $(find .
You should now be able to run the arduino IDE (note if you’re using ssh don’t forget the -X option to enable X forwarding) An Arduino Room Monitoring Web Server « Tutorial by Cytron. First of all, what’s an Arduino?
Arduino is an open-source electronics prototyping platform based on flexible, easy-to-use hardware and software. It’s intended for artists, designers, hobbyists, and anyone interested in creating interactive objects or environments. Arduino can sense the environment by receiving input from a variety of sensors and can affect its surroundings by controlling lights, motors, and other actuators. The microcontroller on the board is programmed using the Arduino programming language (based on Wiring) and the Arduino development environment (based on Processing). Arduino projects can be stand-alone or they can communicate with software on running on a computer (e.g. Introduction In this project, we will use Ethernet shield Ethernet Shield V2.0 and Arduino to create a simple web server. 1.
First, let’s look at the things we need to build this project. 2. First, a 220 ohm resistor is connected in series with the LED and Digital Pin 4 will drive this LED. 3. 4. Arduino + IR Emitter + IR Detector light sensor making steps- www.buildcircuit.com Playground/uploads/Main/arduino_comic_v0004.pdf. RS Mobile. Back Loading...

Our website uses cookies so that you can place an order and we can provide a better service. Continue to use the site as normal if you are happy with this. Alternatively view our cookie policy You are logged in as: Log out Electronics Components,Power & Connectors Electrical,Automation& Cables MechanicalProducts& Tools IT, Test& SafetyEquipment Track a Parcel Quick Order Branch Locator.
Arduino Projects. Project Name: Button Press Counter With Serial 7 Segment LED Display Source Code Link: arduino_button_press_counter.zipDescription: This project will count every time you press a button on a serial LED display.
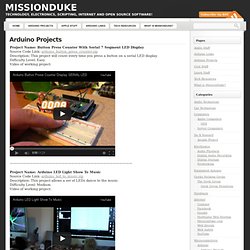
Difficulty Level: Easy Video of working project: Project Name: Arduino LED Light Show To Music Source Code Link: arduino_led_to_music.zipDescription: This project allows a set of LEDs dance to the music. Difficulty Level: Medium Video of working project: Arduino Tutorial - A detailed introduction on how to use LEDs. Tutorial Series for Arduino: It begins. This video was featured on the Adafruit Blog on 01/06/11 This tutorial was featured on the official Arduino blog on 3/9/2011 This video was featured on the DIYFilm Blog on 03/19/11 Thanks to a generous sponsorship from element14, I’m putting together a tutorial series on using the arduino microcontroller platform!
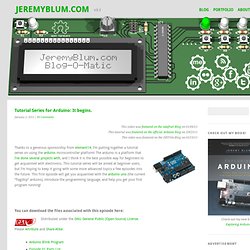
The arduino is a platform that I’ve done several projects with, and I think it is the best possible way for beginners to get acquainted with electronics. This tutorial series will be aimed at beginner users, but I’m hoping to keep it going with some more advanced topics a few episodes into the future. This first episode will get you acquainted with the arduino uno (the current “flagship” arduino), introduce the programming language, and help you get your first program running! You can download the files associated with this episode here: Distributed under the GNU General Public (Open-Source) License. Jadiema. PC to Arduino to LED Control. As I’ve mentioned in previous posts (like the slideshow here), I want to build a teleoperated mining robot.

Since I’m somewhat short of both cash and experience, I have to start small. One key part of the system will be to create an interface to control the robot via computer. And to do that, I have to first be able to control anything, anything at all, by computer. Hence, the following project. First I wrote a program — or ‘sketch’ as it is called — in the Processing computer language. You take your mouse cursor and click on a square. The whole circuit looks a little like this: The laptop runs a Processing sketch, which produces the screen image of colored squares, which the user then clicks with the mouse. The Arduino has its own sketch which reads the commands from the USB cable and interprets them to turn the respective LEDs on and off.