
Mongolia Dodged & Burnt. Gobi Desert, Mongolia, 2012. Click to enlarge. I shot this image in the Gobi last week and used it to show a little dodge and burn to some of the photographers I was traveling with. Most of my images get a little dodge (lighten) and burn (darken), to push and pull the eye subtly through the image. If you know that the eye is pulled by lighter, brighter, sharper, more colorful, and that it is pushed by the inverse (darker, duller, less sharp), you can use that to give an image visual mass and depth. Having done it, with various levels of frustration, for years in the darkroom, I can tell you that the digital approach is much easier. The White Stupa, RAW file, no adjustments. The White Stupa, after global adjustments (Exposure +0.35, Blacks 5, Contrast +15, Clarity +27). In Lightroom (LR3) Brush set to -0.62 Exposure, -46 Brightness, 37 Clarity to darken lines of river bed, line of background hills, darker features in cliffs. Final image.
Lightroom Made Easy! Online Video Training Course - Internet Learning Class. Master the Lightroom skills and secret pro tricks that will transform your photos today!
Learn to work with all kinds of photos You'll get to watch me work on a wide variety of photos in the course lessons, ranging from portraits, to landscapes, architecture, events, fashion, sports, and more. You'll also see black-and-white conversions, sepia tones, and other special effects. All the photos you see on this page are just a handful of the actual case studies used in the course. More things you'll learn in this course! How to create stunning black-and-white conversions from your color photos.
My own professional photo rating system, designed to speed you through big photo sets. The secret for creating dramatic skies in your landscape shots—with one foolproof, two-second adjustment. Professional techniques for portrait retouching, including how to: remove blemishes, whiten eyes and teeth, fix flash "hot spots," and apply glamour-magazine-quality skin softening. Lightroom 4 - Importing and Organizing Your Images. Community Translation Episode available in 1 languages Available Translations: Join the Community Translation Project Thanks for your interest in translating this episode!
To get started, please join the Community Translation Project. Please Confirm Your Interest Thanks for your interest in adding translations to this episode! An error occurred while processing your request. Another translator has already started to translate this episode. Thanks for Participating! This episode has been assigned to you and you can expect an e-mail shortly containing all the information you need to get started. About This Episode Discover the most efficient method for downloading your images to disk, importing to Lightroom and organizing them.
Presented By. Forum: Photoshop Lightroom. Lightroom 4 en bêta publique est disponible ! Fig.01 L’interface de Lightroom 4 bêta publique, et notamment le nouveau module de réalisation de livres photo, développé en collaboration avec Blurb.
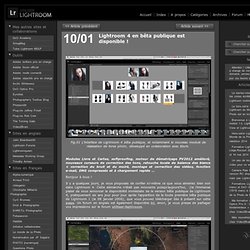
Modules Livre et Cartes, softproofing, moteur de dématriçage PV2012 amélioré, nouveaux curseurs de correction des tons, retouche locale de balance des blancs + correction du bruit et du moiré, montage et correction des vidéos, fonction e-mail, DNG compressés et à chargement rapide … Bonjour à tous ! Il y a quelques jours, je vous proposais de confier ici-même ce que vous aimeriez bien voir dans Lightroom 4. Cette démarche n’était pas innocente puisqu’aujourd’hui, j’ai l’immense plaisir de vous annoncer la disponibilité immédiate de la version bêta publique de Lightroom 4, pratiquement six ans jour pour jour après l’apparition de la toute première bêta publique de Lightroom 1 (le 09 janvier 2006), que vous pouvez télécharger dès à présent sur cette page. Mais ce n’est pas tout ! Prise en charge et traitement des vidéos Courrier électronique. INDEX DES TUTORIAUX.
Tutorial 1 : l’outil de suppression des tons directs par Gilles Théophile Tutorial 2 : les copies virtuelles par Gilles Théophile Tutorial 3 : correction des yeux rouges par Gilles Théophile Tutorial 4 : la sauvegarde par Gilles Théophile Tutorial 5 : Les principaux correctifs de Lightroom 1.2 par Gilles Théophile Tutorial 6 : L’outil Courbe de tonalités par Gilles Théophile.
100 mini raisons d'utiliser LR3 en vidéo en anglais. Lightroom 3 manuel en ligne et PDF. Tuto Lightroom très simples et pertinents Mon Bric à Brac Photo.