
Making of the Bear. Danger Planet. Mytho Logique. How did Mythology started ?
5 amazingly talented students from ESMA (Artistic school in Montperllier, France) decided to explain it for their latest project in college. Created between september 2009 and september 2010, Mytho Logique is an awesome short animation film directed by J. Ambron, A. Aramini, A. Belbari, G. The 8 world’s most prominent hyper-realist sculptors « Blog of Francesco Mugnai. Blender Tutorials Downloads Videos & Education – Blender Cookie. Blender tutorials, tips, tricks and articles! Stickman Begins: A Beginner's Guide to Blender 3D Modeling. Blender is a free and open-source 3d modeling program available from the Blender Foundation, and as an amateur 3d modeler myself I can attest that the software is as fun as it is powerful.
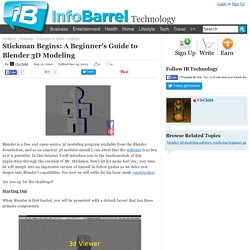
In this tutorial, I will introduce you to the fundamentals of this application through the creation of Mr. Stickman. Don't let his name fool you; over time he will morph into an impressive version of himself in future guides as we delve ever deeper into Blender's capabilities. For now we will settle for his basic mesh construction. Are you up for the challenge? Starting Out When Blender is first loaded, you will be presented with a default layout that has three primary components: Mind you, this is just a general overview; all you really need to know is that the bulk of your work will consist of a couple of keyboard commands and some customization on your part. 1) Green= Y-Axis 2) Red= X-Axis 3) Blue= Z-Axis Viewing the 3D Scene Before we begin, let's go over how to move the 3D Viewer.
Step#4: Grabbing. 25 Useful Blender tricks that aren't so obvious. Automatically add a number to the end of your .blend filename In the ‘Save As’ window, press ‘+’ to add a number to the end of the name. This is very useful if you are saving multiple versions. If there is a number already in the name, blender will automatically increase that number by one.Preview textures The feature you always wanted was right under your nose! Simply Hold Ctrl whilst clicking the ‘Load’ button to take advantage of thumbnail previews. This feature however, is currently in an unstable state (which is why it hasn’t been made official yet), so use it at your own risk! Changing the cameraCtrl + NumPad 0. Hold Ctrl while moving a slider to move it in 0.1 increments (hold Shift + Ctrl to move it in even smaller increments) Have I covered everything?
Blender Dokumentation: Sculpt. Sculpting Mode[Bearbeiten] Sculpt your world!
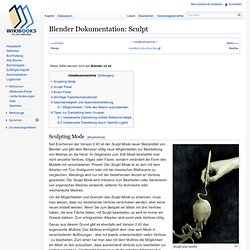
Seit Erscheinen der Version 2.43 ist der Sculpt Mode neuer Bestandteil von Blender und gibt dem Benutzer völlig neue Möglichkeiten zur Bearbeitung von Meshes an die Hand. Im Gegensatz zum Edit Mode bearbeitet man nicht einzelne Vertices, Edges oder Faces, sondern verändert die Form des Modells mit verschiedenen Pinseln. Der Sculpt Mode ist an sich mit dem Arbeiten mit Ton, Knetgummi oder mit der klassischen Bildhauerei zu vergleichen. Allerdings wird nur mit der bestehenden Anzahl an Vertices gearbeitet.
Um die Möglichkeiten und Grenzen des Sculpt Mode zu erkennen, muss man wissen, dass nur bestehende Vertices verschoben werden, aber keine neuen erstellt werden. Genau aus diesem Grund gibt es ebenfalls seit Version 2.43 das sogenannte Multires. Das Anheben oder Absenken von Vertices bezieht sich immer auf die Flächennormale. Gunnery Sergeant Thomas Highway - Computer Graphics. Hi all, my name is Stanislav Klabík and I would like to show you the process of making of my latest personal project named “Gunnery Sergeant Thomas Highway” 3Dtutorials.sk recommendation: To maximise the realism of your 3D characters we recommend using high quality human photo references from the #1 texture website www.3D.sk I really like the movie Heartbrake Ridge where Clint Eastwood play a really tough drill instructor who is in war with marine corps in his platoon so I decided to make a some nice portraits of him.
Modeling I used a simple head model for the first modeling. When I was satisfied with the result, with the base proportions of Eastwood´s face, I used this highpoly model for modeling a new topology with using the great Polyboost scripts. New Topology Then I made a simple rig for the head and turned his head to different position, then I took this model to Mudbox and added all details like wrinkles, pores and etc. Final Head Simple head and facial animation. 3d.sk - All the Human Photo References and Textures 3D Artist Wants.