
The Ten Tastiest Food Photography Tips. Food has an agenda.

It wants you to eat it, and it wants you to eat it now. If you dilly-dally around Food, trying to photograph it instead of eating it, its defense mechanism kicks in. It immediately looks terrible in pictures, forcing you to give up, put down the camera, and eat the Food. Natural selection at work. 15 Awesome Food Photography Tips.
Of all the types of things I photograph, shooting food probably comes the closest to being a full-blown DIY project.
There’s a lot going on– from lighting and composing to styling and shooting, food photography is almost always a production. But regardless of whether you are shooting food for a big publishing client or for a small cookbook of your old family recipes, the process of capturing food at its most flattering remains the same. You Only Need One Light Source Food photography is definitely one of those genres where less is more. With portraits, cars, and interior architecture, for example, we can keep adding more and more light until we have it shaped perfectly for our needs. Sometimes Mother Nature (and Schedules) Don’t Cooperate. 5 tips for flawless food photography lighting - Foodess. In my early blogging days, I SCOURED the web for good resources specific to food photography.
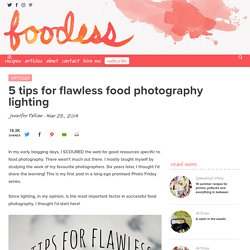
There wasn't much out there. I mostly taught myself by studying the work of my favourite photographers. Six years later, I thought I'd share the learning! This is my first post in a long-ago promised Photo Friday series. Since lighting, in my opinion, is the most important factor in successful food photography, I thought I'd start here! 1. If you want the most beautiful food photos, hands-down natural light is the way to go. Make sure to turn off any nearby lamps or overhead lights, you only want the rays of the sun, no mixing in orange-y artificial bulbs, please. 2.
If you don't have a good source of indirect natural light, you can use even the sunniest window, but you'll need to filter the light to soften it. Many professionals own a scrim, which looks like this, to diffuse the light - but semi-sheer white curtains will do the job perfectly. Fondo de madera para fotos ~ Caramelo - Crafts & Baking. Multitud de sitios suben fotos con fondos de madera vieja que evocan cabañas a un lado de un lago súper chulo, y una viviendo en la ciudad se queda con ganas de vivir en un lugar así para poder tomar fotos tan bonitas...
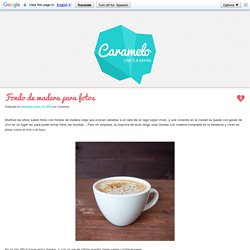
Pero oh sorpresa, la mayoría de esos blogs usan fondos con madera comprada en la ferretería y viven en pisos como el mío o el tuyo. Fondos y superficies para fotografía culinaria. Una de las principales preocupaciones de todo aquel que empieza a interesarse por la fotografía culinaria o la fotografía de still life es el encontrar fondos y superficies bonitas, prácticas y baratas.
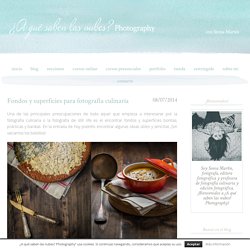
En la entrada de hoy podréis encontrar algunas ideas útiles y sencillas ¡Sin vaciarnos los bolsillos! Uno de los recursos más socorridos consiste en utilizar superficies de madera, pero como no podemos andar comprando muebles para cada ocasión y fotografía culinaria, o bonitas mesas de distintos colores, nada más práctico que hacernos con planchas de madera hechas con tablones que encontraremos en grandes superficies de bricolaje. Podemos pedir que nos las corten y llevarlas a casa para pintar cada una de sus caras de una manera o estilo diferentes. Podéis oscurecerlas con betún de Judea, como en el ejemplo anterior, o bien darles una capa de cera blanca como en el ejemplo siguiente. Photo Boards for Your Pictures - The Bearfoot Baker. When I began my cookie journey, I had a lot of questions about everything.
I felt like a sponge trying to soak up all the information I could. Your photos can make your cookies look AMAZING or just alright! I know how hard we work to make pretty cookies and I want us all to have amazing pictures to show off our hard work. Recently I shared my Sunshine light box with you and now it is time to share a tutorial on how to make photo boards! Photo boards can really help you take your pictures to the next level. The good thing about these is, you can paint both sides so if you make 2 boards, you can have 4 different photo boards. Boards Chocolate Brown Paint Paint Colors You Like Paint Brush Paper Towels Stain Rag GLOVES!!! Let’s talk about the wood before we get started. Amazon. 7 Tips de fotografía solo usando artículos caseros.
Blog del Fotógrafo - Trucos y consejos sobre fotografía, para principiantes, aficionados y profesionales. Common Photography Posing Mistakes and Fixes. Welcome to week three in a 4-part series of Common Photography Mistakes tutorials that Jean Smith wrote for I Heart Faces.Be sure to read the other three parts of her series here: This week is all about posing!

Photography posing can be stressful and sometimes overwhelming when you have so many other things to worry about at a shoot…equipment, camera settings, lighting, and communicating with the client. Amongst all of that, it is your job to come up with photography poses that are both flattering and creative for your client/subject. By learning and practicing the basic elements of posing and making those second nature, you can then focus on more fun and creative posing.
Top ten DIY photography tips. On the day the digital camera was invented, the photographer died.

Go on to the street these days and the only thing a digital camera tells you about a person is the size of their bank balance. As an alternative-lifestyle statement, SLR ownership is now right up there with owning a Coldplay CD. In these troubled times, when SLRs are no longer a badge of actual photography skills, you need something to distinguish yourself from the crowd. We're going to tell you how to stand out from the Jessops jockeys with ten DIY tips for distinctive looking -- and almost free -- photography hardware.
Sellotape at the ready: let's go! 1. Some 'professional' photographers will tell you that you need to buy a tripod to steady your shots. The principle is simple. You can see the likely insertion point in the diagram above (1). If you've got the length right, you should be able to pull up lightly on the camera to produce tension in the strings. 2. Construction is simple. 3. Now find a bowl. 4. 5. 6. 7.