
Sizeof struct - Google Search. Sizeof. Reference Language | Libraries | Comparison | Changes Description The sizeof operator returns the number of bytes in a variable type, or the number of bytes occupied by an array.
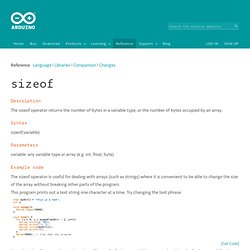
Syntax sizeof(variable) Parameters variable: any variable type or array (e.g. int, float, byte) Example code The sizeof operator is useful for dealing with arrays (such as strings) where it is convenient to be able to change the size of the array without breaking other parts of the program. Arduino/arduino_thermostat_server/arduino_thermostat_server.ino at master · mberntsen/arduino. Arduino/arduino_thermocouple_display at master · mberntsen/arduino. Nerd Ralph: Search results for nrf. Nrf24l01+ modules are a cheap and low-power option for MCU wireless communication.
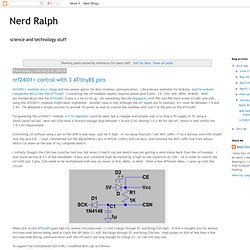
Libraries are available for Arduino, and for arduino compatible MCUs like the ATTiny85. Controlling the nrf modules usually requires power plus 5 pins - CE, CSN, SCK, MOSI, & MISO. With pin-limited MCUs like the ATtiny85, 5 pins is a lot to tie up. On something like the Digispark, with PB3 and PB4 hard-wired to USB+ and USB-, using the nrf24l01+ modules might seem impossible. Another issue is that although the nrf inputs are 5v tolerant, Vcc must be between 1.9 and 3.6V. For powering the nrf24l01+ module, a 3.3v regulator could be used, but a cheaper and simpler way is to drop a 5V supply to 3V using a 20mA-rated red led.
Controlling CE without using a pin on the AVR is also easy: just tie it high. I initially thought the CSN line could be tied low, but when I tried it my test sketch was not getting a valid status back from the nrf module. Void Nrf24l::csnHi(){ void Nrf24l::csnLow(){ #include <SPI85.h> Stanleyseow/attiny-nRF24L01. Nrf24L01. Home Automation Framework » VI. Assembly. Base Station Components: Assembly: NOTE: The Raspberry Pi should be set up with the latest Raspbian OS before you start assembly.
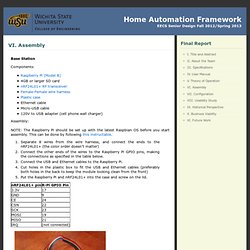
This can be done by following this instructable. Experimenting with the nRF24L01+ 2.4GHz radios. TinyTX/TinyTX_nRF24L01_DS18B20/TinyTX_nRF24L01_DS18B20.ino at master · nathanchantrell/TinyTX. TinyTX/TinyTX_nRF24L01_RX_Simple/TinyTX_nRF24L01_RX_Simple.ino at master · nathanchantrell/TinyTX. TinyTX/TinyTX_nRF24L01_RX_Simple/TinyTX_nRF24L01_RX_Simple.ino at master · nathanchantrell/TinyTX. Stanleyseow/arduino-nrf24l01. Arduino for Beginners: Getting nRF24L01 working with attiny84. After getting the attiny85 (8 pins) working with nRF24L01, I find that while this chip is nice and small, the lack of extra pins is a real hassle when I need to add any sensors/actuators to the MCU.
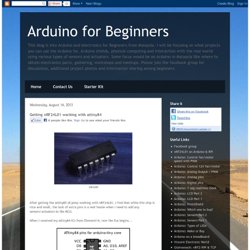
When I received my attiny84 ICs from Element14, now the fun begins... As usual, I hook up the attiny84 and test a blink sketch to ensure the attiny84 is working correctly. The first thing I encounter is that the blink is very slow, about 8 to 10 secs slower and I was wondering why. By the way, I'm using this Arduino tiny-core as there are other tiny-cores available on the net with different settings. After posting my problems on Arduino forum, I found out I need to do a Tools->Burn Bootloader to set the correct speed and fuses on the attiny84. The above pictures are my test setup of the attiny84 on a breadboard with breadboard power supply running on 3.3V, nRF24L01 on an UNO adapter, USBtinyISP and logic analyzer and mini hooks. Nerd Ralph: AVR half-duplex software UART supporting single pin operation.
Many of the ATtiny MCUs have no hardware UART limited number of pins.
Arduino tiny cores uses the TinyDebugSerial class which is output only, so using serial input requires extra code. I have written a small software serial UART which can share a single pin for Rx & Tx when a simple external circuit is used. To understand the circuit, a tutorial on TTL serial communication may help. When the TTL serial adapter is not transmitting, the voltage from the Tx pin keeps Q1 turned on, and the AVR pin (Tx/Rx) will sense a high voltage, indicating idle state. When the AVR transmits a 0, with Q1 on, Rx will get pulled low indicating a 0. I've written the serial code to work as an Arduino library.
Here's a screen shot of putty running the example: 2020 Update Over the past several years I've written many updated and improved bit-bang UARTs. Arduino/arduino_thermostat_server/arduino_thermostat_server.ino at master · mberntsen/arduino. Mberntsen/arduino. Neil's Log Book. The goal of this project was to develop a software driver that would give students an easy-to-use, robust interface to the nRF24L01 radio.
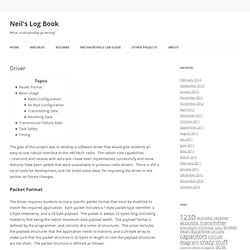
The radio’s core capabilities—transmit and receive with auto-ack—have been implemented successfully and some features have been added that were unavailable in previous radio drivers. There is still a lot of room for development, and I’ve listed some ideas for improving the driver in the section on future changes. Packet Format The driver requires students to use a specific packet format that must be modified to match the required application. Each packet includes a 1-byte packet type identifier, a 2-byte timestamp, and a 29-byte payload.
The PACKET_TYPE enumeration and the payloadformat_t union are implemented by the application developer. In my code, the payloadformat_t union has two payload format structures that correspond to the TYPE0 and TYPE1 messages. Typedef struct and mirf - Google Search. Say Goodbye to Zigbee, and Say Hello to Nrf24l01. (Tutorial 1) Zigbee is a good wireless solution for arduino long time, however, it is expensive.
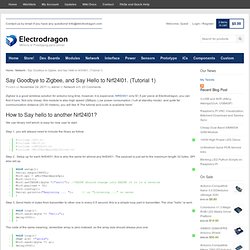
NRf24l01 only $1.5 per piece at Electrodragon, you can find it here. Not only cheap, this module is also high speed (2Mbps), Low power consumption (1uA at standby mode) and quite far communication distance (20-30 meters), you will like it! The tutorial and code is available here! We use library mirf which is easy for new user to start. Step 1. you will always need to include the libary as follow Step 2. Step 3. The code of the same meaning, remember array is zero indexed, so the array size should always plus one And if you want send int format information, the code is Step 4. We receive it and print it in byte format. If you send int format data, the receive code should be Now you know the data is transferring between Nrf24l01 as binary, and you can make a data array to get it and print it in byte format.
Tagged. Implementing multiple int's over nRF24L01 via Mirf Library. Hello everyone.
I'm still rather new, but trying hard to get to grips with the arduino. I have got a basic line of code that works for sending single bytes of data. This is fine if i want to send 1 reading from 1 pin, but my project requires i send data from 4 analog pins, and be able to print them to a LCD seperately on the other side and named. Arduino Sensor Network. Previously, we looked at creating a Low Power Custom Arduino Sensor Board for use in a sensor network.
Now, let’s look at writing the software for our sensor network using that custom board. We will revisit the bathroom occupancy sensor as an example. Low Power Using Interrupts Last time we looked at optimizing power by sleeping the Arduino and waking it only when a door’s state changed. To do this, we used the pin change interrupt on pins 2 and 3. View topic - Microduino-nRF24 wireless transceiver module (HCMIDU0006)
HCMIDU0007 1/4 wavelength SMA antenna (supplied separately) Description: Microduino-nRF24 as a high-speed embedded wireless module which interfaces directly to the Microduino Core and Core+ boards.
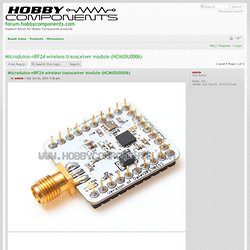
This module uses the commonly used Nordic nRF24L01+ 2.4GHz wireless transceiver chip. nRF24 Module Pin Connections: INT..........D2CSN.........D9CE...........D10SO...........D11SI............D12SCK..........D13IN............3.3V Microduino-nRF24 Module Schematic: Home Automation – Designing a remote module » Makerflux. The desire to start a project in home automation started about 5 years ago, at the point I bought my first home.
Having installed spot lighting in the floor, I wanted to have them switch on during dark hours when we were using the room. This then extended to the kitchen with under cupboard lighting. However I used a simple timer to do the automation. I wanted something that could make decisions based on it’s environment. Inputs such as sound, light, temperature could be used to understand the environment of each room. I have spent many hours since then looking at alternative options that already exist. Since what I wanted to do was collect information and make choices based on them, using an Arduino seemed like an interesting project… Nrf24L01. Mirf multiple data in a payload - Google Search.
Mirf multiple data in a payload - Google Search.