
Export Illustrator Files to Photoshop. I love working in Illustrator, but ever once and a while, I need to export a file to Photoshop.
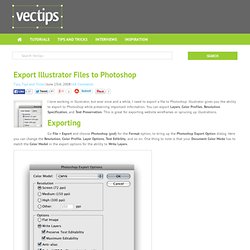
Illustrator gives you the ability to export to Photoshop while preserving important information. You can export Layers, Color Profiles, Resolution Specification, and Text Preservation. This is great for exporting website wireframes or sprucing up illustrations. Exporting Go File > Export and choose Photoshop (psd) for the Format option, to bring up the Photoshop Export Option dialog. 15+ InDesign Tutorials for Magazine and Layout Design. Learn to code. Content-Aware Move Tool - Photoshop CS6 Beta. New in Photoshop CS6, Content-Aware Move will allow you to seamlessly move objects in your photos!
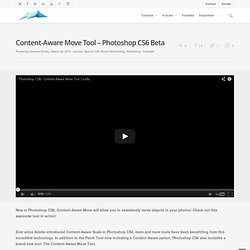
Check out this awesome tool in action! Ever since Adobe introduced Content-Aware Scale in Photoshop CS4, more and more tools have been benefitting from this incredible technology. In addition to the Patch Tool now including a Content-Aware option, Photoshop CS6 also includes a brand new tool. The Content-Aware Move Tool. The Content-Aware Move Tool contains two options. Move: I’m sure you can guess what this might do. When the selection is made, drag the subject to it’s new location. Extend: The second option within Content-Aware, is Extend. To see this new feature in-depth, check out the video at the top of this post! 25 tutorials to build up your design skills - Designer Blog Designer Blog.
One of the best ways to improve and build upon your design skills is by using tutorials — short, instructional guides that teach techniques so you can craft great designs.

We’ve collected 25 of our favorite tutorials from across the web to help you practice your skills. These skills include: Programs: Adobe Photoshop, Illustrator, InDesignLogo, Web, App, Icons, Print and Packaging, TshirtTypography, Grids, 3-D, Opacity, Gradients, Masks, Patterns, Layout, Color Management, Brushes, Meshes, Textures, Bleeds and Margins, and more. Logo Create Isometric Grid-Based 3D Lettering Programs: IllustratorLevel: IntermediateSkills: Typography, Grids, Creating 3D Objects Simple Organic Shapes the Illustrator Way.
Batch Resize Pictures in Mac OS X Using Automator. Need to resize a ton of pictures?
Instead of downloading a third party application or using Preview, you can use Automator to handle the entire operation, even renaming the images to indicate they have been resized to a new resolution. Automator is included in every Mac OS X installation’s /Applications/ folder and is simple to use, making it an excellent tool for repetitive tasks like this. If you’ve never used it before, don’t worry, we will walk through the entire process and get it working. How to Resize a Group of Pictures with an Automator App This will build a little application that has drag and drop support, files that are dropped into it will be automatically resized. If you want the resized images to appear in the same location as the origin folder, choose “Variable” and “Path” as the ‘To’ folder in “Copy Finder Items”, if you choose this option you should be sure that you add the Rename action so that you don’t accidentally overwrite any existing files.
Photoshop Tutorial – Spray Paint Overspray. Hey, looks like you're new here.
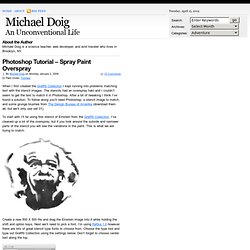
You may want to subscribe to my RSS feed. Thanks for visiting! When I first created the Graffiti Collection I kept running into problems matching text with the stencil images. The stencils had an overspray halo and I couldn’t seem to get the text to match it in Photoshop. After a bit of tweaking I think I’ve found a solution. To start with I’ll be using this stencil of Einstein from the Graffiti Collection. Create a new 500 X 500 file and drag the Einstein image into it while holding the shift and option keys. Looking good, but this is where you begin to notice that the text looks out of place. Add a layer mask to the text layer and choose the brushes called dekonstruct_01 you downloaded from HowieZine. Set your colors to black and white by pressing the d key.
Next command click on the text to make a selection and expand it by 2px. Now we need to adjust the levels and opacity of the layers to match. Related Posts.