
Straight Line Tutorial. Text and images Copyright (C) 2002 Seth Burgess and may not be used without permission of the author.
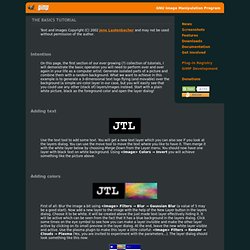
Intention This tutorial shows you how you can do straight lines with GIMP, using a feature called the Shift Key. Straight lines are a convenient way to make things that aren't so terribly affected by the imprecision of a mouse or tablet, and to take advantage of the power of a computer to make things look neat and orderly. This tutorial doesn't use Straight Lines for complex tasks; its intended to show how you can use it to create quick and easy line effects. Step 1 The invention called the typewriter introduced the Shift Key. Step 2 First, create a new image. Step 3 Then click on the paintbrush. Step 4 After you click the paintbrush tool, you can click the image. Step 5 After you have a starting point, and have held down the Shift Key, you'll see a line like above if you're running GIMP version 1.2.x or later. Final See how the line is drawn on top of the preview? Examples. Red Eye Removal. Text and images Copyright (C) 2002 Carol Spears and may not be used without permission of the author.
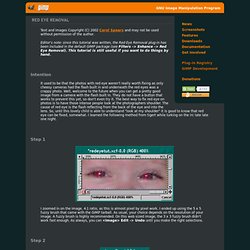
Editor's note: since this tutorial was written, the Red Eye Removal plug-in has been included in the default GIMP package (see Filters -> Enhance -> Red Eye Removal). This tutorial is still useful if you want to do things by hand. Intention It used to be that the photos with red eye weren't really worth fixing as only cheesy cameras had the flash built in and underneath the red eyes was a crappy photo. Well, welcome to the future when you can get a pretty good image from a camera with the flash built in. Step 1 I zoomed in on the image, 4:1 ratio, as this is almost pixel by pixel work.
Step 2 A long time ago, someone suggested on the gimp-user list that the Layers, Channels and Paths Dialog always remain open while you use GIMP. Quickmask Tutorial. Text and images Copyright (C) 2002 Zach Beane and may not be used without permission of the author.
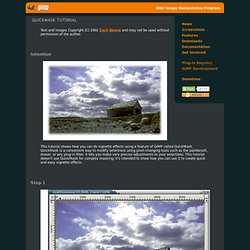
Intention This tutorial shows how you can do vignette effects using a feature of GIMP called QuickMask. QuickMask is a convenient way to modify selections using pixel-changing tools such as the paintbrush, eraser, or any plug-in filter. It lets you make very precise adjustments to your selections. This tutorial doesn't use QuickMask for complex masking; it's intended to show how you can use it to create quick and easy vignette effects. Step 1 For your first step, load up an image. Paths (Bezier Selections) - Bezier Selections.
GIMPLite Quickies - Lite Quickies. Text and images Copyright (C) 2004 Carol Spears and may not be used without permission of the author.
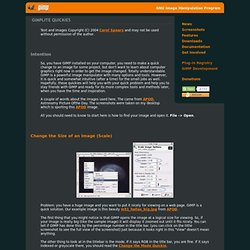
Intention So, you have GIMP installed on your computer, you need to make a quick change to an image for some project, but don't want to learn about computer graphics right now in order to get the image changed. Totally understandable. GIMP is a powerful image manipulator with many options and tools. However, it is quick and somewhat intuitive (after a time) for the small jobs as well. A couple of words about the images used here. Simple Floating Logo - The Basics Tutorial. Text and images Copyright (C) 2002 Jens Lautenbacher and may not be used without permission of the author.
Intention On this page, the first section of our ever growing (?) Collection of tutorials, I will demonstrate the basic operation you will need to perform over and over again in your life as a computer artist: Generate isolated parts of a picture and combine them with a random background. What we want to achieve in this example is to generate a 3-dimensional text logo flying (and movable) over the background (a simple uni-color layer in our case, but you will easily see that you could use any other (stack of) layers/images instead. Start with a plain white picture, black as the foreground color and open the layer dialog! Adding text Use the text tool to add some text. Adding colors First of all: Blur the image a bit using <Image> Filters → Blur → Gaussian Blur (a value of 5 may be a good start).
Bumpmapping Using the layer mask Now activate the text layer again. Draw On Selections Borders - Borders On Selections. Text and images Copyright (C) 2002 Francisco Bustamante Hempe and may not be used without permission of the author.
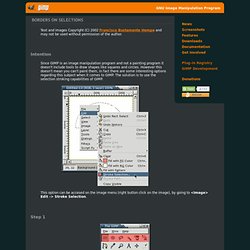
Intention Since GIMP is an image manipulation program and not a painting program it doesn't include tools to draw shapes like squares and circles. However this doesn't mean you can't paint them, in fact there are some interesting options regarding this subject when it comes to GIMP. The solution is to use the selection stroking capabilities of GIMP. This option can be accesed on the image menu (right button click on the image), by going to <Image> Edit -> Stroke Selection. Step 1 Before doing that however we need to make a selection with the shape we want.