
Hand Embroidered Note : Daily source of DIY craft projects and inspiration, patterns, how-tos. Embroidery Designs at Urban Threads - Projects. Cozy Kid's Roll-Up Nap Blanket - Sew4Home. When we're little, we simply have no idea have wonderful it is to be able nap.
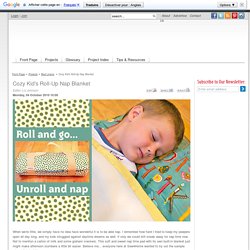
I remember how hard I tried to keep my peepers open all day long, and my kids struggled against daytime dreams as well. If only we could still sneak away for nap time now. Not to mention a carton of milk and some graham crackers. This soft and sweet nap time pad with its own built-in blanket just might make afternoon slumbers a little bit easier. Believe me... everyone here at Sew4Home wanted to try out the sample when I finished it! The Wee Woodland flannels we chose are by Keiki for Moda Fabrics. The amount of flannel listed below is actually enough to make two cuts from each fabric. We always recommend pre-shrinking, but especially stress it when working with flannel. Thanks to our friends at Fat Quarter Shop for providing the Wee Woodland fabric for this project.
Any Sewing Machine (we recommend the Janome Memory Craft 5200)Even Feed or Walking foot: optional, but helpful to sew through multiple layers. Charming Window Pillows. Hi!
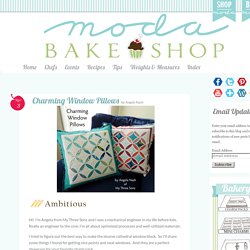
I’m Angela from My Three Sons and I was a mechanical engineer in my life before kids. Really an engineer to the core, I’m all about optimized processes and well-utilized materials. I tried to figure out the best way to make the elusive cathedral window block. So I’ll share some things I found for getting nice points and neat windows. And they are a perfect showcase for your favorite charm pack. We’re going to make two pillows here – most efficient use of materials and all. 1 Just Wing It Charm Pack 1 3/4 Yards Bella Solid Snow 4 Just Wing It Fat Quarters Washable glue stick 2 Square pillow forms – 20″x20″ 2 18-20″ zippers (optional) Pink and Blue Matching thread (optional) Tutorial: Scrap Buster Fall Pillow. This is my favorite thing to do with my little scraps, and since its Scrap Buster month over at Sew, Mama, Sew, I made a quick tutorial so you can make your own.

This pillow cover is 16" square with an envelope back & the design possibilities are endless! I added some pillows I’ve previously made with this same method at the end of this post. Happy Sewing! You’ll Need: 1. 2. 3. 4. Iron your fabric scraps onto your appliqué material according to the directions on the appliqué material. Now with scissors cut out your trunk and leaf shapes. When you get all your leaves cut out, tear the backing appliqué paper off the leaves and trunk. Design*Sponge » Blog Archive » sewing 101: making a pouf. Add a burst of color to your room with this crafty pouf!

At 17” wide and 10” deep, it’s large enough to serve as floor seating or a foot stool. (And if you have pets, I have a feeling they may want to make this their new favorite spot!) This project is a little challenging to sew, but it’s not too difficult, so if you’re comfortable with the basics of sewing, give it a try. Sewing Tutorial: Piggy Pillow. As promised, I have completed the tutorial and the pattern for the “Be My Valentine – Piggy Pillow”, which was published 3 weeks ago.
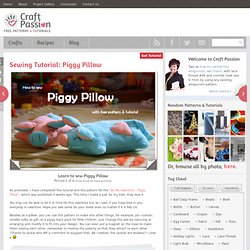
This time I made a pair for my kids, they love it. You may not be able to do it in time for this valentine but as I said, if you have love in you, everyday is valentine. Hope you sew some for your loved ones no matter if it is Feb 14. Besides as a pillow, you can use this pattern to make into other things, for example, pin cushion, smaller softy as gift, or a piggy back pack for little children. Just change the size by reducing or enlarging and modify it to fit into your design. Material you need:1. Print out the PDF pattern of the piggy pillow. Use a pencil and trace the pattern onto the cotton fabric. Sandwich the towels in between 2 fabrics. Sew it up on the sewing line, it can be from sewing machine or hand stitching. Turn body, ear and tail inside out. Tie a knot at the tip of the tail as shown, mark a length of 4″ from the tip. Sew the ears on. How to Sew a Pottery Barn-esque ‘Button’ Pillow Slipcover « DIY Maven. I’ve been eyeing PB’s ‘button’ pillow slipcovers but not to buy one.
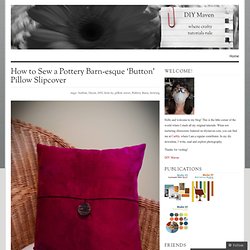
I was giving them a once over to copy them. One of theirs will set you back $24 (and that’s just for the cover). My version cost 6 bucks (yay remnants!) I had the pillow form on hand and the button too. Besides the $$$ savings, it’s actually really fun to whip up. French Desk Set: Basket Liners. I adore being organized.
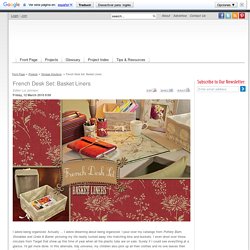
Actually ... I adore dreaming about being organized. I pour over my catalogs from Pottery Barn, Storables and Crate & Barrel, picturing my life neatly tucked away into matching bins and buckets. Hooded Towel and Washcloth Set. This project is relatively quick and very simple to sew.

I think it would make a perfect gift for your next baby shower! Materials To make one 31-inch square towel and two 9-inch washcloths: Please keep in mind that the Terry Cloth used here is a knit fabric so it has a lot more stretch that the sheer floral. Be very careful when cutting and sewing it not to stretch it out. Cutting For the towel, cut: One 32-inch square from the Terry ClothOne 32-inch square from the Sheer FloralOne 12-inch square from the Terry ClothOne 12-inch square from the Sheer Floral For the washcloths, cut: Two 10-inch squares from the Terry ClothTwo 10-inch squares from the Sheer Floral Sewing the Washcloths Pin one of the 10-inch Sheer Floral squares to one of the 10-inch Terry Cloth squares with their right sides together.