
Arduino sur Twitter : "Art Drops: capturing what the human eye can’t see #water #Arduino #pictures... Blog » Blog Archive » Art Drops: capturing what the human eye can’t see. Art Drops: capturing what the human eye can’t see Zoe Romano — June 25th, 2015 Art Drop is a project by italian photographer Gianluca Sambo and recently awarded with first prize from PX3, “Prix de la Photographie de Paris”.
He’s been experimenting for some time a DIY technique based on Arduino to capture amazing shapes of liquid drops mixed with dyes and other ingredients to vary the density, and therefore, the shape of the liquid in motion. Arduino allows him to synchronise the camera with the flash and the water pump, creating a series of pictures full of colours and unforeseen shapes. Take a look at the video below to see how it works: Reference Etendue. Arduino. ShiftOut. Learning Examples | Foundations | Hacking | Links Started by Carlyn Maw and Tom Igoe Nov, 06 Shifting Out & the 595 chip At sometime or another you may run out of pins on your Arduino board and need to extend it with shift registers.
This example is based on the 74HC595. The datasheet refers to the 74HC595 as an "8-bit serial-in, serial or parallel-out shift register with output latches; 3-state. " How this all works is through something called "synchronous serial communication," i.e. you can pulse one pin up and down thereby communicating a data byte to the register bit by bit. The "serial output" part of this component comes from its extra pin which can pass the serial information received from the microcontroller out again unchanged.
"3 states" refers to the fact that you can set the output pins as either high, low or "high impedance. " Here is a table explaining the pin-outs adapted from the Phillip's datasheet. Simple POV display. Affichages à LED (DEL) - Affichage. PlanetArduino. Use the Maxim MAX7219 LED display driver with Arduino in Chapter 56 of our Arduino Tutorials.
The first chapter is here, the complete series is detailed here. Introduction Sooner or later Arduino enthusiasts and beginners alike will come across the MAX7219 IC. And for good reason, it’s a simple and somewhat inexpensive method of controlling 64 LEDs in either matrix or numeric display form. Furthermore they can be chained together to control two or more units for even more LEDs. Here’s an example of a MAX7219 and another IC which is a functional equivalent, the AS1107 from Austria Microsystems. When shopping for MAX7219s you may notice the wild price fluctuations between various sellers. At first glance you may think that it takes a lot of real estate, but it saves some as well. You can even switch the display off for power saving mode, and still send it data while it is off.
Before continuing, download and install the LedControl Arduino library as it is essential for using the MAX7219. MAX72XXHardware. 20mm square 8*8 LED Matrix - Red - LEDs - Affichage. Voltage to apply : 3.3v.
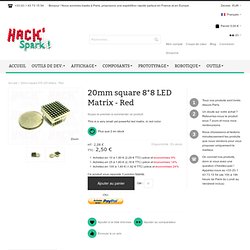
Always use it with correct resistors or you will burn the leds. ABCDEFGH Connect to Anode Power. 12345678 Connect to Cathode Power. L293D - Commander des moteurs depuis Arduino. My first Arduino Project - Wall Clock. Display arduino output on tv for less than $1. Arduino-tvout - A composite video output library for AVR/Arduino. The goal of this project is to create a simple interupt driven library for generating composite video on a single AVR chip.
Currently the output is NTSC or PAL at a resolution of 128x96 by default. The library currently works on ATmega168,328,1280,2560,644p,1284p,AT90USB1286 and more can be added by editing one file. Beta1 for version 1.0 is out!!! It has some it changes the hardware connections as well as some of the function calls see the wiki for full details. SYNC is on OCR1A and AUDIO is on OC2A There are some timing issues with the m1284p, may be related to sanguino core. Wayne and Layn LLC now makes a shield that uses this library, the video game shield. nootropic design is selling a stand alone arduino compatible board the hackvision.
Very simple as they may be. Transformer un clavier en piano avec un Arduino UNO - Semageek - Podcast 1. Arduino. Arduino Mini Light. L'Arduino Mini Light est la version miniaturisée des platines Arduino (sans module de connexion USB) Il s'agit de la même platine que l'Arduino Mini, mais sans connecteur strip.
Ses dimensions minimales (30x18mm) sont particulièrement adaptées lorsque les dimensions du projet sont cruciales. Search results for arduino. Tobias Muthesius » bluetooth. L’installation FaceToFace réalisée avec Juliette du lab212 est exposée à la Maison Folie Moulins à Lille dans le cadre de l’exposition Alter Ego. Initialement crée pour une performance en direct, FaceToFace à été adaptée au format “exposition” en ajoutant la possibilité d’ajouter son visage sur l’une des face du cube.
Le projet est visible à Lille jusqu’au 19 décembre 2010. 19/10/2010 | In Artistic, Electronics, News, Programming | Tags : accelerometer, arduino, bluetooth, exhibition, lab212, lille, openframeworks. Arduino + Servo + openCV Tutorial [#openFrameworks] by Joshua Noble. One of the my favorite things about creativeapplications.net has always been the small tags one can find beneath the name of an application indicating among other things, the technology used to create it.
![Arduino + Servo + openCV Tutorial [#openFrameworks] by Joshua Noble](http://cdn.pearltrees.com/s/pic/th/tutorial-openframeworks-6616441)
That little nod to the process and to all the work that went into creating the libraries and techniques that an artist or designer uses helps not only contextualize the work but it also helps give recognition to everyone who has contributed their time and expertise to building tools for creative expression in code. Arduino Tutorial - Lesson 2 - Modifying the first sketch. OK you've gotten your Arduino set up and also figured out how to use the software to send sketches to the board.
Next step is to start writing your own sketches. We'll start off easy by just modifying something that already works. To start we will venture deep into the Blink sketch, looking at each line and trying to understand what its doing. Adaptateur WiiChuck pour Arduino DFRobot. • Conçu pour être inséré dans le connecteur d'un Nunchuck Wii de Nintendo • Se connecte à deux périphériques• Type d'interface : I2C• Tension : + 5 V L'Adaptateur WiiChuck pour Arduino de DFRobot est une petite carte à circuit imprimé conçue pour être insérée dans le connecteur d'un Nunchuck Wii de Nintendo pour fournir un accès aux 4 fils de la télécommande.
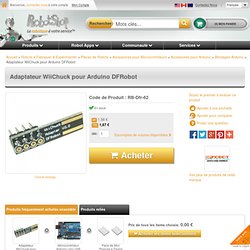
L'alimentation, la terre et l'interface à deux fils de la manette Nunchuck sont toutes réparties sur une embase à 4 broches de pas de 0,1". Par rapport à la norme WiiChuck, le WiiChuck de DFRobot dispose de 4 broches supplémentaires qui vous permettent de le connecter à deux périphériques. Arduino with Wii nunchuck. Arduino High Speed Photography Trigger. Arduino : Présentation et traduction en Français de ArduBlock. Blog » Blog Archive » Arduino Intervalometer. Logiciels: arduino. Arduino est une plateforme open-source pour la création d’interfaces tangibles et d’installations interactives (physical computing).
Elle est composée d’une plaque d’entrée/sortie simple (que l’on peut relier à des capteurs ou des actionneurs), et d’un système de développement basé sur le langage Wiring (basé lui-même sur Processing). Arduino peut être utilisé pour créer des installations autonome (stand alone), fonctionnant sans être connectés à un ordinateur), ou être connecté à certains logiciels (par exemple Flash, Processing, MaxMSP). Arduino tuto. Dans ce tutoriel on se propose d’allumer successivement deux LED par l’action d’un bouton-poussoir, chaque appui allumant l’une et éteignant l’autre. L’une des diodes est rouge et l’autre, verte, est allumée au lancement du programme.
L’environnement de développement (IDE) est préalablement installé sous Linux, Mac OS X ou Windows. Débuter avec une carte Arduino. La famille Arduino est apparue en 2006 sous forme d’une carte programmable avec un port série. Puis de nouvelles versions sont apparues, toujours aussi simples, avec différents formats : petites, grandes, plus puissantes, plus économiques, avec USB, avec Ethernet, compatible Androïd, etc...
On peut les utiliser pour récupérer les informations de capteurs, pour contrôler des moteurs, pour communiquer avec un ordinateur, avec un téléphone portable, pour envoyer et lire des messages sur Internet, pour éteindre des appareils électriques, pour piloter un robot mobile, pour servir de cerveau à un humanoïde, ou tout simplement pour apprendre l’électronique, et encore bien d’autres usages. Retrouvez grâce au lexique tous nos articles traitant de la carte Arduino. Arduino, c’est une grande famille et une solution reconnue avec des publications dédiées. Différents modèles, une même passion.
LivretArduinoFr06.pdf (Objet application/pdf) ARDUINO. View Edit Attributes History Attach Print Search.