
September Tutorial #1: The Dancer - Dynamic Liquid Splash Effect. In this tutorial we’ll create an image of a Dancer with a dynamic liquid splash effect.

Here are the few images used: Dancer: Image ID: 5826686 © Alexander Yakovlev 123RF.com Liquid Splash: Image ID: 7311559 © ifong 123RF.com Liquid Splash: Image ID: 7409551 © ifong 123RF.com Liquid Splash: Image ID: 7409560 © ifong 123RF.com Liquid Splash: Image ID: 7499024 © ifong 123RF.com Liquid Splash: Image ID: 7499033 © ifong 123RF.com Spatter: Image ID: 4797910 © Ana De Sousa 123RF.com Preparing the splashes Fire up Photoshop and open the Dancer and paint/liquid splash images that you want to use.
First the splash image. The layer name will be renamed from “Background” to “Layer 0″. Use the Magic Wand Tool (W) select the background of the splash, then hit delete. Try to look for sections of the clothing that will go well with the “flow” of the splash. Lower the opacity for the splash so it’s a lot easier to see where you’re placing it. I used mainly around 30%-10%. Applying the splashes Brushes. Photoshop CS4: A Picture Worth a Thousand Words Layers Magazine.
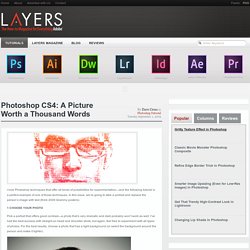
I love Photoshop techniques that offer all kinds of possibilities for experimentation—and the following tutorial is a perfect example of one of those techniques.

In this issue, we’re going to take a portrait and replace the person’s image with text (think 2009 Grammy posters). Pick a portrait that offers good contrast—a photo that’s very dramatic and dark probably won’t work as well. I’ve had the best success with straight-on head and shoulder shots, but again, feel free to experiment with all types of photos. For the best results, choose a photo that has a light background (or select the background around the person and make it lighter). Create a new document (File>New) in a size that’s smaller than your photo: the specifics don’t really matter. Switch back to the photograph. Then, press Command-J (PC: Ctrl-J) to copy the selected pixels onto a new layer. Go back to the Select menu and choose Color Range again. Click the Create a New Layer icon at the bottom of the Layers panel. Learn Adobe Illustrator: All the Basics for Beginners.
A few weeks ago we published a post, Learn Photoshop, that included links to well over 100 resources for mastering the basics of Photoshop and the use of the various tools.

In response to reader request, we’re publishing this post to help designers who want to get started with Adobe Illustrator, or maybe just sharpen their existing skills. Illustrator is a powerful program, but it can be overwhelming or confusing at times, simply because of everything that is possible. If you’re new to Illustrator, taking the time to understand the basics and how to use the specific tools will go a long way towards setting you up for success.
In this post we’ve categorized more than 100 resources that will teach you everything you need to learn. Basic Intro to Illustrator and the User Interface: What is Illustrator? Getting Started in Illustrator Working with Illustrator’s Workspaces (video) Fun with Illustrator’s Lessor Known, Yet Powerful Tools How to Use Smart Guides in Illustrator (video) Magic Wand Tool: