
Ammunition Box - Small-Arm. Undefined Ammunition Box - Small-Arm The British Army 560-cartridge small arms ammunition box of the period was a wooden box with a sliding lid section on the top.
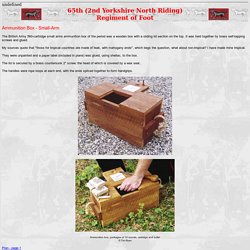
It was held together by brass self-tapping screws and glued. My sources quote that "those for tropical countries are made of teak, with mahogany ends", which begs the question, what about non-tropical? I have made mine tropical. They were unpainted and a paper label (included in plans) was glued, using shellac, to the box. The lid is secured by a brass countersunk 2" screw, the head of which is covered by a wax seal.. The handles were rope loops at each end, with the ends spliced together to form handgrips.
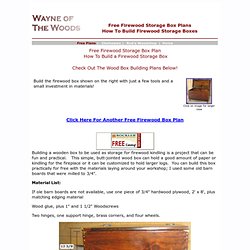
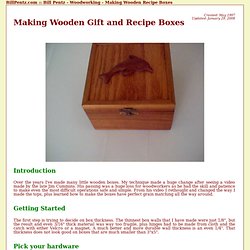
Ammunition box, packages of 10 rounds, cartridge and bullet © Tim Ryan Plan - page 1Plan - page 2 (including label) Note: When printing plans on A4 paper, set your left and right margins to 10mm. Free Fire Wood Box Plans - How To Build A Wood Box. Building a wooden box to be used as storage for firewood kindling is a project that can be fun and practical.
This simple, butt-jointed wood box can hold a good amount of paper or kindling for the fireplace or it can be customized to hold larger logs. You can build this box practically for free with the materials laying around your workshop; I used some old barn boards that were milled to 3/4". Material List: If ole barn boards are not available, use one piece of 3/4" hardwood plywood, 2' x 8', plus matching edging material Wood glue, plus 1" and 1 1/2" Woodscrews Two hinges, one support hinge, brass corners, and four wheels. The RunnerDuck Old Fashioned Wall Box, step by step instructions. Bill's Woodworking - Making Wooden Recipe Boxes. Created: May 1997 Updated: January 29, 2008 Introduction Over the years I've made many little wooden boxes.
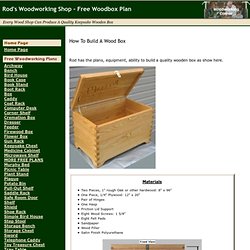
My technique made a huge change after seeing a video made by the late Jim Cummins. His passing was a huge loss for woodworkers as he had the skill and patience to make even the most difficult operations safe and simple. From his video I rethought and changed the way I made the tops, plus learned how to make the boxes have perfect grain matching all the way around. Getting Started The first step is trying to decide on box thickness. Pick your hardware At first I used to live with the often too large brass hinges and catches available from my local box store. Make the grain all match The trick to making the grain match all the way around is to realize that if you spilt a board by resawing it not only bookmark matches side to side, but the end grains match end to end. Pick your wood carefully Now layout the stock Let's build them Now make the tops and bottom. Free Wood Box Plans - How To Build a Wooden Box. Materials Two Pieces, 1" rough Oak or other hardwood: 8" x 96" One Piece, 1/4" Plywood: 12" x 20" Pair of Hinges One Hasp Friction Lid Support Eight Wood Screws: 1 5/8" Eight Felt Pads Sandpaper Wood Filler Satin Finish Polyurethane Step 1: Make the Board Material - Select the two, one inch hardwood boards Rip the rough edge of each board Adjust the fence and rip the other rough edge of each Both boards have two straight edges; rip each board in half Glue and clamp the four boards together, alternating the woodgrain After the glue has dried overnight, run it through the planer to 3/4" Step 2: Cut the Panels to Size - Select the 15" (Approximate width) x 96" Rip the board to 12" (remove material from each edge) Crosscut three pieces @ 20" Crosscut two pieces @ 12" Mark with a pencil, all the edges: "Front, Back, Right, Left, Interior, Exterior" Select the 1/4" plywood for the bottom panel and cut it as shown above Step 4: Cutout the legs - Select the Front, Back, and two Sides.
Woodsmith Tip: A Lipped Box Lid. Printer-Friendly Version The easiest way to make a lidded box is to build the box and lid as one piece and then cut them apart on the table saw.
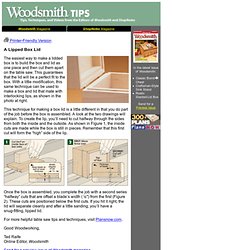
This guarantees that the lid will be a perfect fit to the box. With a little modification, this same technique can be used to make a box and lid that mate with interlocking lips, as shown in the photo at right. This technique for making a box lid is a little different in that you do part of the job before the box is assembled. A look at the two drawings will explain. Once the box is assembled, you complete the job with a second series “halfway” cuts that are offset a blade’s width (1/8″) from the first (Figure 2). For more helpful table saw tips and techniques, visit Plansnow.com. Good Woodworking, Ted Raife Online Editor, Woodsmith Send for a preview issue of Woodsmith magazine More Tips & Techniques Index of Tips by E-mail More Tips & Techniques WoodNET, Woodworking on the Web.