
Basic Branching and Merging. Let’s go through a simple example of branching and merging with a workflow that you might use in the real world.
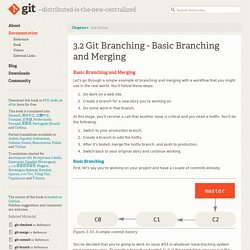
You’ll follow these steps: Do work on a web site.Create a branch for a new story you’re working on.Do some work in that branch. At this stage, you’ll receive a call that another issue is critical and you need a hotfix. You’ll do the following: Switch to your production branch.Create a branch to add the hotfix.After it’s tested, merge the hotfix branch, and push to production.Switch back to your original story and continue working. Basic Branching First, let’s say you’re working on your project and have a couple of commits already.
Git ready » learn git one commit at a time. Stashing your changes. Committed 10 Jan 2009 Stashing is a great way to pause what you’re currently working on and come back to it later.
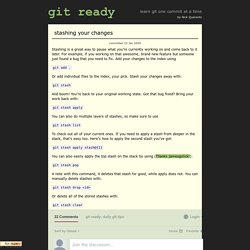
For example, if you working on that awesome, brand new feature but someone just found a bug that you need to fix. Add your changes to the index using git add . Or add individual files to the index, your pick. Git stash And boom! Git stash apply You can also do multiple layers of stashes, so make sure to use git stash list To check out all of your current ones. Git stash apply stash@{1} You can also easily apply the top stash on the stack by using (Thanks jamesgolick!) Git stash pop A note with this command, it deletes that stash for good, while apply does not.
Git stash drop <id> Or delete all of the stored stashes with: The Thing About Git. The thing about Git is that it's oddly liberal with how and when you use it.

Version control systems have traditionally required a lot of up-front planning followed by constant interaction to get changes to the right place at the right time and in the right order. And woe unto thee if a rule is broken somewhere along the way, or you change your mind about something, or you just want to fix this one thing real quick before having to commit all the other crap in your working copy. Git is quite different in this regard. You can work on five separate logical changes in your working copy -- without interacting with the VCS at all -- and then build up a series of commits in one fell swoop. Or, you can take the opposite extreme and commit really frequently and mindlessly, returning later to rearrange commits, annotate log messages, squash commits together, tease them apart, or rip stuff out completely. I'm not saying this is the Right Way to use Git: in the end, it all goes to the same place.
StGIT Wiki: StGIT Tutorial. Introduction StGIT is a Python application that provides functionality similar to quilt (i.e. pushing/popping patches to/from a stack) using GIT instead of 'diff' and 'patch'. StGIT stores its patches in a GIT repository as normal GIT commit objects. StGIT is not an SCM interface on top of GIT. For standard SCM operations, either use GIT's porcelain commands or the Cogito tool. Book. Git User’s Manual (for version 1.5.3 or newer)
This chapter covers internal details of the git implementation which probably only git developers need to understand.
It is not always easy for new developers to find their way through Git’s source code. This section gives you a little guidance to show where to start. A good place to start is with the contents of the initial commit, with: $ git checkout e83c5163 The initial revision lays the foundation for almost everything git has today, but is small enough to read in one sitting. Note that terminology has changed since that revision. Also, we do not call it "cache" any more, but rather "index"; however, the file is still called cache.h. If you grasp the ideas in that initial commit, you should check out a more recent version and skim cache.h, object.h and commit.h. In the early days, Git (in the tradition of UNIX) was a bunch of programs which were extremely simple, and which you used in scripts, piping the output of one into another.
Next step: get familiar with the object naming.