
Cassie Stephens: In the Art Room: My Fave Landscape Lessons. Leafy Spring Prints. I don't know what it's like where you live, but here in Tennessee, we are experiencing spring-like weather.
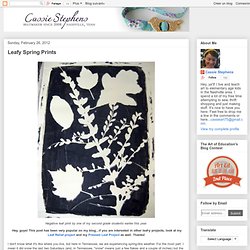
For the most part. I mean it did snow the last two Saturdays (and, in Tennessee, "snow" means just a few flakes and a couple of inches) but the other day it was 78 degrees. Crazy, right? For that reason, I've got touch of spring fever. You too? For this project, you'll need the following: gelatin, not Jell-o. Cassie Stephens: In the Art Room: Leaf Relief. Hey guys!

This post has been very popular...if you are interested in other leaf related projects, be sure to look at this Leaf Printing post and my Leaf Press Project. Thanks! While second grade was completing that project, I was working with my third graders on these Leaf Reliefs. The Little White Studio: Kids Summer Holiday Art Workshops. Our first workshop session of the Summer Holidays is Thursday 7th August, 9.30am to 11.30pm.
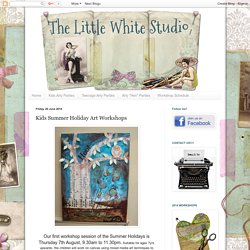
Suitable for ages 7yrs upwards, the children will work on canvas using mixed media art techniques to create our "Owl in the Tree" piece, as shown here. Cost £20 inc all materials and refreshments. Places are limited so booking early is advised, please email or facebook message to reserve your place. Hilary Emerson Lay. Studio Kids - Children's Art Classes in Ballard, Seattle. The Art of Fall: Mixed Media Workshop for Kids. Winter Window Shade. If you are looking for something pretty to hang in a window at home or in your classroom this winter, check out the easy instructions below on how we made these snowflake-inspired shades.
We are so fortunate here in The Art Studio to not only have a full wall of floor-to-ceiling windows that let in a lot of light, but we also have a beautiful view of the apple orchard on The Carle’s grounds. Starting in late November and early December, on particularly sunny days, Studio staff and guests start “feelin’ the burn” from the hot sun pouring through our southern-facing windows. To help shade the light but not sacrifice the view, we’ve created various shades to hang in the windows (Our Ribbon Shade, Plastic Cap Screen, and our ever-popular Rainbow Window Shades just to name a few!). First, using scissors, an x-acto knife and hole punches, create designs by folding up pieces of 8.5″ x 11″ copy paper or drawing paper. Next, pair your finished design with a sheet of tracing paper the same size.
Printmaking at Fort River. Diana, Meghan and I all had the privilege of teaching a series of art classes through our contract with Amherst Public Elementary schools.
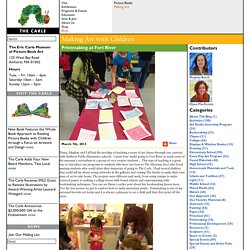
I spent four weeks going to Fort River to teach some of the museum's curriculum to a group of very creative students... This type of teaching is a great way to introduce our programs to students who have not been to The Museum, but I also loved meeting students who could share their memories of going to The Carle. I had several children that could tell me about seeing artworks in the galleries and visiting The Studio to make their own piece of art to take home. The projects were different each week, from using stamps to make textured paper, to making a collage house with found objects and experimenting with bookmaking techniques. Monotype Printmaking with Kids. I wanted to share this monotype printmaking project we teach during Animals, Art and Imagination, a mixed-age summer class we host here at The Carle every summer.
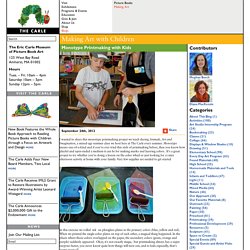
Monotype means one-of-a-kind and if you've ever tried this style of printmaking before, then you know how playful and open-ended a medium it can be for making marks and layering colors. It's a great project to try whether you're doing a lesson on the color wheel or just looking for a rainy afternoon activity at home with your family. Very few supplies are needed to get started In this exercise we rolled ink on plexiglass plates in the primary colors (blue, yellow and red). When we printed the single-color plates on top of each other, a magical thing happened. Let me backtrack to earlier in the day, prior to the printmaking lesson.
They had a discussion about what they saw going on in the large landscape, and then sketched the parts of the sculpture that interested them the most on small clipboards. Printmaking at Fort River. Toddler Art Activity: Materials Play Roundup. It feels good to be back at The Carle!
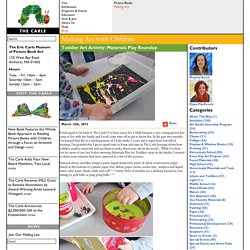
I've been scarce for a while because a very young person has come to live with my family and I took some time off to get to know her. In the past two months I've learned that life as a working mom of 2 kids under 2 years old is super busy but full of learning. I'm grateful that I get to spend time at home and time at The Carle learning about how toddlers explore materials and use them to make discoveries about the world... While I've been out for most of our last Friday morning Materials Play for Toddlers series in the Studio, I wanted to share some pictures that were captured in a few of the sessions.
Pictured above: marbles, tempera paint, liquid watercolor paint, & black construction paper placed in the bottom of a plastic paper tray. Below: plexi mirrors, washable markers, water-soluble oil pastels, wide cups of water and brushes. Truck Printing! . . . pressed and sprinkled onto contact paper (paper frame attached first). Plastic Cap Window Screen. We love The Studio's large, southern-facing wall of windows and often use them as a creative display space for visitor art work or interesting materials.

This winter, Diana and I have been brainstorming ways to reuse old marker caps and at the same time have been wanting to introduce a few new hanging displays. Easy Paper Marbling. This month I've been saying a lot of 'goodbyes' to student staff members as they leave for summer break.

It makes me realize how fortunate we've been to work with such a stellar group of student employees over the years and see them move on to careers in art, museums and education. We invited our very talented former Studio intern, Anna McNeary, to share this marbling paper activity she taught recently to children at ArtSpace Charter School in Swannanoa, NC. Anna McNeary working on her final Studio project, fall 2010 I spent a very fruitful semester interning in the Art Studio during autumn of 2010, while I was attending Smith College.
Since moving on from both the Carle and Smith, I've continued to pursue opportunities in art education. I'm a printmaker, so some of my favorite projects drew on printmaking concepts. Materials: containers with seal-able lids, shallow pans, vegetable oil, food coloring, forks, spoons, skewers, and sturdy paper (like card stock). Weaving Fabric with a Handmade Loom. Have you ever wanted to weave your own fabric into a unique cloth but didn't quite know where to start?
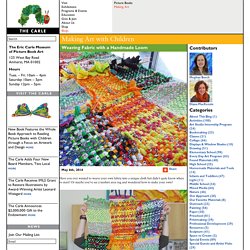
Or maybe you've see a teeshirt area rug and wondered how to make your own? This post will show you how to make your own wooden loom and turn ordinary strips of scrap fabric into beautiful hand-woven swatches to display or give as gifts. For those of you feeling more adventurous, the swatches can be stitched together to create larger pieces, like the one pictured above that Art Studio guests helped us make.
The individual swatches were stitched together into a wall display. Make a comfortable floor mat or rug, blanket, pet bed or anything else you can imagine! Family Thank You Books. The holiday season is fast approaching and it's the perfect opportunity to share with friends and family the happy memories of the past twelve months and wishes and goals for the new year ahead. It's also a time to give thanks for love and support from friends and family, or acknowledge all the good happening in your life.
What better way to record your family's gratitude all in one place at your next family dinner in a simple-to-make book. You probably have all the materials you need already on hand: -several sheets of 8.5" x 11" white printer papers cut in half (8.5" x 5.5"), one page for each of your friends/family members -1 or 2 sheets of 9"x 12" construction paper cut in half (about 9"X 6", or trim to the same size as copy paper) Printing with Found Materials 2. This is my second post about printing with found materials. Collaging Paper Cats. Purple cat, purple cat, what do you see? Well, if purple cat visited The Art Studio this month she would see lots of colorful paper kitty friends perching, playing and purring in our Kitty Cafe!
For this project, everyone starts with a large organic shape for the cat's body, then cut their own shapes out for the head, legs, tail and other details. Mirror Image Printing. Last Sunday, two of our Art Studio Assistants, Emily Biffis and Sara Ottomano, designed and led a project inspired by autumn and everyday materials. Here is their report from the day. While brainstorming ideas for our Special Sunday project, we were drawn to use paint and paper to create art inspired by Rorschach Inkblot tests. Like a Rorschach, we folded the paper down the middle.
Instead of using ink, we tried adding pre-painted natural and found recycled materials (with washable tempera paint) and pressing them inside the folded sheet of paper. Family Thank You Books. Wood and Paper Stars. We’re always trying to think of ways to shade and catch the beautiful sunshine that streams directly through the Art Studio’s wall of south-facing windows in the cold months.
Inspired by the array of twig stars I’ve seen on Pinterest, staff in the Art Studio helped me make these stained-glass-like stars and turn them into a happy window hanging. First, we made the stars’ forms with wooden coffee stirrers and tacky white glue. Toddler Art Exploration: Printing Circles with Found Objects. An exploration I offered in my Friday morning toddler program featured plastic caps and cups, paper towel tubes, paint, and paper.
The great thing about this exploration is that it's not just for toddlers! Tear It Up: Silly Collage Characters. Printing with Stencils. Make Your Own Foam Stamp. Make Your Own Stamp Pads. Making a Stamp. Making stamps for decorating stationary or gifts is fun and easy. The current project Prints, Patterns and Papers is keeping guests busy cranking out unique designs now until July 21st. Materials: A block for your stamp (We cut down sheets of insulation foam from the hardware store but you could also use sanded scrap wood, corrugated plastic sheets, styrafoam, laundry detergent cap, etc.) sticky-back foam pieces stamp pad or paint and a brush (Here is a blog post about how we make our own stamp pads.) colorful printing papers Our volunteers are staying busy keeping the art supplies stocked in The Studio!
After cutting out sticky foam pieces, peel off the back sticker and press them onto your block. When you design is complete, press the stamp face down onto a stamp pad and then onto your paper.