
Sharpie Markers Official Blog. Getting antsy for Spring to come?
UGH we are, too (can you tell?)! For those of you that already skipping through town in your perfect spring getup, I would like to introduce you to the Sharpie green-eyed monster. Hello. So, to brighten up this cloudy weather, we thought of the perfect way to add a little color in our lives…SHARPIE COASTERS! These artsy, one-of-a-kind additions to your coffee table will make any appreciative guest marvel at your OBVIOUS skilled craftsmanship as you chuckle to yourself and shove your Sharpie markers out of sight.
Mixed media art "Create beautiful things" DIY Wall Art - Textured Mixed Media. Divinity Withinity - art, creativity, fun: Tutorial: Making Colourful Backgrounds That Won't Warp Thin Papers. I finally created a photo tutorial for the art journal backgrounds I've been talking about.
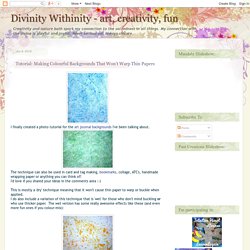
The technique can also be used in card and tag making, bookmarks, collage, ATC's, handmade wrapping paper or anything you can think of! Using Tim Holtz's Distress Stains - Joggles.com. Distress Stains ** Strathmore Visual Journals - I'm using the Mixed Media paper in 5.5" x 8" size ** NonStick Craft Sheet ** Mini Misters ** Silk Salt ** Mop Brush ** Perfect Pearls Mists ** Craft Scraper ** Venise Lace Because there was a fair amount of water on the page the colors pooled in places.
Once the page dried the colors appear darker in those places where they'd pooled. This page was done the same way, but before it dried Jess put silk salt in areas to cause bursts. Rather than just scatter the silk salt she made little piles of it which causes the large bursts you see here. Smaller amounts (or single crystals) will create far smaller bursts.
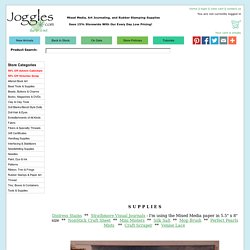
The salt is gone now and you can see the way the color was drawn to the salt and then collected there to form patterns within the larger bursts. Scattered Straw on the page first, then Tattered Rose around the edge. Dragging colors with the craft scraper or old credit card. This is the same technique, but with one additional step. Aileen's Musings: Christy's Color Mists Background Pages. My gal pal Mz Christy has been having fun playing with She has very generously sent me some examples and a description of how she achieved each of her beautiful backgrounds.
Brushed Out On the “Brushed Out” one, I used a ¾ inch flat brush (no real reason except this particular brush holds water well and has the right amount of spring) and sprayed Lime Jello, another green and blue (the highlighter one) on over the pages and while saturated, brushed vertically and then horizontally and used the heat gun to dry it. CM Normal This next one, Cm normal spray, is exactly what I usually do…spray the pages first with one color, in this case, the turquoise and then next with Copper Kettle while the other was still wet.
CM Starbust For the starburst pages, I started off pretty much business as usual with yellow all over, then orange (hi-lite) and magenta all while they were still very wet. White Final Spray White Oil Pastel Resist MonoPrint For Unique Whimsical. Alisaburke: plastic bag printmaking. I fell in love with printmaking back in college and my favorite printing process is monotyping- drawing or painting on a smooth non absorbent surface and then transferring it to paper.
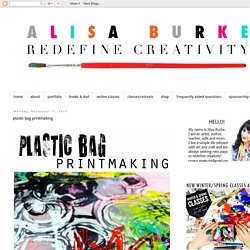
A monotype produces a completely unique print with a process that is unpredictable, expressive, painterly and totally unlike any other creative process. There are all kinds of tools and supplies for monotypes (acrylic printing plates, the Gelli plate, etc) but really any slick surface will work- even something as simple as a plastic bag! I like to start by "inking up" a plastic bag with either a brayer or a paint brush. You can can use printing ink, acrylic paint or even fabric paint if printing on fabric surfaces. There are all kinds of ways to get expressive on the surface- you can scratch into the paint with a toothpick, old paint brush or the end of a pencil. Once you are satisfied its time to print by simply placing the plastic bag onto your surface. Art Journaling 101 - Background Techniques « Kristal NortonKristal Norton.
Oh yay, we’re on to the fun stuff now!

Today I want to share with you a couple of my favorite background techniques for art journaling. They are all super simple and fun to do. When you find yourself stuck and not knowing where to begin you can always start prepping your pages with these and many other background techniques! This first technique can be applied in so many ways. Gel medium acts as a resist, so you can stencil, stamp, and paint with it on your surface, then go over it with a wash of paint to reveal the resist. The gel medium is clear, so its a bit hard to see where and how well you are working, you kinda have to watch it at an angle.
Paper Creations by Shirley: Gerberas & Background Tutorial. » Mixed Media Background Tutorial by PamMerly Impressions. I wonder how many of you have chosen ONE LITTLE WORD for 2014?
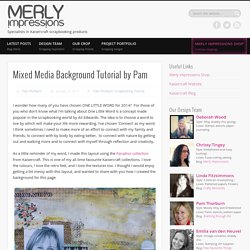
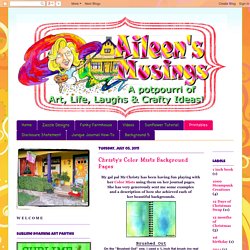
For those of you who don’t know what I’m talking about One Little Word is a concept made popular in the scrapbooking world by Ali Edwards. The idea is to choose a word to live by which will make your life more rewarding. I’ve chosen ‘Connect’ as my word. I think sometimes I need to make more of an effort to connect with my family and friends, to connect with by body by eating better, to connect with nature by getting out and walking more and to connect with myself through reflection and creativity.
As a little reminder of my word, I made this layout using the Paradiso collection from Kaisercraft. 1. 2. 3. 4. 5. So, that’s it.