
You're my one in five billion. Spoon Graphics. How To Create Digital Particle Waves in Adobe Illustrator The blend tool in Adobe Illustrator is often used to create abstract wave graphics, but I’ve been experimenting with some additional adjustments and discovered some handy tricks to create sci-fi inspired digital particle waves.
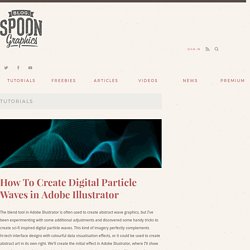
This kind of imagery perfectly complements hi-tech interface designs with colourful data visualisation effects, or it could be used to create abstract art in its own right. Itsphotoshop.com. How do I make gifs?
Go here and check “How to make gifs”. Make sure you select a valid tutorial to your operating system. Itsphotoshop.com. Example: Your videos must be 720p or 1080p, no less.
If there isn’t a HD version of the video you want to use, make your gifs as small as possible (160px or 177px), but they won’t look HQ still. For tips on how to avoid grain in gifs, go FAQ > Photoshop > Most popular issues. You can make gifs by importing video frames to layers or loading files into stack. If you use the second method, don’t extract more than every 2 caps or less than 24-25 frames per second in KMP, MPEG, VLC or any other software you use. Pictaculous - A Color Palette Generator (courtesy of MailChimp)
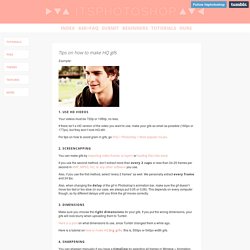
How To Create a Realistic Chalk Lettering Effect. Last week I posted a showcase of stunning chalk lettering designs, which gave me the inspiration to create some chalk typography myself.
Unfortunately I neither have the talent or a chalkboard to produce authentic hand made chalk typography murals, but I’ve come up with a technique that designers can use to achieve realistic chalk lettering effects with their artwork. We’ll use the power of Illustrator to design a concept, then we’ll use some analogue tools to help capture the character of hand lettered art. Hipster Text Effect in Photoshop CS6. A few weeks ago we posted a tutorial showing how to create a hipster text effect using Pixelmator.
Now we decided to show you the same effect using Photoshop CS6. As we had said, we will be doing that in Fireworks and CSS as well. So stay tuned. Make a Vintage Planetary Landscape Poster in Photoshop. When working with an outer space theme, the possibilities are endless — there are plenty of elements you can incorporate and photo manipulate into your composition.
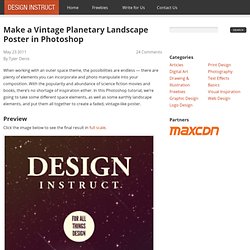
With the popularity and abundance of science fiction movies and books, there’s no shortage of inspiration either. In this Photoshop tutorial, we’re going to take some different space elements, as well as some earthly landscape elements, and put them all together to create a faded, vintage-like poster. Preview Click the image below to see the final result in full scale. Itsphotoshop.com. Where Photoshop & Lovers meet. Divided we fall. Cassiopeia dandara; 18, infp/infj i try to write stuff.
SoDamnReckless (Vielka Reyna) - DeviantArt. Itsphotoshop.com. Itsphotoshop.com. Textures favourites by CuddleBone on DeviantArt. TEXTUREs favourites by belongto11th on DeviantArt. Transparent Textures. Hopeless wanderer. Hopeless wanderer. Hopeless wanderer. Where Photoshop & Lovers meet. Where Photoshop & Lovers meet. Where Photoshop & Lovers meet. Home of Photoshop. Home of Photoshop. Free, high res textures.
Free Photoshop and Illustrator tutorials. Those who want to learn useful techniques in Photoshop, Illustrator, InDesign, and photography might be interested in Nicole's Classes.
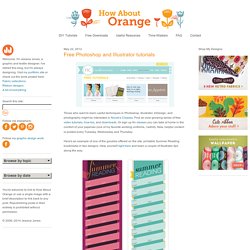
Find an ever-growing series of free video tutorials, how-tos, and downloads. Or sign up for classes you can take at home in the comfort of your pajamas (one of my favorite working uniforms, I admit). New, helpful content is posted every Tuesday, Wednesday and Thursday. Here's an example of one of the goodies offered on the site: printable Summer Reading bookmarks in two designs. Help yourself right here and learn a couple of Illustrator tips along the way.
Ps help? Ps help? Honeyresources. Free High Resolution Textures - gallery. Free textures for your next web project. Nothing like a field of beautiful flowers. Download Download These lovely water-colorful dots will make your designs pop. Download More leaves from another angle. Download. Pink Watercolor Texture 1 by Shembre on DeviantArt. ✼ Drummers Are Very Sexy — Dreamy Photoshop Tutorial. Honeyresources. Honeyresources. Holiday golightly, traveling. Holiday golightly, traveling. Love, Blood, and Rhetoric. O(≧o≦)o. Stranger things happen. Home of Photoshop. Home of Photoshop. Home of Photoshop. Home of Photoshop. Wolfsbane. The Dummies’ Guide to Illustrator View the... - oddhour. Ample Stones. Meliapond.tumblr. Home of Photoshop. Kissmygraphics. Double Exposure Effect Photoshop Tutorial. Welcome to a new easy-and-quick tutorial for Adobe Photoshop, it’s nice to you read us once again.
We know you are very interested in learning how to get great and trendy effects on your designs in a easy way. So this time let’s learn how to create a double exposure effect. What is it about this effect? Well, you surely have already seen this in several graphics, consists in two overlapping photos in which one is projected inside the other one, in photography and cinematography, the multiple exposure is the combination of two or more exposures for creating a single image through the opening of the shutter more than once to expose the film several times. So knowing this, let’s start with this step-by-step tutorial.
Step 01. The first thing that we’ll to do is open the main image we use as a base (I used a bear photo from Pexels.com) and in which will project the another one. Step 02. Once traced the contours, select the Paint Bucket Tool (G) always in the quick mask mode. Step 03. Step 04. Winchester tutorials. Just one, I’m a few, no family too, who am I. Stranger things happen. You've been asleep cap. Weird works for me. The less i know the better. 夜神月, Graphic Tutorial. This is the edit that anon requested a tutorial on: this is my first tutorial ever so i’m sorry if there’s anything that’s unclear. if there’s anything you’d like me to elaborate on, just ask!
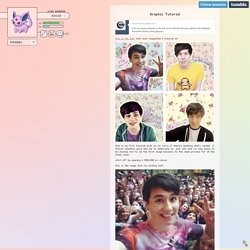
(and i’m only going to be showing how to do the first image because its the same process for all the other ones) start off by opening a 500x500 px canvas this is the image that i’m working with: Using the magnetic lasso tool, trace around the person, then using the quick selection tool tidy up your selection. afterwards copy and paste your selection, and then make the original image invisible, so that only the selection is visible, that way you can see which areas you need to fix. using the quick selection tool again, as well as the eraser tool, tidy up your selection until you’re happy with the way it looks. then create a new layer, and using the polygonal lasso tool cut around the person, then using the paint bucket tool, fill in the selection with whatever colour you like and thats it!
Demetriaspsds.tumblr. Shot lipgloss through my veins. I'VE MOVED. –– love no more. Mostly void: I’m doing another tutorial because my other one got notes and somebody did it and credited me omg im so proud. Can't Even Tell His Boys Apart. Our blades are sharp. I figured that as I get more and more into the world of editing and graphics I ought to give back in some way. Hey, gotcha. Mostly void. Textures, psds, actions & more. Textures, psds, actions & more. Textures, psds, actions & more. Browsing Photoshop Brushes on DeviantArt. What. WAVE TEXT EFFECT TUTORIAL BY TIMEVORTX Recently,... : we're all stories. Idek. Catching dreams. Wolfsbane. Counting stars. Face It Tiger. □ Frivolous Whim.
Stardust; □ May I help you?