
Capteurs. HC-SR04. How to connect raspberry pi to laptop or desktop monitor using LAN and WIFI. Librairies geany. Python WSGI adapter module for Apache. Lancer python dans php. Utiliser GPIO avec apache. Réalisation complète et application pratique en domotique Le RaspberryPI avec PLCLink PLCLink PLCLink est une application pour iPhone ou iPad de supervision et de télécommande d'automatismes utilisant des protocoles standards du net (HTTP, XML, JSON, Modbus).
Raspberry PI Le Raspberry PI est une carte complète micro-ordinateur avec Linux comme système d'exploitation. Vous avez avantage à fixer rapidement l'adresse IP du RaspberryPI en associant l'adresse MAC de celui-ci avec une IP fixe dans l'interface du routeur, il sera plus simple de réaliser ensuite les routages de port pour un accès en réseau extérieur. Le câblage de la LED à été modifié dans la suite. Installation de base Vous trouvez sur les sites consacrés à ce produit les détails pour le montage de base, réaliser une carte mémoire de boot 1Go est largement suffisant pour cette démonstration.
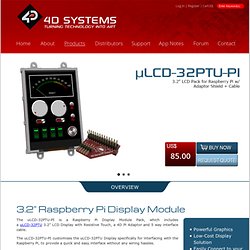
ViSi-Genie-Reference-Manual-REV1. uLCD-32-PTU-PI-Datasheet-REV1. 4dsystems/ViSi-Genie-RaspPi-Library. 4dsystems/ViSi-Genie-RaspPi-Demo-Monitor. Download & Install. WiringPi is now maintained under GIT for ease of change tracking, however there is a Plan B if you’re unable to use GIT for whatever reasons (usually your firewall will be blocking you, so do check that first!)
If you do not have GIT installed, then under any of the Debian releases (e.g. Raspbian), you can install it with: sudo apt-get install git-core If you get any errors here, make sure your Pi is up to date with the latest versions of Raspbian: sudo apt-get update sudo apt-get upgrade To obtain WiringPi using GIT: git clone If you have already used the clone operation for the first time, then cd wiringPi git pull origin Will fetch an updated version then you can re-run the build script below. To build/install there is a new simplified script: cd wiringPi . The new build script will compile and install it all for you – it does use the sudo command at one point, so you may wish to inspect the script before running it. Plan B Click on this URL: (it should open in a new page) Using the Dagu Pan/Tilt Kit with the Raspberry Pi.
The Pan/Tilt kit that we sell, developed by Dagu with the guys over at Let’s Make Robots, is a great way to mount mobile sensors on your robotic projects.
In this tutorial we look at how you can control the Pan/Tilt kit with a Raspberry Pi and the Python programming language. Required Materials and Equipment Pan/Tilt KitRaspberry PiBreadboard for making connectionsBreadboard header pinsWires with 2.54mm connectorsA separate power supply for the servo motors (optional) Assembly In order to control the servos of the pan/tilt kit with the Pi, we need to provide the servos with power, and connect their signal lines to GPIO pins on the Pi.
Connect the servos to the Pi as shown in the circuit diagram below. Circuit Diagram – Made using Fritzing External Servo Power – Diagram made using Fritzing As the the servos in the Dagu pan/tilt kit don’t require much current, we can power them from the 5V line of the Pi. Understanding Servo Motors. Wifi. Fichier network. Qualité wifi. Commandes utiles. Modifier Proxy. Network service. Activer / Désactiver le compte super-utilisateur de Ra - Soft-alternative, actualité, tutoriaux informatique.
Télécharger l' Présentation Par défaut le système Raspbian ne permet pas de connexion à partir du compte super-utilisateur (root).
Il est nécessaire d'activer celui-ci pour pouvoir s'y connecter. Procédure Démarrer le "RaspberryPI" sur la distribution "Raspbian". Lors de la prochaine ouverture de session du système il sera maintenant possible de se connecter à l'aide du compte super utilisateur (identifiant : root) et du mot de passe saisi précédemment. uLCD-32-PTU-PI_datasheet_R_1_2. Introducing 4D Systems' All New Workshop4 IDE (Double Click to Add Contents) Supports multiple development environments, to cater for different user requirements and skill level.
Workshop4 is a comprehensive software IDE for Microsoft Windows that provides an integrated software development platform for all of the 4D family of processors and modules. The IDE combines the Editor, Compiler, Linker and Downloader to develop complete 4DGL application code. All user application code is developed within the Workshop4 IDE. Workshop4 includes four development environments, for the user to choose based on application requirements or even user skill level. This environment enables the user to write 4DGL code in its natural form to program the display module. An advanced environment that doesn't require any 4DGL coding at all, it is all done automatically for you. uLCD-32-PTU-PI_datasheet_R_1_2. uLCD-32PTU-Datasheet-REV1.8.