
DIY Art For Your Walls. Typographic Gift Wrap. This year, I vowed to only make or buy handmade holiday gifts for my friends and family, and I've kept to it so far.

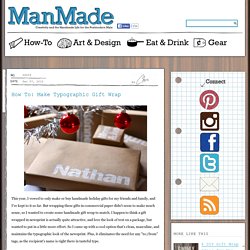
But wrapping these gifts in commercial paper didn't seem to make much sense, so I wanted to create some handmade gift wrap to match. I happen to think a gift wrapped in newsprint is actually quite attractive, and love the look of text on a package, but wanted to put in a little more effort. So I came up with a cool option that's clean, masculine, and maintains the typographic look of the newsprint.
Plus, it eliminates the need for any "to:/from" tags, as the recipient's name is right there in tasteful type. Once I figured it out, it was actually quite easy and quick - less than ten minutes per gift. Here's how to do it: Materials and Tools. Neonflames. DIY Paper Rose. Paper roses are one of my favorite paper crafts.

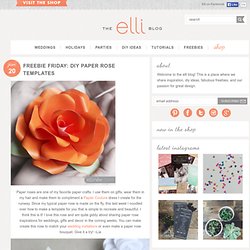
I use them on gifts, wear them in my hair and make them to compliment a Papier Couture dress I create for the runway. Since my typical paper rose is made on the fly, this last week I noodled over how to make a template for you that is simple to recreate and beautiful. I think this is it! I love this rose and am quite giddy about sharing paper rose inspirations for weddings, gifts and decor in the coming weeks. You can make create this rose to match your wedding invitations or even make a paper rose bouquet.
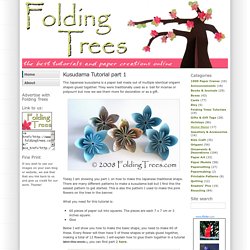
{for a printable PDF version of these instructions, click here} DIY Paper Peony. Peonies are my favorite flowers. They are a little wild looking, yet so elegant. There are so many varieties in both shape and color. I have been brewing on how to make a paper peony from something other than crepe paper, which is no easy task. Here is what I came up with. I picked a text weight paper called Strawberry from Paper Source to make this flower. Lia Lia is a daily crafter, maker, designer and DIYer. Kusudama Tutorial. The Japanese kusudama is a paper ball made out of multiple identical origami shapes glued together.

They were traditionally used as a ball for incense or potpourri but now we see them more for decoration or as a gift. Today I am showing you part 1 on how to make the Japanese traditional shape. There are many different patterns to make a kusudama ball but I find this the easiest pattern to get started. This is also the pattern I used to make the pink flowers on the tree in the banner. What you need for this tutorial is: 60 pieces of paper cut into squares.
Below I will show you how to make the basic shape, you need to make 60 of these. Fold the bottom corner to the top. Fold the left and right corners up to the middle corner. Fold the same points down. Open up the flaps you have just created and flatten them. Fold the top triangles towards you so they are level with the edges of the paper. Fold the triangles back using the crease you made earlier and glue the outside triangles together. Pixelated Heart Popup Card. I‘ve been scratching my head trying to come up with a card for my hubby {AKA the non-romantic type}.
I finally decided to make this pixely popup heart card! They are really minimal (which I love) and take about 20 minutes to make (that includes the card, insert and envelope). You can even make some pixely confetti to put inside the card (if you are a big kid like me!). Full instructions and printable templates below! (BTW I remember seeing something similar in a popup book years ago. How to 1. (If you have a cutting machine then see note at end of post!) Cut along the black lines and score the grey lines. Optical Design.