

Mag Reuse. Show mom. Everyday Mom Ideas: Scrap Paper Tree Centerpiece Tutorial (Featured guest blogger) Hi there! I'm Sharon from Two Girls Being Crafty, and I am so delighted to be today's guest blogger on Everyday Mom Ideas! Thank you so much, Julia, for having us. My co-blogger, Tristin, and I create fun and inexpensive crafts that anyone could do. Our goal is to inspire. So come check us out! Today I would like to share with you all our newest craft. This simple project uses scrapbook paper leaves to create a bright and cheery Spring ambiance for your home. First, drag out your unseemly healthy assortment of scrapbook paper scraps. Cut out a template of your leaf from the cardboard (you can also use chipboard or card-stock).
Take your floral wire and cut strips anywhere from 5"-8" long. Lay down some newspaper next to your workspace. Now for the fun part! ...or make them funky. And you're done!
Gift Ideas for Poor Creative Souls (9) Posted by: Cathy on Sep 18, 2011 Tagged in: Untagged I like this idea because you can make it so personal. It really is the perfect gift for Christmas when family time is so important. This tutorial comes courtesy of A Yummy Mommy. (The full tutorial can be seen there) Materials Needed: Modge Podge or PVA glue wooden blocks foam brush photos printed on a laser printer (slightly smaller than the blocks) cutter letters (optional) Cut all you scrapbook paper out to fit the squares and cut your pictures out. You then use your foam brush to apply a thin layer of Modge Podge to the block and apply the paper and the photos in whatever arrangement you desire. Apply another thin layer of Modge Podge. It is very important that you let the blocks dry completely between all steps. Lightly sand the corners and edges (I use a 120-180 grit sandpaper) Now use a tiny teeny amount of the paint and rub it on all the edges and corners. Iron Craft Challenge #40 – Graveyard Terrarium.
This week for Iron Craft we were to create something using bottles or jars.

I’d been playing with making creepy trees for Halloween terrariums and thought a mason jar would make for a great vessel. I’m kind of in love with how this turned out. To make it even spookier I added a flickering light to make it really show up at night. I like it so much, I made a bigger one in terrarium that I had killed all the plants in. Here’s how I made it… Our Journey: Kitchen Command Center ~ Finally! I started drafting up plans for my little Kitchen Command Center a few month ago ... and FINALLY ...
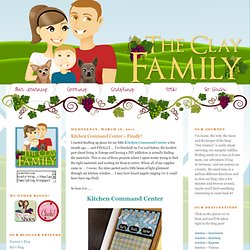
I've finished! As I've said before, the hardest part about living in Europe and having a DIY addiction is actually finding the materials. This is one of those projects where I spent weeks trying to find the right materials and waiting for them to arrive. Vintage Frame Purse. This is the another version of Mic-O-Pear coin purse I published a few days ago.
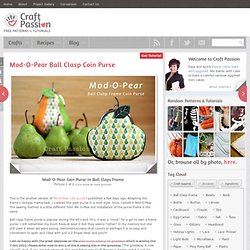
Adapting the frame’s vintage mama-look, I created this pear purse in a mod style, thus, named it Mod-O-Pear. The sewing method is a little different from Mic-O-Pear but installation of the purse frame is the same. Ball clasp frame purse is popular during the 60′s and 70′s, it was a “must” for a girl to own a frame purse. I still remember my mum have at least 2 but they seems “rotten” in my memory but she still used it when we were young. Sentimental value that counts or perhaps it is so easy and convenient to open and close with just a 2-finger twist and pinch! I am so happy with the great response on the pear purse sewing kit giveaway which is ending this 7 Oct 2011. Pattern: Download pattern here.Materials: 1. Download the Mod-O-Pear Purse sewing pattern in pdf document and print it with your printer. Get ready all the materials as mentioned above. Sew purse to base, from marking “B” to marking “B”. Candoodles: Upcycle: Time for a good Book (Clock) ....
You already know how this is going to start right?
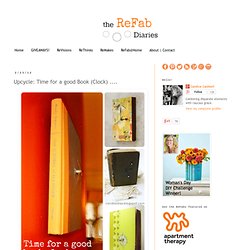
Once, way back, when I had a little more time than money, I turned old books into clocks. I was honored to be able to sell them at The Armadillo's Pillow for a few years! When I set out, there were no online tutorials to be found so there was a lot of trial and error involved. The first one was so much work, I kept it ... still hangs on the wall in my home even though it's quite plain (see the last image in this post). Now ...well, it didn't take very long to find, not one, but six really good tutorials to feature here. One thing I'll add: If you want to hang a book clock on a wall, you can. The first tutorial, for the clock pictured above, is hands down my favorite. Love this one from Ruffles and Stuff because she upcycles an old book and an old clock. Again, an outstanding tutorial for a clock that looks too simple to need one.
Happy Hippity Hop! We're taking a long weekend off here for the Easter break (we're working on a new website with hopes of getting a bit more done with the extra day tucked in there).
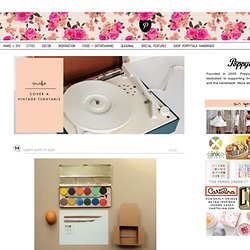
So we're bidding you farewell early with a few links and this cute little picture tutorial (see more below) sent to our e-mail from the folks at Present&Correct. Happy wishes for your Easter and Passover break. We're heading over here later to learn how to make some marshmallow peeps! Care to join us? High/low Easter party. West coast applications close Friday at Renegade. DIY T-Shirt Quilt. How To Make Your Own Nail Polish In Any Color. Pregnancy insomnia can be a little bit of a blessing (depending on how you look at it).
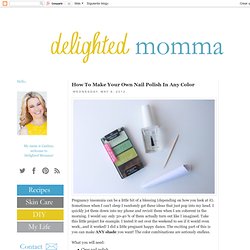
Sometimes when I can't sleep I randomly get these ideas that just pop into my head. I quickly jot them down into my phone and revisit them when I am coherent in the morning. I would say only 30-40 % of them actually turn out like I imagined. Take this little project for example. I tested it out over the weekend to see if it would even work...and it worked!