"Proper Cards"!!! We have some fabulous talented ladies who teach & shop here at Pickleberry!

Let me share their cards, then my feeble attempt at what we called "proper cards" We had some great light-hearted banter last night, inserts or not?! I so struggle with layering, matting, precision much to Jean & Heathers' amusement! So first to one of Barbara's cards which she taught here last week with Artemio Baubles Stamps And my version from last night.... Jean made us a Wonderful Card, isn't it gorgeous! Thank you & for the use of some your pearlesent card ;) Here's a Stunning one from Heather who used an amazing Dreamweaver stencil, thanks Heth! Here's another we received from a lovely customer Anne, thanks Anne it's amazing, I love the embossing! So now to one of mine which I had to resist the urge to distress & use copious amounts of foam pads (needs to be flat for posting!) Thanks to Jennie for the loan (again) of the Sizzix Ornaments die ;) Ok I lied, there's a teeny bit of Dusty Concord on the hanger thingy!
Paper Flower Tutorials & Templates. Here’s a lovely assortment of paper flowers to make, I’ve organized them in a few sections for easier browsing: Bouquets & Centerpieces, Tissue Paper, Crepe, Origami and the rest under general tutorials.
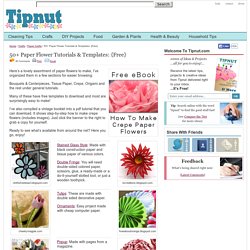
Many of these have free templates to download and most are surprisingly easy to make! I’ve also compiled a vintage booklet into a pdf tutorial that you can download. It shows step-by-step how to make crepe flowers (includes images). Just click the banner to the right to grab a copy for yourself. Ready to see what’s available from around the net? Ninthstreeteast.blogspot.com Stained Glass Style: Made with black construction paper and tissue paper of various colors.
Double Fringe: You will need double-sided colored paper, scissors, glue, a ready-made or a do-it-yourself slotted tool, or just a wooden toothpick. increations.blogspot.com cheekymagpie.com Tulips: These are made with double sided decorative paper. Ornaments: Easy project made with cheap computer paper. howaboutorange.blogspot.com.
36 Do It Yourself Gift Box Tutorials For Your Christmas Presents « PrintRadar - Scanning digital space. Or so she says...: Rolled Paper Tree Tutorial (she: Kimberly) Honeycomb Ornament. Today I am sharing a tutorial on how I made a Honeycomb Ornament using my Cricut E2 and the Paper Trimmings cartridge (but you can use any cartridge that has a similar ornament).

This is Gaby and am thrilled to have remembered that the 15th is the third Thursday in December and not the second.... long story.... Sheila knows... :) -- On to my project! There are several tutorials on how to make a honeycomb out of paper in the WWW. Actually, I knew the basics of making a honeycomb such as pretending there is a clock face and place glue at 3, 6, 9 and 12 when creating a honeycomb circle (or similar such as a pumpkin, apple, etc.). Next layer you place glue at 1:30, 4:30, 7:30 and 10:30. Step One - Cut 18 of the same design. Step Two - Fold the 18 pieces in half. I used the thinnest paper I had. Step Three - Use one of the negative spaces to mark ones and twos, alternating the numbers. Closer look at the numbers. I run out of 1/2" tacky tape... on my way to craft store... bottom. to hang on top. Advent Calendar. Done at last buts it's taken a while!

Wednesday, 1 December 2010 Advent Calendar This year I was totally inspired by the 'Junk drawer Advent Calendar' over on 2gypsy girls blog.I can thank Irene for the link and some of her junk drawer stash too! This Calendar has given me the opportunity to use lots of broken jewellery bits that I have had tucked away for years.I have had a lot of fun doing this project and even though I originally planned to add a tag a day to the board over the next 25 days I have decided to put them all on in one go and enjoy them for the whole of Advent! Thanks for looking at my efforts.X Posted by Shirley at 09:14. Talk Crafty To Me. Why not brighten up your gloomy winter day, by making your own paper flowers.
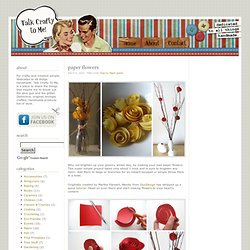
This super simple project takes only about 5 mins and is sure to brighten any room. Add them to twigs or branches for an instant bouquet or simply throw them in a bowl. Originally created by Martha Stewart, Wendy from DoziDesign has whipped up a quick tutorial. Head on over there and start making flowers to your heart’s content. Pictures from Dozi & Jen Elisebeth. related posts. 101 Crafty Gifts. Spring Craft Ideas – Easy Spring Crafts and Projects. How to make a little bow with a fork - Project Wedding Forums - StumbleUpon. Glittered Candleholders - Introduction - MarthaStewart.com. Thecraftysisters. Older posts Add your thoughts here...

(optional) Cancel. Done at last. A Crafting Journey.