
Sewing+room+4-11+001.jpg (1600×1200) Sewing+room+4-11+007.jpg (1200×1600)
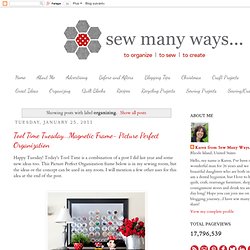
50 Crafts and Projects Using Recycled, Repurposed, & Upcycled Cans {Saturday Inspiration & Ideas} Organizing. The title of this post should have been... How To Fit 2 Pounds of Crap in a 1 Pound Bag! Space (psst...there's also a reality check photo at the end) This is my sewing room today...now that's a lot of crap, oh sorry "stuff". I changed the blue accents to red and added some more furniture.space You may remember some of these ideas from an earlier post, but I'll share again for new comers. I painted an old mug tree for all my scissors and rotary blades. I use a plate rack to hold all my quilting rulers.
This is a BEFORE of the blue boxes of "stuff". This is today with the boxes covered in black and white polka dot. Everything is labeled and filled with "can't live without" stuff. lolI know you have that stuff too! Space Here's a before of the blue boxes. Now cute in black and white. and filled with computer ink. Remember I used pipe straps for the handles. They just screw into the box. Don't forget...all the boxes are from cases of water. This is the before of the supply cabinet. Love my label maker! Organizing. Hi Everyone!
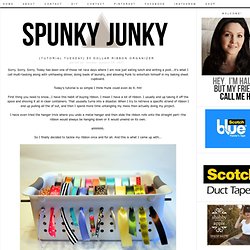
Wow do Tuesdays come up fast or is it just me? Today's TTT is from the curtain rod section of the hardware store. I'll be using a tension rod for a ribbon organizer. Do you remember this post below? I used galvanized spikes to organize my ribbon. Here is a tension rod. They have small rubber cups on the ends to not only protect the surface they are up against, but to prevent the rod from slipping. Here is where I am storing my ribbon now! I added a yard stick that I cut to fit the shelf. I used my favorite 3M Command stickers to keep the ruler in place. {Tutorial Tuesday} $5 dollar ribbon organizer. Sorry.
Sorry. Sorry. Today has been one of those rat race days where I am now just eating lunch and writing a post...it's what I call multi-tasking along with unthawing dinner, doing loads of laundry, and allowing Punk to entertain himself in my baking sheet cupboard. Today's tutorial is so simple I think Hunk could even do it. HA! First thing you need to know...I have this habit of buying ribbon. I have even tried the hanger trick where you undo a metal hanger and then slide the ribbon rolls onto the straight part--the ribbon would always be hanging down or it would unwind on its own. ahhhhhh.
So I finally decided to tackle my ribbon once and for all. For this project you will need: *slotted tupperware bin (I found mine in the organization/storage section of Walmart). *1/4 inch dowl rod (can be purchased at any hardware or craft store). I then inserted each ribbon spool onto the rod. Like so...Isn't that cool? Then I pulled each ribbon end through a hole on the front. Cost: Bin: $3. For the Home / Whoever came up with this is a genius.