

Realistic 3D interior archviz tut - Modeling and rendering - chocofur.com. Video Tutorial Contest #1 – Results. Video Tutorial Contest #1 – Results Posted by Lee on February 5th, 2013 | 5 Comments CG Masters Video Tutorial Contest Here are the final results for the CG Masters Video Tutorial Contest!

Congratulations to all the winners! The turnout was amazing, and the results are something that everyone is benefiting from so thank you to everyone that participated, and keep an eye out for more contests like this in the near future! You can view all the entries, the rules, and all other contest information on the original contest page. 1st Place – $150 and all CG Masters DVDs (Character Creation Volumes 1 & 2, Car Creation, and Environment Creation) 2nd Place – $100 and two DVDs of your choice 3rd Place – $50 and one DVD of your choice Honorable Mentions – Tutorial published on www.cgmasters.net. Results – Tutorial Contest for 2.72. Results – Tutorial Contest for 2.72 Posted by Chris Plush on November 10th, 2014 | 4 Comments CG Masters Tutorial Contest for Blender 2.72 Here are the awesome results for the CG Masters Tutorial Contest for Blender 2.72!

Congratulations to the winners and thank you to everyone that participated! We host these contest for almost every release of Blender, so stay tuned for another chance to share your knowledge with the world and win some prizes while you’re at it! 45 Epic Blender Tutorials. Blender Game. Oliver Villar. ITS ART Mag. BlenderDiplom. Blender Nerd. CG Masters. Contact us | view cart CG Masters - Blender 3D Modeling, Texturing and Game Tutorials.

Welcome to CG Masters, a training platform for Blender that provides high quality training DVD's and free tutorials. Creating Rope. INTRODUCTION Rope is a fairly common prop used in many different 3D scenes.
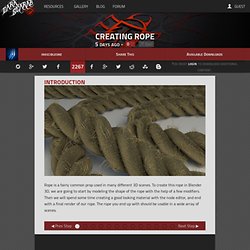
To create this rope in Blender 3D, we are going to start by modeling the shape of the rope with the help of a few modifiers. Then we will spend some time creating a good looking material with the node editor, and end with a final render of our rope. The rope you end up with should be usable in a wide array of scenes. THE FIRST STRAND The mesh used is a cross-section of the rope. The key is to understand that rope is made up of smaller strands of rope wrapped or braided into each other.
Head down to the children section of the particles system. Soccer Ball with Stitching. Evermotion. Create tangled jumping rope. Creating spinning totem. Create Chistmas scene. 8 techniques of cutting holes. All Authors. Creating a Spider. In this Blender 2.5 tutorial course, I’ll show you how to create a large spider, in preparation for Halloween.
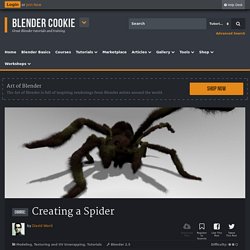
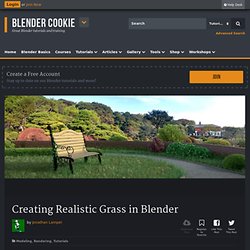
We start by showing a good place to get reference images, then we begin modeling the spider from a Cylinder, pushing and pulling vertices and extruding until we get him in the shape we want. Then we add seams and jump in to start texture-painting. After we get the body painted up nicely, we add a second Material to the model, and apply it to the eyes. Need a web for your spider? Go over to our good friends at Blendtuts.com for their spider web tutorial. Creating a Grungy Brick Wall. Creating Realistic Grass in Blender. Let’s welcome Jonathan Lampel to Blender Cookie.
Creating a Shoe. Creating a Urban Stairway Scene. Modeling a Building. Breaking Objects w/ the Cell Fracture Add-on. Shatter and break objects with the Cell Fracture add-on A very common task in visual effects is to break apart, shatter, and otherwise destroy objects.
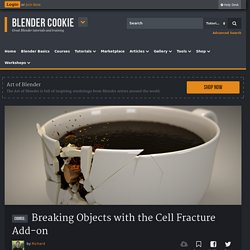
No matter if you’re smashing a car, demolishing a building, or creating some other destruction effect, it is no easy task and requires a lot of work and practice to get a convincing result. In this short tutorial learn how to break apart objects with the Cell Fracture add-on. Intro to Dynamic Topology Sculpting. The dynamic topology system in Blender allows for a much more organic, creative sculpting process.
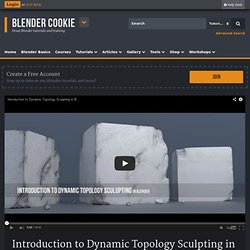
It gives you much more flexibility in not only how, but what you sculpt by not limiting you to the original starting basemesh. When working with dynamic topology, Blender will automatically tessellate the mesh under your brush stroke to account for the detail needed. This gives you the ability to add detail anywhere you wish, create new forms, and work with a much more optimized polycount since the tessellations are localized. Check out CG Cookie Citizen for more sculpting training To learn more about using dynamic topology in your workflow and creating finished sculptures I recommend you check out Kent Trammell’s training series on Creature Modeling For Production, and his Citizen course on Hard-Surface Sci-Fi Weapon Sculpting.
Creating a Pumpkin Patch. Creating an Ocean Scene with OceanSim and Cycles. In this Blender 2.6 video tutorial, we take a look at using the Ocean Sim modifier in conjunction with the Cycles render engine to create a gorgeous ocean scene.
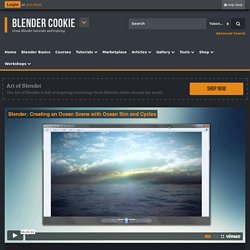
This tutorial covers the entire process needed to create the final result, including generation of the ocean, the sky background, rendering in Cycles, and setting up the composite nodes to create the final effect. Note: I mixed up during the tutorial, and wrongly attributed the Sky Texture. The actual author is David Keyes, and the texture comes from his sky pack that you can download here: Download our Sky Texture pack here: part 1 | part 2. Creating a Realistic Head. Hello and welcome to this complete Blender tutorial series on creating a realistic head in Blender 2.6 by Kent Trammell.
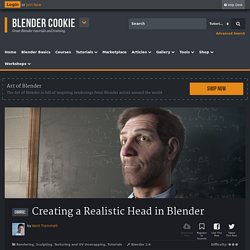
This is a in-depth tutorial series explaining the creation of a realistic human portrait with Blender. The entire process will be covered from base mesh modeling, detail sculpting, texture painting, hair growing and styling, sub-surface scatter shading, and compositing. Some of the more time-consuming tasks will be time-lapses with commentary like modeling, sculpting, and texture painting; the other parts will be mostly real-time.
Creating Antelope Canyon. Blender Guru. Realistic Grass Tutorial. Make a Cave. 1. Delete the default cube and lamp, and replace with a Cylinder, turned 90 degrees. 2. Make Cherry Blossom Flowers. In this tutorial you will discover how to: Model a cherry blossom flowerCreate a beautiful translucent materialUse depth of field effectively Alright boys, it’s time to put our manly passions behind us and endeavor on something a little more “feminine”. No guns, grenades or explosions this time. We’re making flowers. And pink flowers at that. How to Make Towels. Creating the Towel 1. Start a new scene.
Delete all the default objects and replace with a Plane. Scale it double along the X axis (S>X>2). 2. 3. 4. 5. 6.