
Tips. OpenShading. Re-rendering GH House. Hi, this time I invite you to create an exterior architectural visualization. The model that will be used is the GH House that you can download from the link here. B°wide NodePack. Here is my hand picked selection of NodeGroups i’ve created over the past 2-3 years.
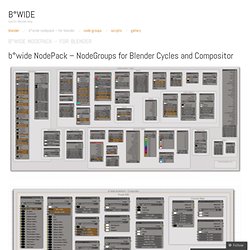
There’s everything, from simple little Tools, Materials, UberShaders to Compositing. Some are made quickly, on some i spent countless hours. O'Reilly Webcast: Ben Simonds on Cycles. Rendering Wooden Barrels in Blender Cycles. Rendering a Guitar w/ Cycles. Hello and welcome to this tutorial on rendering a guitar in Blender with Cycles!
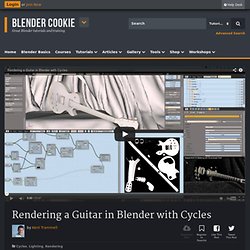
In this tutorial by Kent Trammell, you’ll be taken through the process of rendering a sleek, electric guitar image in Blender with the Cycles render engine. What you’ll learn: This tutorial will walk you through all of the steps needed for the lighting, shading and rendering of this guitar in Cycles. You will how to create a soft, satin cloth material, how to create layered shaders for the guitar body and other various techniques needed to give you the final render result. Want more? Login to your Citizen account and download the source files to make your own version of the guitar! Don’t have a Citizen account? Intro to Cycles Render Engine. Hello and welcome to this Blender Cycles Render Engine Introduction!
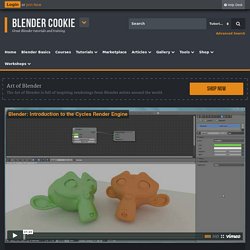
In this video tutorial we introduce you to the new Blender Cycles render engine that is now available for Blender 2.6. Cycles offers a much more realistic, interactive rendering workflow than the current Blender Internal engine and is a lot of fun to work with. Intro to Node Groups. The node system in Blender is very powerful gives unrivaled flexibility when it comes to creating shaders and compositing effects.
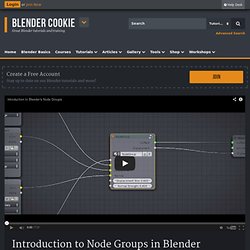
One of the node systems most powerful features, though, is it’s ability to group nodes together. By grouping nodes we can effectively create custom, reusable nodes. This works by grouping sets of nodes together and then exposing specific settings, inputs, and outputs from the nodes within the group. Ubershader Course 01: Overview of Ubershader Controls. Cycles Basics Playlist. Organize Nodes w/ Frames. Mastering Lighting in Blender. IES Lamps to Cycles. Lell, not everything is so easy: let's look at the node tree: This is how typical 1D image looks like.

If you connect the generated node group to shadeless sphere (12, 13, 14) and set Strength to 1, you could see how it works. Node 1, 2, 3 are the common way to map 1d-texture to the sphere. And there starts the difference. HDR Panos / Adaptive Samples. Note: This is an update of an old tutorial, I’ve learnt a lot since then and made the process easier.

A simple 3D scene that was lit using only the HDRI above (no additional lamps) There is no easier or quicker way to light a CG scene than to use an HDRI. They are essentially snapshots of the real world that contain exquisitely detailed lighting information, which can transport your bland CG objects into realistic virtual environments. Not only do they provide accurate lighting, but they can be seen in the background and in reflections, which makes them all the more immersive.
Creating a high quality HDRI from scratch is quite a complicated task that requires very specific equipment and a meticulous workflow. I’ve been making HDRIs for a couple of years now, so I hope I can save you some time and experimentation. By the end of this tutorial, you’ll have made your very own 360º HDR environment map that can be used to light a 3D scene. Proper HDR Lighting.
Creating Invisible Lights in Cycles. Place and animate the sun with the Sun Position addon. Sun Position addon. From BlenderWiki Introduction The sun position widget can be used for creating sun animations as well as for just studying the sun position for given locations and times as a singular object or multiple objects on the ecliptic or as an analemma.
Intro to Texturing w/ Cycles. Hello and welcome to this introductory tutorial on texturing with Cycles in Blender!
In this Blender tutorial Jonathan Williamson gives you an introduction on setting up your material shaders with textures for Cycles in Blender. What you’ll learn: Through this tutorial you should gain a solid understanding texturing with Cycles in Blender, including how to take existing texture maps (diffuse, spec, bump) and use them in material shaders to create the various surfaces you require for your project. You will learn how to set up the textures through both the Material Properties and the Node Editor while being shown distinct advantages of each method.
Create seamless art deco texture. Texturing in Blender. Blender gives us all kind of texturing techniques that would take days if not weeks to describe.
Still it's not a common ground for many 3D artists as there are not many good free tutorials that investigate this subject. In order to fill this gap I decided to create this short tip that explains how to use GLSL shading and tweak our textures in realtime without using any other 2D or 3D software. I focused on two kinds of materials – wood and metal. Both of them require Color, Specular and Normal Maps. How to Add a Decal in Cycles. Custom UV Transformation Nodes for Cycles. Non-Uniform Transformations Have you ever wanted to just move, scale, or rotate just part of a texture within cycles render nodes, or twist a texture about an axis?
Intro to the Compositor. During the video you will learn: The fundamentals of compositingWhy compositing is similar to food production (no really!) How to add eye popping glow and glare effectsHow to add a background image quickly and easily without re-rendering Since starting Blender Guru, I’ve received a TON of emails from people asking for help with the compositor. I’d even go so far as to say it’s one of my most requested tutorials. So alas, I created this easy to digest Introduction to the Compositor tutorial. Screenshots from the video: If you’re interested in learning more about the compositor, check out The Wow Factor. I hope you enjoyed the tutorial Introduction to the Compositor, 4.9 out of 5 based on 90 ratings. Fighting Compression in Blender. German version Especially while working with selective color correction, you may quickly strech the heavily compressed material to it's limits.
So, because of the low bit-depth and bitrates you will encounter annoying compression Blocks, primarily in the color components. Blur your Traces in Blender. Gernan Version. Noise Reduction With the Compositor. Tip: Quickly Link Noise Reduction Nodes with Python. Published: 10 April 2014 b°wide has provided the community with a great pack of predefined node groups you can use in many situations. They are a must-have for any more sophisticated project. Using the Sun Beams Node. Hey there :) So Blender has recently got a new node called Sun Beams, which (as you probably have already guessed) creates light rays/god rays from an image/alpha input. The direction of the sun beams is determined by the x and y values. Sadly the node doesn’t have the option yet to plug in an x/y coordinate, so for now you would have to animate it manually in order for the sun beams to cast in the same direction if the sun beams casting object or the camera moves.
Depth of Field in Blender. Depth of Field can be a beautiful effect, adding both aesthetic interest to an image, and serving a narrative purpose in drawing the viewer’s attention to the centre of attention. But getting DoF right using Blenders compositing nodes can be tricky, as there are a few things to know about how the defocus node works, and some limitations it has that you need to know about.