
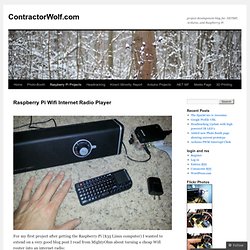
Raspberry Pi Wifi Internet Radio Player. For my first project after getting the Raspberry Pi ($35 Linux computer) I wanted to extend on a very good blog post I read from MightyOhm about turning a cheap Wifi router into an internet radio: In that article he also had a cheap Linux device (the router) and was able to stretch it to be a mucic machine.
I had no previous experience with Linux, always used and programmed on Windows machines. So I wasn’t sure what to expect when my Raspberry Pi finally arrived. After some initial hickups, I was able to get the device running: I installed MPD, MPC, and SSH on it so that it could be a headless (meaning no monitor) device. I control which stream the player is listening to using the Adafruit Cobbler to breakout the pins so that the python program is just listening for button presses.
These links are the documentation for how to setup and run the Raspberry Pi as a Wifi Internet Radio: The Raspberry Pi and where to buy it The book “Getting Started with Raspberry Pi” Blog Archive » Building a Wifi Radio – Part 10, Building the Box. This is the tenth and final part of a series about building a low cost, open source streaming internet radio based on the ASUS WL-520gU Wireless Router .
If you haven’t already, check out the previous parts (see the links below) for some background about the project. Wow, we’ve come a long way since part one! To date, there have been nine parts in this series, each covering a different aspect of building the radio: Preface to Part 10: In this part, I’m going to show you a few steps in the process I used to turn a wireless router, a breadboard, and a pile of loose parts into a finished standalone internet streaming radio receiver. The Box: Some time ago, I posted a Google Sketchup model of the radio enclosure that I created with the help of Tony, a good friend of mine who lives in Southern California. Here’s the model we came up with: A few weeks later, Tony sent me this masterpiece. Finding an Audio Amplifier: I wanted a small, inexpensive, stereo audio amplifier to mount inside the radio. Welcome to garydion.com / n4txi.com.
The Wifi Radio Project Introduction I'm one who often has the radio playing when I'm working on a project or unwinding at the end of the day.
And while there are a few good radio stations still around, there are times I'd like to listen to a genre that a local station just doesn't cover. Ever since stations started simulcasting on the internet, I've been a big fan. You name it, and someone probably has a station dedicated to it. Background Information Inspiration for this project came in no small part from Jeff Keyzer over at mightyOhm.com. I also collect (horde?) Hardware Components First things first, I had to collect all the parts I wanted to fit into the radio. The board itself hosts the microprocessor, a Maxim MAX233 serial level converter, a few capacitors, a pull-up resistor for the reset line, and the headers for connecting cables. Add an external mpd client.
At this stage, you could close the router again and use an external mpd client to control your radio.
In this instructable we will also build an interface but having a way to acces the player while testing is always good. You can download a lot of mpd clients at even for you Iphone. I downloaded and installed the Ario client. To do so, I needed to install GTK+ too ( When you have installed the program, you need to set up the connection.