
The 30 Minute $6 Dress Tutorial. Guest post by Rachael at Talk 2 the Trees.

The perfect dress is hard to come by. I like my dresses to be cheap, and long enough. Watermark Tee by Sweet Verbana. Hello U-Create readers!

I am so excited to be guest posting here today. It just so happens to be my first guest post and I'm still a little shocked that it's here at Ucreate, one of my favorite blogs! A little bit about me.. I'm from a little town called Keller, Texas. I'm a junior at Texas A&M University (whoop!). I'm working on my education degree and expect to be an elementary school teacher in just two short years. When I'm not busy studying for classes, I love to sew. I just started blogging in May and have already met all kinds of wonderful women, I hope you'll stop by and say hi too!
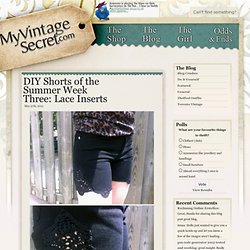
Watermark Tee Tutorial What I love about this project is that it's completely customizable. Materials: Elmer's Blue Gel Glue (it must be the blue gel, white won't work) Fabric Dye (RIT is my tried and true brand) A white cotton Tee, Tank, Dress etc. Blog. May 27th, 2012 Lace inserts are a popular denim DIY this summer.

Usually done with white lace and light denim I wanted to mix it up and try it with black! Sources: (Top Left – Right) 1. Clones ‘N’ Clowns 2. Refinery29 3. What you Need: Shorts/Jeans – I got mine from Value VillageLace – Mine is the edging of fabricScissorsThreadHand Sewing NeedlePins Loading ... Categories: Blog, Do It Yourself, Shorts of the summer series May 25th, 2012 One of my favourite parts about thrifting is finding that amazing item that is great quality but CHEAP.
Categories: Blog, Thrifted Outfits, Toronto Vintage May 4th, 2012 I think everyone who thrifts has those few items that you look for each time you go. A Little History Coco Chanel is credited for making the tweed suit fashionable in the 1960′s. She's Crafty: DIY Multi-Chain & Ribbon Necklace. Due to the resounding success of her last She’s Crafty, my friend Pandora from Accessory Source is back with another lovely necklace DIY tutorial that would make a fantastic christmas present for a friend or relative!

She says: When it comes to jewelry, I favor big and bold pieces. And while I tend to wear mostly gold, lately I’ve become obsessed with mixing metals like silver and gunmetal (and throwing in some bling for good measure!). My multi-chain necklace has become a staple in my wardrobe because it incorporates it all. Here’s a quick 10 step tutorial on how to make your own bulky bauble. You will need the following tools: ScissorsRulerPliers (optional)Ribbon-1 yardTwo jump rings (the size of a nickel). Supplies I chose a mix of metals in various colors and sizes and a few strands with rhinestones. All of my materials were purchased at Toho Shoji.
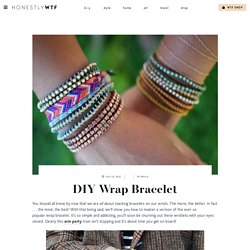
Cut your first strand of chain to 12 inches Step 1: Cut your first strand 12 inches long. Hang your chains from longest to shortest. DIY Wrap Bracelet. You should all know by now that we are all about stacking bracelets on our wrists.

The more, the better. In fact . . . the most, the best! With that being said, we’ll show you how to master a version of the ever so popular wrap bracelet. It’s so simple and addicting, you’ll soon be churning out these wristlets with your eyes closed. Clearly this arm party train isn’t stopping and it’s about time you get on board! You’ll need (for a double wrapped bracelet) :* Lengths will vary depending on the size of your wrist (see comments for suggestions). Fold the length of leather cording in half to form a loop. Place the ball chain along the leather cording with the end of the chain meeting the end of the wrap. Continue wrapping while checking it for fit around the wrist. When you have reached the end of the ball chain wrap the linen cording around the leather strands 2-3 more times. Thread the hex nut through the strands and tie a second knot. Trim with scissors and your wrap bracelet is finished!!
DIY of the Month: Braided T-shirt Bracelet. How To: Give your old t-shirts a second life.

Sorry dust rag pile! Photos: kirsten for we heart this I love using simple materials to make something fun and innovative. The supplies for this bracelet DIY are really basic, so there’s a REALLY good chance you own all of them already. I mean, who doesn’t have a stack of soft old T’s you can’t wear outside of the house, but love to much to toss in the rag pile?
As with most of my DIY’s for wht, this is very customizable. Supplies: • T-shirt scraps • 2 keychain rings • Scissors • Needles and thread • Glue gun • Ruler 1. 2. 3. 4. How to Make A Dress from Tshirt.