
Mini Zippered Bag (box bottom) I started working on this little bag because we have quite a bit of travel planned for this summer, and I’ve found that when we travel I use way too many disposable zipper bags for miscellaneous things, like markers, toys, legos, snacks, etc. This little reusable bag will be perfect to fill with those little things and throw in the kids’ backpacks that I made a few weeks ago.
(It would also be a great little cosmetic bag.) The finished size of this bag is approximately 9″ X 5 1/2″, not including the handle. You could easily increase the size, though, and turn it into a larger bag. If you increase the size, you could also line it with diaper-makers PUL and use it as a wet bag for soiled cloth diapers or damp swimsuits. For this project you’ll need two pieces of cotton woven fabric cut to 10″ X 6 1/2″ for the outside of the bag and two pieces of a medium weight fabric like cotton twill cut to 10″ X 6 1/2″ for the inside of the bag.
Start with preparing your zipper. Zippered Pouch (with tidy ends) I know there are lots of zippered pouch tutorials out there, and they're great, but I haven't found one that explains how to make the ends of the zipper more finished.

Once I figured out how to do this, I thought I'd share. This tutorial is more about the zipper ends than it is about the finished pouch. Though I am going to tell you how big I cut everything, you can easily make these pouches any size you want. I tried to take a lot of pictures, but if anything is unclear, please let me know! Supplies: (2) Exterior pieces, I cut mine 8.5" x 6.5" (2) Lining pieces, mine are 8.5" x 6.25" (1) 2"x4" piece of exterior fabric to cover the zipper ends (2) pieces of medium weight fusible interfacing OR fusible fleece the same size as your exterior pieces. . (1) zipper--Mine is 7" The rule of thumb here is to have your exterior pouch length be 1.5" longer than your zipper.
Trim the corners of the fusible interfacing to reduce bulk and fuse to the exterior of your pouch. Repeat for the other side. Lined, zippered pouch / make up bag tutorial. This morning I was in a rush to make a simple lined make-up bag and had a quick look on the internet to see if I could easily find any dimensions for such a thing.
I could find instructions on how to make a pouch, but none with dimensions and none with covered ends to the zips, which is how I like my zips to be finished. It now seems quite illogical to me that I decided that I simply must write a tutorial for such a thing when I was meant to be 'rushing'...but it seems that most things can wait.
So here we have a lined, covered zip ends make up bag / coin purse tutorial (for personal use only, see tutorial end for other terms). Photos are plentiful and instructions (hopefully) basic, in the hope that a beginner will be able to make this easily. This make-up bag will end up measuring: 7.5" x 5". Here are the ingredients you will need: Yay! Take one of the 3" x 1.5" pieces of material. Place your zip so that it butts up to the half way fold that you made. Pull the zip open halfway. Small Clutch. I made another linen, metal zipper clutch.

It's a wonder I haven't made 6 more (I guess it's those other obligations I have like my day job). Just like the internet, I am obsessed with these and could have one in every size and color. This one is a small size, for just carrying the essentials out or for using as a wallet, which is how I'm using it now. The construction is exactly the same as the larger version I posted about here, but you'll start with different dimensions. After the jump, I've got plenty more pictures to detail the process. The final dimensions of this clutch will be 5"x8" (larger version here, is 11.5"x11.5").
Cut your exterior and interior fabric to 10"x11". Cut your zipper to 8". I added a small pocket to the inside. Just as instructed in the larger clutch tutorial, make a small piece of binding in your exterior fabric to wrap the raw edges of your zipper in. Once you've stitched your first zipper side down, complete the second. Stitch up the raw sides. Gathered clutch tutorial. A huge thanks to Dana and Disney for doing such a great job of rounding up all sorts of wonderful mother's day projects!
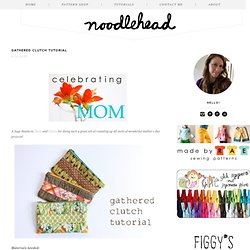
Materials needed: 1/4 yard each of three coordinating fabrics (you'll definitely have scraps leftover)8" zipper (you can always purchase a longer zipper and shorten it, just follow the directions on the packagescraps of medium weight fusible interfacingCutting the pieces: For the main exterior, cut two pieces, one 5.5" tall by 9" wide, and one 5.5" tall by 13" wide (this will be the gathered front) Pieces of medium weight fusible interfacing for exterior pieces of clutch: (2) 5.5" tall by 9" wide For the front band, cut one piece 4" tall by 9" wide.
Seriously, the most time consuming part for me is always picking out my fabrics and cutting them, the rest goes together pretty easy, so let's go! Take the front band piece and fold it in half the long way (right sides together) and sew together using a 1/2" seam allowance. Grab the 13" wide main exterior piece.