
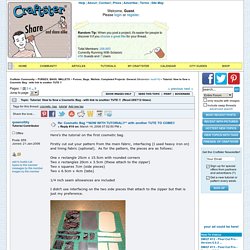
With side zip (rectangular, flat) With kiss clasp. With gusset. Box pouch. Other shape pouch. How to Sew a Cosmetic Bag. Here's the tutorial on the first cosmetic bag.
Firstly cut out your pattern from the main fabric, interfacing (I used heavy iron on) and lining fabric (optional). As for the pattern, the pieces are as follows: One x rectangle 25cm x 15.5cm with rounded cornersTwo x rectangles 20cm x 3.5cm (these attach to the zipper)Two x squares 7cm (side pieces)Two x 6.5cm x 4cm (tabs) 1/4 inch seam allowances are included I didn't use interfacing on the two side pieces that attach to the zipper but that is just my preference. Then iron your interfacing to your main fabric Finish the edges on the two rectangles of fabric to go either side of the zipper Then fold the finished edges to the wrong side Then sew these side bits to the zipper, making sure that it is the same width as the two square side pieces (these are a 7cm square) With zipper sewn in: Fold raw edges of end tabs in then fold in half Sew both long edges of the tabs.
Making a Zip Pouch without Dented Corners. This post really got everyone's attention!
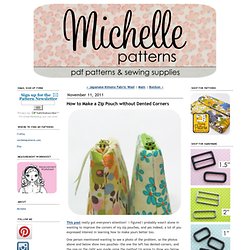
I figured I probably wasn't alone in wanting to improve the corners of my zip pouches, and yes indeed, a lot of you expressed interest in learning how to make yours better too. One person mentioned wanting to see a photo of the problem, so the photos above and below show two pouches--the one the left has dented corners, and the one on the right was made using the method I'm going to show you below. This zipper technique does require hand sewing, but it is worth the extra effort. The corners look a lot better, and the zipper will open nice and wide. Some general info/tips: Stitch the zipper into the corners BEFORE closing the opening for turning. 1. Your fabric pieces can be as wide as your zipper is long. 2. Ok, here is the main trick to making this work...sew the fabric pieces to the zipper begining and ending sewing 1" (2.5 cm) from the sides. 3.
Press the pieces away from the zipper, making a firm crease along the unsewn edges at the sides. 4. Wristlet tutorial. This is the first sewing tutorial I’ve ever written. I almost gave up several times! About the author: Joy is a work at home database programming Mom (with a capital M of course), of a 6 year old daughter. She hadn’t sewn for over 20 years and doesn’t know how she did without it – she blogs at 100 spools of thread Supplies: Outside Fabric good quality cotton fabric: 1 piece 9″x12″, 1 piece 9″x18″, 1 piece 7″x8 1/2″, 1 piece 2″x14″, 1 piece 3/4″x5″ Lining (cotton broadcloth) – 1 piece 9″x12″ Interfacing (Fusible Fleece) 1 piece 9″x12″ and 1 piece 7″x4 1/4″ 1 Button (here used 9/16″ mother of pearl with a metal shank) First fuse the interfacing: Following the manufacturers instructions, fuse the 9″x12″ interfacing to the 9″x12″ outside piece.
Next make the patch pocket piece: The patch pocket piece is now 7″x4 1/4″, with a layer of interfacing inside the fold. With the outside piece face down on the table (the fused interfacing is clearly visible), measure up 4 1/2″ from the bottom.