
Heart Shaped Pouch. I know a lot of you have asked for this heart pouch tutorial and I finally finished it!

First, I want to let everyone know that I’ve finished and posted the licensed version of the Circle Zip Earbud Pouch. I’ve completely re-written the tutorial with new photos, an improved technique and the same PDF format as my other patterns with the same license so that you can make items to sell in your Etsy shops or at craft fairs. I was completely overwhelmed with the interest in the Earbud Pouch, so thank you to everyone who has made one (or twenty!) And commented and posted photos. It is truly amazing. This is just a mini-tutorial. Download the PDF with the pattern pieces HERE. Pay close attention to the grain direction while cutting out your pieces. I cut my batting like 1/4″ smaller around the outside edges. Line up the Front Left pieces as shown, with the zipper pull to the left. Then place the Front Right pieces as shown, with the zipper pull to the left.
Triple-Zip Pouch. Supplies Needed3 zippers, 9" or longerfabric for pouch body, accent pieces, and linings (fat-quarters are plenty for the pouch body and linings; accents can be made from scraps)fusible fleececoordinating thread (which may be more than one, depending on your choice of accent fabrics) All seams are 1/4” * Note: The piece indicated is one already partially stitched onto the pouch.
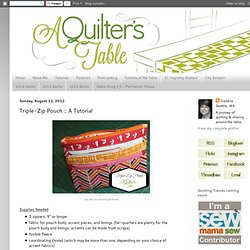
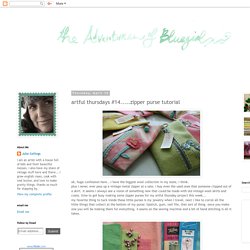
Now you will be stitching on the other end; will be a lining piece that you are working with, except for the last instance, where it will be the main body fabric. Cutting Instructions1 – main body fabric, 8” x 9 ½”1 – fusible fleece, 8" x 9 ½” (not shown)2 – front accent pieces (can be the same or contrasting), 8" x 1 ¼”2 – pieces fusible fleece, 8" x 1 ¼” (not shown)6 – zipper ends (all matching or matching pairs), 2 ½" x 3”1 – main zip lining fabric, 8" x 12 ½”1 – center zip lining fabric, 8" x 9 ½”1 – bottom zip lining fabric, 7" x 8” Preparing FabricAdhere fusible fleece to matching fabric piece. Zippered felt pouch tutorial. Ok, huge confession here...i have the biggest wool collection in my state, i think.plus i never, ever pass up a vintage metal zipper at a sale. i buy even the used ones that someone clipped out of a skirt. it seems i always see a vision of something new that could be made with old vintage wool skirts and coats. time to get busy making some zipper purses for my artful thursday project this week...my favorite thing to tuck inside these little purses is my jewelry when i travel, next i like to corral all the little things that collect at the bottom of my purse: lipstick, gum, nail file, that sort of thing. once you make one you will be making them for everything. 4 seams on the sewing machine and a bit of hand stitching is all it takes. step 1. cut your wool felt into a rectangle. my tiny size purse is 8 inches by 5.5 inches. step 2. scallop or zig zag cut the short ends of the wool rectangle. here are a whole stack of ideas to get you going. fancy buttons make great flowers!
Neat 'n' Tidy Zippered Pouches. Thank my friend Erin for the cute name.

No-raw-edge-pouch was just too dreadful. She also told me to go to bed, so of course this is what I did instead. I get 3 hours of sleep but but you all get a new tutorial. Yay? Please speak up if it makes no sense… :) Also this is kind of a thank you for the amazing response to the new wristlet pattern. You all know how much I hate raw edges in bags when they aren’t necessary, however if you’re just making quick makeup bags or coin pouches, I still say you can’t go wrong with how quickly the Easy Zippy Pouches go together. Enough chatting. Figuring out what size to cut for this one is simple. The square pouch is 4″ square finished and I cut the pieces to 4.75″ square (charm pack anyone?) (OK so how cute are those monkeys? This is a quick and dirty tutorial. Cut two squares from both your main fabric and lining. Fuse interfacing to the wrong side of the main fabric. Then flip the main fabric piece over and align the same edge.