
Knits, lycra, elastic.
A casual edging for knits. Copy Your Favorite Tee. Photo: Jack Deutsch When you sew your own T-shirts, you can refine the fit, alter necklines and shape to flatter your figure, and make tops in the perfect fabric.

What's more, when you've found that favorite T-shirt-the one that makes you feel great every time you wear it-you can reproduce it in every color for every season and add a variety of special details along the way. Once you learn how to make a pattern from your favorite T-shirt, you can copy the fabulous fit and shape into any knit you like. For summer, try a light tissue knit like the one shown here. What You'll Need: Foam corePattern paper or wax paperNeedlepoint tracing wheelRulerFrench curvePencilPinsClear elasticThreadFusible interfacingTissue knit or other T-shirt knit fabricTwin needle (optional) Trace Your Tee Prepare your favorite T-shirt by first gently pressing it flat. 2.Trace around the tee. 1 | 2 | 3 | 4 | 5next> View all.
Not Your Ordinary T-Shirt. Sew a customized t-shirt by Marcy Tiltonfrom Threads #65, pp. 62-67 Although the word T-shirt may conjure up images of men's cotton/poly underwear, the customized version you can sew has its roots in the finest ready-to-wear, where a price tag of $100 and even $200 isn't uncommon.

And if a T-shirt is well made and beautifully shaped, it can be the glue that holds your wardrobe together, worn just as easily with a suit as with jeans. When you sew your own versatile T-shirts, you can refine the fit, alter necklines and shaping to flatter your figure, use beautiful fabrics, and add fine details. Fitting and adjusting are easy when you follow a few simple guidelines. Elastic stitched in seams for knits. I am highly flattered by being asked a technical sewing question.

Mary Nanna, excellent seamstress of Make it Smirk fame, commented "You mention using elastic in the seams with the merino - can you explain this process? " Despite a sneaking suspicion that Mary Nanna is much better at sewing than I, and could possibly be asking this question with the aim of provoking some smirking from champion sewers of knits, here is my approach to this process, developed by close inspection and some destruction of RTW, and considerable trial and error. Please note that I am a self taught seamstress and profess no qualifications in the "right" way to carry out any sewing what so ever. (That disclaimer was for Bunny, because she has a very good point about tutorials). This is how I use elastic in the seams of knits. The stitch I like to use when including elastic in the seam is a 3 step zigzag, with stitch length of between 1.0 and 2.0mm and stitch width of between 1.0 and 1.5mm.
Two Ways to Tame T-Shirt Hems. Hemming the knit garments that we sew can often be a frustrating experience.

Wavy, stretched-out, lumpy, and uneven hems are all too common. Here are 2 easy ways to get great looking hems on knit garments every time! The first way to hem knit garments and the one I use most often is by "Crowding the Needle". As you can see in the photo above, as the un-stitched part of the hem of this knit top approaches the needle, I push it towards the needle. This lets the feed dogs do all the work while I gently guide the fabric, deliberately "pushing" it towards the needle with one hand...while I keep the garment straight by guiding it gently with the other hand behind the presser-foot. The second way to tame knit fabric hems is by using any of the various brands of Clear "Water Soluble" embroidery stabilizers...such as the brand-name product, "Solvy" (easily available at chain fabric stores).
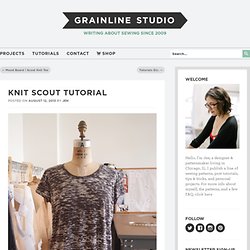
As pictured below, first cut about a 10-inch length of the stabilizer. Now stitch your totally stabilized hem. Basic t-shirt sewing instructions. Are you guys ready for the knit Scout Tee instructions?

I’ve made this tutorial using a serger for a majority of the construction but if you don’t have one, or just don’t prefer to use one, you can use a regular machine. If you are using a sewing machine rather than a serger, my recommendation would be to either use a straight stitch with a walking foot and stretch slightly as you sew or use a small zig zag stitch. Step 1 | Lay out your pattern pieces. For knits, since both the front and back pieces are cut on the fold, I like to fold the selvedges to the center creating two folds rather than the standard folding layout which only creates one. Step 2 | Mark and cut your pieces. Step 3 | Sew your shoulder seams together, press seams towards the back of the shirt. Step 4 | Set your sleeve. Step 5 | Side Seams! Step 6 | Now for the neckband.