

Reusable Produce Bag Tutorial. Paper or Plastic?
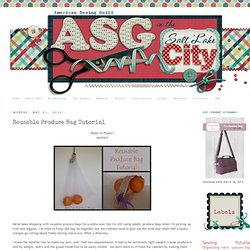
Neither! We've been shopping with reusable grocery bags for a while now, but I'm still using plastic produce bags when I'm picking up fruit and veggies. I've tried to forgo the bag all together, but the cashiers tend to give me the stink-eye when half a dozen oranges go rolling about freely during check out. Microwaveable Fabric Bowl Tutorial. Now you may be wondering what is a Microwaveable fabric bowl….well it’s a hot pad that allows you to take a hot bowl right out of the microwave without burning your hands! Make an Oven Mitt! I wanted to see a little piece of Heather Bailey’s gorgeous Nicey Jane fabric every day, so I made an oven mitt.
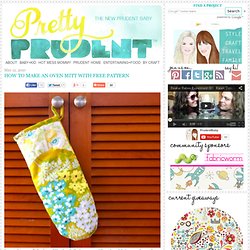
Now I have to make an apron to match! Get the free downloadable pattern and full Oven Mitt Tutorial after the jump… DIY Oven Mitt 1. First go ahead and download, print, and cut out our oven mitt pattern. 2. 3. 3. Fold each long edge into the center and iron. Now your tape looks like this. So go ahead and fold it in half again and iron: Set that aside. 4. Then pin the corners, then continue to pin the edges together: Sew in place: Lay your lining pieces right side down, your batting on top, and your outer piece right side up (so wrong sides are facing, with batting sandwiched between), like so: Sew in place all the way around the curved edges. 5. 6. Sew around the edge of that part first: Then pin in down and sew around the outside edge.
60-Minute Gift: Herringbone Hot Pads. Combine a herringbone pattern with the popular zig zag for a fun, unique pot holder and trivet that is self binding.
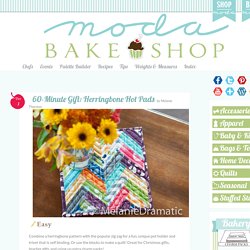
Or use the blocks to make a quilt! Great for Christmas gifts, teacher gifts and using up extra charm packs! 1 Simply Color charm pack or charm pack of your choice1 yard of fabric for backing or four 14×14 inch squares1/2 yard batting or eight 10×10 inch squares1/2 yard insul-bright Insulating material or four 10×10 inch squares. Housewife pillow cases. Plain pillow cases, known as housewife pillow cases, are very easy to make.
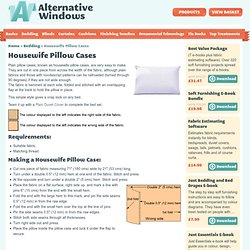
They are cut in one piece from across the width of the fabric, although plain fabrics and those with nondescript patterns can be railroaded (turned through 90 degrees) if they are not wide enough. The fabric is hemmed at each side, folded and stitched with an overlapping flap at the back to hold the pillow in place. This simple style gives a crisp look on any bed. Flannel pillowcase tutorial. I called these pillowcases European style the other day, but I don't know if that is the proper term.
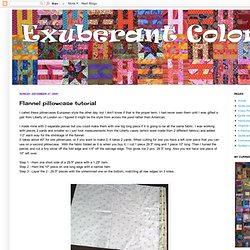
I had never seen them until I was gifted a pair from Liberty of London so I figured it might be the style from across the pond rather than American.I made mine with 3 separate pieces but you could make them with one big long piece if it is going to be all the same fabric. I was working with pieces 2 yards and smaller so I just took measurements from the Liberty cases (which were made from 2 different fabrics) and added 1/2" each way for the shrinkage of the flannel. It takes about 40" for one pillowcase, or if you want to make 2, it takes 2 yards. When cutting for one you have a left over piece that you can use on a second pillowcase. With the fabric folded as it is when you buy it, I cut 1 piece 29.5" long and 1 piece 10" long. Step 4 - Place the 10" piece on top of the end with the 1.25" hem matching raw edges on 3 sides. This is what a serged stitch looks like. Charming Window Pillows.
Hi!
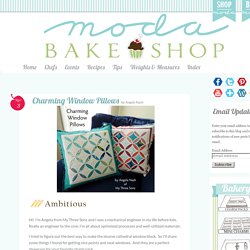
I’m Angela from My Three Sons and I was a mechanical engineer in my life before kids. Really an engineer to the core, I’m all about optimized processes and well-utilized materials. I tried to figure out the best way to make the elusive cathedral window block. Grommet Drapes. I promised a tutorial for our Basement Drapes, so here it is!
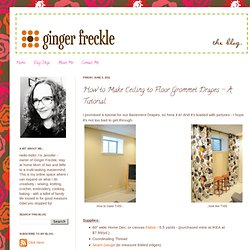
And it's loaded with pictures - I hope it's not too bad to get through. Supplies: 60" wide Home Dec. or canvas Fabric - 5.5 yards - (purchased mine at IKEA at $7.99/yd.)Coordinating ThreadSeam Gauge (to measure folded edges)12" Ruler (to measure grommet spacing)Measuring Tape (at least 10-ft long to measure length of drape)2 packages of Grommets ($12.99 sets of 8, bought at Joann's with a coupon)Curtain Rod (small enough to fit through grommet holes) IronMarking pencil or penScissorsPins NOTES: Always be consciencious of the direction of your fabric print and/or texture.
Postage stamp coasters. I’m getting ready to go running off to complete the zillion post-holiday errands I have on my plate, but I decided I simply must add the supplies for this project to my shopping list.
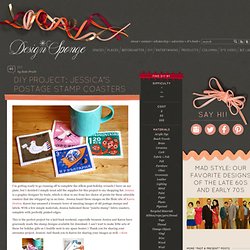
Jessica is a graphic designer by trade, which is clear to see from her choice of prints for these adorable coasters that she whipped up in no time. Jessica found these images on the flickr site of Karen Horton. Karen has amassed a treasure trove of amazing images of old postage stamps and labels. With a few simple materials, Jessica fashioned these “jumbo stamp” fabric coasters, complete with perfectly pinked edges. This is the perfect project for a laid-back weekend, especially because Jessica and Karen have graciously made the stamp designs available for download. CLICK HERE for the full how-to after the jump!
Materials: Instructions: