

T-Shirt scarf ~ necklace. I love upcycling!

Here's a fun & easy way to accessorize with an old t-shirt. I'm using an old longhorn t-shirt that was headed to the rag bin. What you need: t-shirt (with no side seams)rotary fabric cutterrulercutting matWhat you do: Using the ruler and rotary cutter, cut off the very bottom of the t-shirt. Starting at the bottom of the t-shirt, measure and cut 1 inch strips.
Continue cutting 1 inch strips until you have your desired amount of loop strips. Stretch out each loop. Felt Flower Scarf Tutorial. Thank you for all of the sweet love on my Felt Flower Scarf!
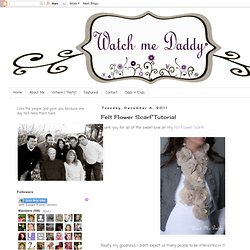
Really, my goodness, I didn't expect so many people to be interested in it. I'm happy to share this tutorial for you on how to make one of your own! Materials needed: 1/2 yard of 72" Felt or Felted Wool (this measurement is to be safe... but you'll end up with some extra here for sure.) Scissors Needle and Coordinating Thread *optional - Fast Grab Tacky Glue or Hot Glue *optional - Small hook and eye Let's get started shall we?
1. Start by cutting your long scarf piece. Now, cut a scallop around the edge of your long scarf piece. Next, circle cutting mania. Each flower will have 6 circles. DO NOT spend the time cutting out perfect circles. Chenille Scarf from a Sheet. I know it's probably too late to offer this as a Christmas gift idea, but here's a soft, upcycled handmade scarfc made from a soft vintage sheet.
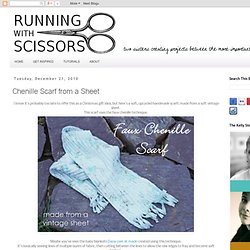
This scarf uses the faux chenille technique. It's basically sewing lines of multiple layers of fabric, then cutting between the lines to allow the raw edges to fray and become soft texture. Make a Vintage Sheet Faux Chenille Scarf. Hooded Scarf Tutorial. How to sew a hooded scarf or scoodie! First, fold your fabric lengthwise in half, right sides together.

Press it well on the highest setting (steaming would be good) so you get all the wrinkles out and develop a nice crisp line at the fold. Take your favorite hoodie and turn it inside out and make the hood as flat as possible along the middle fold. Place the opening of the hood straight along the fold a couple of inches away from the edge. You'll want to trace a half inch away from the hood all the way around it, until you hit shoulder area. Now, you'll want to trace a couple inches down from the bottom hood seam, and begin taking your line horizontally back to the fold. Scoodie. Figure 8 scarf. I named this the Figure 8 Scarf (we sell 18x72" pre-cuts here) because it reminded me of what I used to tell myself as a little girl to get the hang of twisting a rubberband around my hair to make a pony tail.

Once the band is around once, you twist it, turning the band into a figure 8 before you pull the pony tail through the band a second time. Putting this full loop scarf around your neck is just the same. Plus figure 8 sounds winter-y and fun. Plus I can't do it on skates. So. . * After making sure that each layer, in this case the voile and the velveteen, are trimmed to the exact same size, and also making sure that the width of the two pieces is uniform throughout the length, use a 1/2" seam allowance to sew right sides together along the two long edges* Start and end each of these seams 1/2" away from the end of the length* Pull through to the right side and press* Then press a 1/2" width of voile back against it's right side, as shown above, on both ends So there.Have fun.xo, AM.
Fleece hat. Good Morning Everyone!
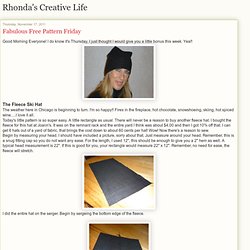
I do know it's Thursday, I just thought I would give you a little bonus this week. Yea!! The Fleece Ski Hat The weather here in Chicago is beginning to turn. Fleece Scarflette Tutorial. We have had a relatively mild winter so far, and I've been very happy that I haven't had to bundle up quite as much as usual.

This week, we did receive enough accumulation to send Clark out to make snow angels, and push his dump truck through the snow. I typically don't love spending long periods of time in the winter weather, but after spending a few days cooped up at the sewing machine, I had to get out. I was reminded of how much I enjoy my fleece scarflette that I made last year. It provides you with the coverage you need, and stays in place as you walk/run/etc. I decided that I'd re-post my original tutorial for those of you who may have missed it. One of the problems with a pull over neck warmer, is that fleece often creates quite a bit of static electricity.
There are many possibilities when it comes to making and embellishing these fleece scarflettes. Begin by cutting a rectangular piece of fleece. Fold your fleece in half with right sides together. That's it. Ric-Rac Scarflette.