

Smoooooooth Waistbands. At your request, here's the tutorial on how to make the waistband of the pants in the last post.
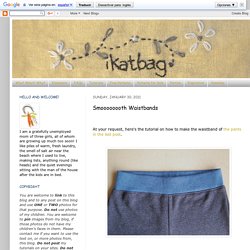
This is not a tutorial for the pants: I'm assuming you have a pair of pants that merely needs a waistband. A suggestion for maximizing the smoothness of this waistband: use as small a waistline on your pants as is possible. Remember that the waistline needs only be as big as your hips to be pulled up over them. If you entertain excess ease in your waistline, it'll all show up bunched under this waistband. Elastic in pants (no show) Okay, the above picture doesn’t look like much.
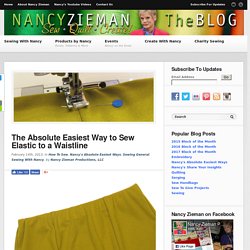
That’s the point! It’s the easiest way to sew elastic to a waistline without the telltale topstitching of an elastic waistline. Over the years, I’ve tweaked and personalized sewing techniques. My favorites are collated in my book, The Absolute Easiest Way to Sew. Now I’ll share a bonus technique for the letter “E” for inserting Elastic in a waistline.
Prepare the elastic. Cut the elastic 2″–4″ smaller than your waistline measurement, depending on what you feel is comfortable. Trim away the excess woven fabric.Quarter mark the elastic. How To Install Elastic In Flat Front Pants. I know there are tons of sewing tutorials about installing elastic, but figured out a way that I love.
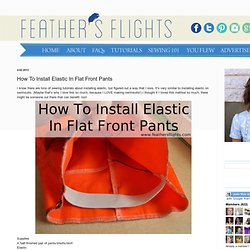
It's very similar to installing elastic on swimsuits. (Maybe that's why I love this so much, because I LOVE making swimsuits!) I thought if I loved this method so much, there might be someone out there that can benefit too! Supplies A half-finished pair of pants/shorts/skirt Elastic Sewing supplies 1. 5. Alternative Shirring - Using Elastic Casings. First off, I want to apologize to those whose comments I deleted when I originally made this post late last night.
I made a few wrong decisions with that and I am sorry. I did not know that this method is considered shirring as well because I've never seen it on ready to wear. I learned something from you and I thank you for that. I'm sorry. Now on to the post. I have tried several methods of shirring and have yet to get the right results.....that is until I discovered this method of shirring. Materials 1) a pattern of your choice and the items listed on the back of the pattern envelope 2) about a yard of extra fabric for the shirring panel 3) needle and thread or a sewing machine with machine needles and thread 4) about 3 yards of 5/8 inch elastic 5) a ruler 6) fabric chalk or any washable fabric marking device 7) fabric shears 8) a safety pin no wider then your elastic 9) stick pins10) choice of small quality lace to go along the back shirring panel and original back peices.
A better elastic waistband finish - tutorial. A better elastic waistband finish - tutorial 12 April 2012, 14:35 While I await a photoshoot on my new Papercut Ooh La Leggings, I thought it’d be nice to share with you what’s become my go-to finish for elastic waistbands.

Oftentimes pattern instructions will tell you to create a casing, leave an opening, and thread the elastic through it. I totally hate this! You end up with uneven bunching of fabric, plus the waistband tends to fold up and twist and generally get really uncomfortable to wear. Over the years, I’ve developed this method which a) attaches the elastic directly to the fabric, and b) protects your skin from direct contact with the elastic. Finished leggings: Step 1 Step 1 – Place the elastic around yourself where the waistband will lie, making sure it’s snug, but not tight (you may want to pre-stretch the elastic a bit first). Attach elastic w serger (scroll down) Stitch Elastic Without Quarter Pinning. I made a new suit to celebrate warmer weather!
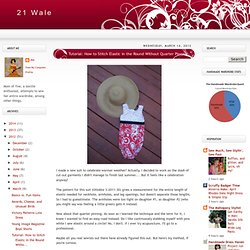
Actually, I decided to work on the stash of cut-out garments I didn't manage to finish last summer.... But it feels like a celebration anyway! The pattern for this suit (Ottobre 3-2011-30) gives a measurement for the entire length of elastic needed for neckhole, armholes, and leg openings, but doesn't separate those lengths. So I had to guesstimate. The armholes were too tight on daughter #1, so daughter #2 (who you might say was feeling a little green) gets it instead. Now about that quarter pinning. My tried and true method for elastic casings. Elastic threaded through a casing is a quick, easy way to cinch in fabric.
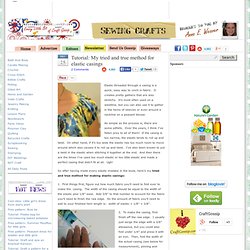
It creates pretty gathers that are also stretchy. It’s most often used on a waistline, but you can also use it to gather in the hems of sleeves or even around a neckline on a peasant blouse. As simple as the process is, there are some pitfalls. Over the years, I think I’ve fallen prey to all of them! If the casing is too narrow, the elastic tends to roll up and twist. So after having made every elastic mistake in the book, here’s my tried and true method for making elastic casings: 1. 2. If you serged the raw edge at 3/8″, you should fold over width of elastic + 1/8″ ease.
If you’re folding under the raw edge at 1/4″, you should fold over the width of elastic + 1/8″ ease + 1/8″ allowance for stitching the casing down. Stitch the casing down close to the edge, leaving a hole big enough to insert your elastic. 3. 4. 5. Pull the ends out far enough that you’ve got a couple of inches to work with on each side. 6. Elastic waistband. Jimmy Jams, Socks, Flinen Trousers and the Pattern Plus Pyramid OK, so there is a lot to get through today, so better get at it!
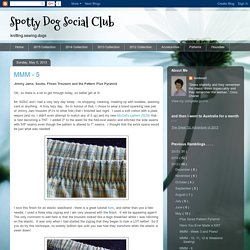
Mr. SDSC and I had a very lazy day today - no shopping, cleaning, meeting up with buddies, washing cars or anything.