
SOOTHING A SUNBURN. Photos/post/graphics: Kristin Ess Let’s start this post off by saying you should always try and avoid being in the sun without proper protection in the first place.
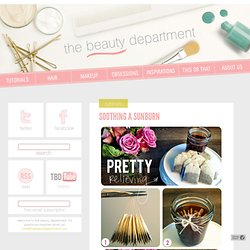
See HERE. But sometimes you just can’t plan for it and you can unexpectedly find your skin baked beyond belief-especially if there’s an overcast. One of the girls in our office turned a nice shade of lobster over 4th of July. I remembered something we used to do as kids when we’d get burned and I must admit– out of all of the home remedies I’ve ever tried, this one has been the most consistently relieving. Tea bags aren’t very big, so you can’t cover a lot of sunburned skin with individual bags. Leave the tea bags/t-shirt on the skin until you feel it has soaked up the majority of the moisture from the bags/t-shirt. HOT CROSSED BUN (REMIX) NAILED IT! D.I.Y. MAKEUP FIXER UPPER. Photos + post by amy nadine, graphic design by eunice chun Don’t you just want to cry when you drop your brand new compact and the powder shatters into a million little pieces?
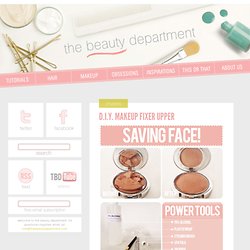
But wait! Don’t throw it out and call your losses. You can absolutely put humpty dumpty back together again! And while you’re at it, grab your old cream shadow, blush or liner that has dried out, cracked or shrunk and bring it back to life too. POWER TOOLS: 70% alcohol {it works 1000 times better for this than your typical rubbing alcohol from the drug store and can be purchased at your local art supply}, plastic wrap, spatula, dropper, synthetic eyeliner brush {I used this favorite go-to liner brush for its round edges and stiff short bristles}, Q-tip {optional if you’re a perfectionist… you know who you are!} To revive your dried-out and cracked old cream shadow, apply the same steps except there’s no need to wrap it up or mash it up.
NAILED IT! ROBIN’S EGG NAILS. Photos, graphic design, post by Kristin Ess Some people are more skilled at nail art than others and some can’t wear crazy funky nail art to the office.
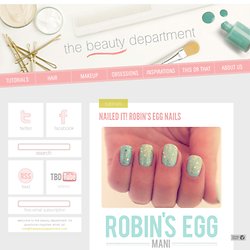
So here’s a simple look that anyone can do no matter your skill level or work environment. DIY LIP SMOOTHIE. Photos + post by amy nadine, graphic design by eunice chun Dry + cracked lips ruin how lipstick looks.
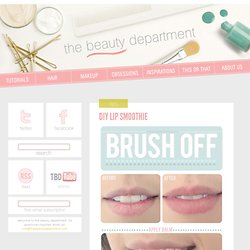
And because of recycled air, flying, dehydration and just life, unfortunately all of us are victims! So I’m sharing exactly what I have my clients do before I apply their makeup. All you need is a disposable mascara wand (or toothbrush if you don’t have one), lip balm (I use this one for severe cases and this one for a healthy vitality) and a tissue. 1. NAILED IT! MANI MONDAY: DIY GLITTER POLISH. Photos/post/graphic design by Kristin Ess A lot of you have mentioned that some of the polishes that we’ve posted in the past are too expensive when you’re living on a budget.

Well, this sparkly DIY glitter polish tutorial should help you out. Here we go: Roll a post it into a cone shape and tape the side to create your funnel.You’ll need 3 kinds of sparkle. I used thick chunky craft glitter from the craft store, a fine craft glitter by Martha Stewart, and a gold pigment powder. PIN IT TO WIN IT. PRETTY POLISH IDEA. Photos + post by Kristin Ess First of all, sorry for the lack of posts this week.
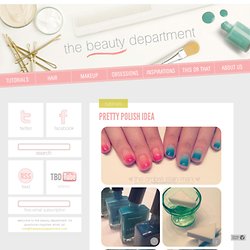
By now you know that Lady Conrad has a brand new book called THE FAME GAME. We joined her on her book tour and that busy schedule left little time for much else. But we’re back and bringing you the ombre stain mani! We’ve seen lots of ombre techniques in the past, but this one is pretty cool because it’s done on your bare nails and has more of a stain effect than looking like actual nail polish. You will need: 3-4 gradient nail polish colors (dark to light and all in the tonal family), a clear top coat, a triangle makeup sponge, a cup of water, a piece of paper for blotting the polish, a paint brush + nail polish remover for clean up. Unscrew the lids of your 3 or 4 gradient colors so they’re ready to go. Try it in other colors. Tags: DIY, do it yourself, how to, kristin ess, mani, mani monday, manicure, nail art, ombre, paint, polish, spring, stain, style, summer Related posts: DIY COCONUT + ROSE BODY SCRUB.
Few things smell better than coconut and rose so let’s combine them, shall we?
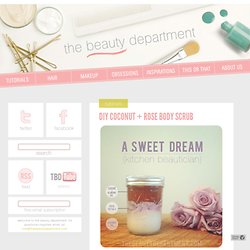
In this Kitchen Beautician DIY, we’re making a “Spring Time Scrub” to help you exfoliate and get your skin super soft for the coming summer months. Bathing suit season is just around the corner and nobody wants to be the ashy girl! Here’s my new favorite way to get rid of dry skin caused by winter dryness: You’ll need: a mason jar, coconut oil, raw cane sugar, almond or jojoba oil and one fragrant rose (here I used sterling silver roses because they’re my favorite AND they’re one of the most fragrant roses ever.)
MANI MONDAY. NAILED IT! Photos + post by Kristin Ess Sometimes you’ve gotta get a little country!
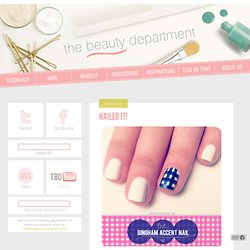
Nothing screams sweet southern style more than gingham, so let’s make that into a mani, shall we?! Start by painting the nails white.Using the DIY sticker method we showed you a couple weeks ago, paint blue, pink, green or whatever color you love on a piece of tape. Wait for it to dry and cut it into thin strips. You’ll need 6-10 strips per finger.Lay 3-5 strips horizontally on the nail.Then lay the other 3-5 strips vertically.Trim the excess with cuticle nippers.