
21 ways of turning pallets into unique pieces of furniture. Seriously Awesome Jewelry Storage. Happy Friday, y’all!

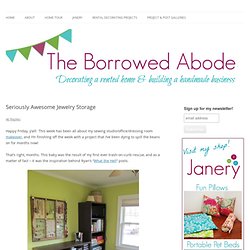
This week has been all about my sewing studio/office/dressing room makeover, and I’m finishing off the week with a project that I’ve been dying to spill the beans on for months now! That’s right, months. This baby was the result of my first ever trash-on-curb-rescue, and as a matter of fact – it was the inspiration behind Ryan’s “What the Hell” posts. What’s that on the wall? If you’re thinking it’s an old wooden window-turned-jewelry-display, you’re right! I forgot to take a true “before” photo, but here’s what it looked like after a ton of sanding. The work was totally worth it. I backed three of the window pane sections with coordinating Erin McMorris Wildwood fabric (you saw it earlier on my custom dry erase board) just for fun.
Two of the bottom panes got a fresh piece of screen so that all my hook earrings would have a place to dangle. And some simple wooden dowels added more chunky necklace and bracelet storage on the sides of the window. Porządki. Every year I like to reflect. Take a look back at the year and say WAHOO, it was a GREAT year! And... take a moment to look for any areas of opportunity and set some goals to make the next year even BETTER!
2011 was a really great year for us. I got to be a stay at home mom and be extremely involved with the kids at home and at school. We started rebuilding our lower level and even tore down a wall! So, just like I did last year, I thought it would be fun to look back at my favorite projects from this year! In January, I started out the year by looking at time management and shared a couple of things that work well for us. I chatted about all of my favorite storage any why. We tackled the paper monster: Step 1, Step 2, Step 3, Step 4, Step 5, Step 6 and Step 7. In February, we worked hard on getting our photos organized: Step 1, Step 2, Step 3, Step 4 and I shared what camera and lenses I use.
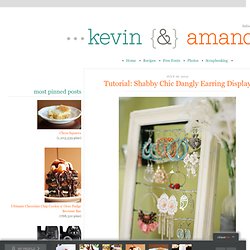
And we took a little break from all of the photo organizing to make a quick DIY earring holder: Stolik z gałęzi. Modern Country. Bo med barn. Tutorial: Shabby Chic Dangly Earring Display. This fun little shabby chic earring stand, made from an altered picture frame, is a great way to hang and display all your beautiful, dangling earrings.

I had the idea for this project after we talked about my love affair with dangly earrings and how to display them. I don’t know about you, but I just love seeing them all hanging in a row! :) The next day I made this earring frame, and it was so quick, easy, and inexpensive to put together, I knew I had to share it with you! :) I spent a grand total of $5.34 on this project. Cost: Less than $10 Time: 30 mins Supplies: picture frame, 12′ of picture wire, acrylic paint & brush, staple gun (or nails/tacks, etc) I started out with a black 8×10 picture frame from Walmart, $3. Since the frame wasn’t real wood, I was a little concerned with how it would turn out once I painted it. But as you can see from the above images, this little inexpensive frame did great! Next, I took a piece of wire and laid it across the back of the frame.