SLIME. Don't you LOVE it when your little one is over the moon about an activity you shared together?!
I do!! This morning we made RAINBOW SLIME and Biscuit was beside herself with excitement. There are a few ways to make slime, however I found this recipe works best ~ 1 1/2 cups of CLEAR glue and 1 1/2 cups of liquid starch. The liquid starch we used was the brand STA-FLO, you can find it at your local grocery store with the laundry detergent or you can purchase on amazon. You mix it all together, separate the slime into a few small bowls and add food coloring to each bowl. You only need a few drops of food coloring!!! Making her slime All ready to go! "Stretchy" "Eeeeeew. " "I squish it! " Deep in thought.... By the end there was just one big ball of slime. She played with this stuff for thirty minutes ~ uninterrupted. *High-fiving myself* Happy Playing & Exploring!! Tot School Tumblr. Creating 3-D Paper Sculptures With Kids.
On most Fridays, I set-out a free play art activity for my girls.
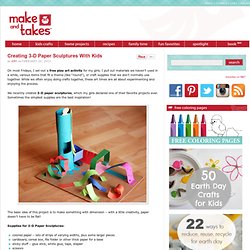
I pull out materials we haven’t used in a while, various items that fit a theme (like “round”), or craft supplies that we don’t normally use together. While we often enjoy doing crafts together, these art times are all about experimenting and enjoying the process. We recently created 3-D paper sculptures, which my girls declared one of their favorite projects ever. Sometimes the simplest supplies are the best inspiration! The basic idea of this project is to make something with dimension – with a little creativity, paper doesn’t have to be flat! Supplies for 3-D Paper Sculptures: colored paper – lots of strips of varying widths, plus some larger piecescardboard, cereal box, file folder or other thick paper for a basesticky stuff – glue stick, white glue, tape, staplerscissors To get the girls started, I showed them a few ways to fold, twist, curl, and cut the paper.
After a quick demo, they were off and running! Tot School Tumblr: Archive. We made colored sand and fall leaves in preschool. Last week, we explored making colored sand.
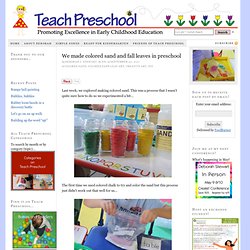
This was a process that I wasn’t quite sure how to do so we experimented a bit… The first time we used colored chalk to try and color the sand but this process just didn’t work out that well for us… I think that the kind of chalk I used was part of the problem. I figured out that the cheaper and more powdery the chalk, the easier it is to color the sand. I also didn’t care for how pale the colors were so on our next try, we just added food color to the sand… The sand we are using for this process is white sand that comes in a jar purchased at the Dollar Tree… And the shaker bottles that I put the colored sand in come from Deals (which is like a Dollar Store). We used the colored sand to make veins in our paper leafs. Then the children shook the colored sand on the glue… Some of our students asked to make more than one leaf so we let them go at it… Update Check out Deborah's new book and order your copy today!