
DIY Sharpie Tie Die. Present wrapping ideas: a week of Christmas on Pinterest. Who knew becoming a mom would make me want to be so crafty?

I didn’t. But here I am. And I decided to search Pinterest for cute and creative present wrapping ideas! Love these. As always, click the photo to get to the pin for more info and the original source. Source. Urban Comfort: Handmade. I was out of town last week, one of my husband's birthday gifts to me being a ticket to New York. I had a great week, on lots of different levels, which I'll share as the week progresses. But for now, I'll get back to the blog post I had planned to publish last week. I like to celebrate the seasons as much as possible, turning the natural materials just outside my door into art supplies. How to make a Tulle Pom Pom Ball - Influential Mom Blogger, Parenting, Community - StumbleUpon. 148.2K Amazing Shares Facebook 62 Pin It Share 1.2K 1K+ Twitter 9 Google+ 7 StumbleUpon 146.9K Email -- Email to a friend 148.2K Amazing Shares × How to make a tulle pom pom ball for wands…otherwise known as, “how to make a cat toy” in my house.
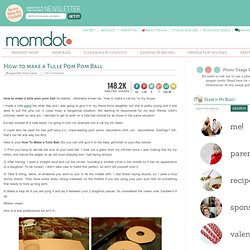
I made a tulle wand the other day and I was going to give it to my friend Kims daughter, but she is pretty young and if she were to pull the pins out, it could mean a dangerous situation. Not wanting to responsible for my best friends child’s untimely death by lace pin, I decided to get to work on a tulle ball tutorial for all those in the same situation. Except instead of a tulle wand, I’m going to turn my example into a cat toy for Gwen. It could also be used for hair puff pony-o’s, cheer-leading pom poms, decorative shirt..um…decorations. 2010 Planner Kit: Instructions - Red Velvet Art Blog. Hi Everyone! These are the instructions for the 2010 Planner Kit. I am going to share with your the specific steps I took to assemble my planner.
Please remember, though, that these planners are meant to be customized! Snowy Balloon Ornaments - Martha Stewart Holiday & Seasonal Crafts. Martha Stewart Crafts. How To Stencil Your Own Shirt - Video - StumbleUpon. 101 Crafty Gifts - StumbleUpon. DIY Stone Sconces.
Weekly DIY Roundup: Printing on Fabric! For the Love...: I {heart} gift wrap guest post: DIY burlap gift bows. My first guest in the I {heart} gift wrap series is Carrie Stroud of The Rowdy Stroudys.
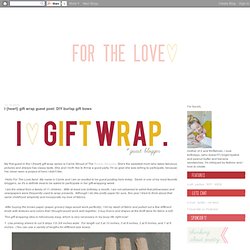
She's the sweetest mom who takes fabulous pictures and always has classy taste. Custom Color Chalkboard Paint - Martha Stewart Organizing Crafts. Thanks to paint that dries into a chalkboard finish, your board can be whatever size you desire and placed wherever you like.
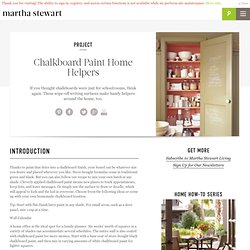
Store-bought formulas come in traditional green and black. But you can also follow our recipe to mix your own batch in any shade. Cleverly applied chalkboard paint means new places to track appointments, keep lists, and leave messages. Or simply use the surface to draw or doodle, which will appeal to kids and the kid in everyone. Choose from the following ideas or come up with your own homemade chalkboard location. Jewlery Resin. Looking for a quick and easy gift for Valentine’s Day? This project fits the bill. Remember this post on patriotic resin jewelry? The process is the same, except I used Valentine’s Day sprinkles instead of red, white and blue. Recycled Craft Ideas.
DIY Hand Stitching, part 2 - LA. Last week, I started a DIY Hand Stitching series and began with how to hand stitch your own handwriting.
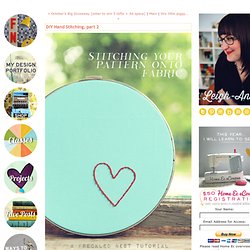
I stitched onto paper and showed a method for transferring the pattern by poking or drawing dots as a guide on the surface. The same technique can be used when stitching a simple pattern onto fabric but when you stitch more than one color or there's a lot of intersecting lines (like these), it's much easier to use a piece of tear away backing. I'll show you how-- it's really neat!
You will need: Fabric (linen, muslin & thick cottons), Needle (i use a #5 Embroidery Needle), Embroidery Thread, Scissors, Pencil, Thumbtack or Piercing Tool, Masking Tape or Low-Tack Tape, Tear Away Backing (available at fabric & sewing stores), Emboidery Hoop (optional) 1> Cut a piece of tear away backing, a bit bigger than your pattern. Repurposed Etched Glass Spice Jars... As an avid recycler, I often find myself admiring the numerous boxes of glass bottles in our garage, awaiting their fate.
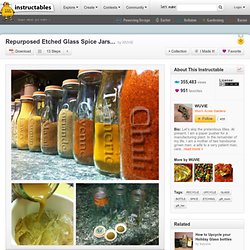
When I noticed more than a dozen empty bottles from one particular product, I knew I had a problem there must be something else I could do other than toss them into a recycling bin once a week. In order to justify my purchase of a caffeine-laden treat, I decided to repurpose and upcycle the glass containers from my favorite splurge. Enter Starbucks Frappuccino. (I know, I know, but I'm trying...) And no, we're not rich. Star Crochet Blanket, granny squares blanket. Woohoo I’ve finally finished my star crochet blanket!
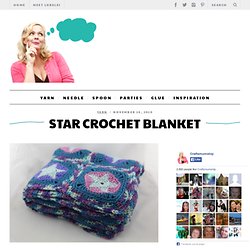
Here it is all folded up, edging done and all the loose threads weaved in. What a great feeling of satisfaction I get when I finish a big project. This one took a while as I ran out of yarn and had to order some more in. To cut a long story short after being told it would be a week I finally got it over a month later. Templates. These cute purses are so easy to make!
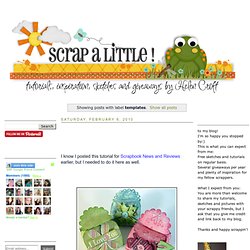
It won't take you more than 30 minutes. Wouldn't they be a perfect gift for mom. Put a gift certificate inside to her favorite store/restaurant. And don't forget "Teacher Appreciation Day" May 5! "*The Heartfelt Home*" DIY,Sewing, Decorating, Crafts, Cooking, Sentimental, Homeschooling: Salt Dough Ornaments and Gift Tags. I am so excited to share a great Christmas craft project today. Salt dough ornaments and gift tags. Map Coasters. Hey...Things Change!: DIY: Paint Chip Calendar. *New and improved version of the Paint Chip Calendar is right here.
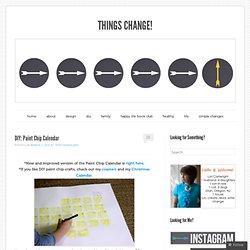
Yesterday, while perusing some of my favorite blogs, I found this great DIY calendar idea from Design Mom. It got me thinking about a project I had put on the back burner for a while and it also reminded me that I have yet to purchase a 2011 calendar and here it is March! So I took my back burner idea involving paint chips and combined it with a DIY calendar and created my own mash up: a DIY Paint Chip Calendar. Supplies: paint chips, glue, white paper…I used a Crayola floor pad.
I chose the floor pad because the top is hooked together with a strip of gluey stuff, making it easy to tear off each calendar page as the month ended while still holding the rest of the calendar together. I measured the squares on our old calendar, which was approximately the same size as the floor pad… …and cut the paint chips to the same size, 2.5” x 3.” I then recruited daughter 3, Lainey, to do some gluing. 1. 2. 3. 4. 5.
DIY Painted Wooden Crates - StumbleUpon. The Technique Zone: Acrylic Paint Transfer. Supplies needed: Acrylic dabbers, photocopy of an image, water spritzer bottle, paintbrush, card stock, craft sheet and heat tool (optional) Take the lid off the dabbers and brush the paint onto the card stock, ensure you get a good coverage Take your photocopied image ( remember that you will get a reverse of the image, so don't use bold words), flip it over and place it in the acrylic.

Lightly press it down making sure it's smooth and not wrinkled Leave to air dry for at least 15 minutes and then if you wish give it a blast with the heat tool Only move onto this step when you are sure your paint is completely dryTake your water filled spritzer bottle, spray the back of the paper no more than two squirts, you don't want it too wet Next start to rub the paper very gently with your finger Keep rubbing and extra spritzing if you need too Eventually you will get rid of all the paper, but it does take a bit of patience as you have to be careful not to wet it too much and rub the image away.
Santas Workshop: Handmade Gifts for Her - Martha Stewart. Semiprecious Stone Necklace - Introduction - MarthaStewart.com. Braided Dupioni Silk Necklace Craft. Tote Bags with Iron-On Silhouettes - Martha Stewart Crafts by Technique. Fingerprints on the Fridge: Christmas topiary. Build It With Ana: Floating Shelves. Mini Crepe Paper Flower Favors DIY. Jan 26. Sugar Bee Crafts: sewing, recipes, crafts, photo tips, and more!: Monogram Mirror. Braided jersey scarf. December 15th, 2011. Skip To My Lou - StumbleUpon. Make your own paper bead jewellery - Better Homes & Gardens Magazine - Yahoo!7 Lifestyle - StumbleUpon. Most of us have a little stash of leftover decorative papers from projects and parties.
But before you put your scraps in the recycling bin, take a look at what you can do with them. These colourful beads can be made from any paper – junk mail, magazine pages, used giftwrap or leftover stationery papers – and they’re so easy, you and the kids can whip them up by the dozen. How to transfer a photo to fabric - A Beautiful Mess - StumbleUpon. Make Your Own Canvas Portrait! - A Beautiful Mess - StumbleUpon. Adventures in home-making: the best online craft projects to do with kids.
Tissue Flowers Tutorial, No.2 - gingerandgeorge - StumbleUpon. A couple of months ago, Jenny - the very lovely editor of PaperCraft Inspirations - asked me to work up a feature on different ways to use tissue paper. You can see the results in the September issue (on sale right about now), and alongside ruffles, twists, layers, buttons and twirly skirts, there's a miniature version of an old tissue-paper favourite. I made these flowers for Halloween a couple of years ago, and although the large scale can look fantastic on card projects, it doesn't leave room for very much else. ThreadBanger - D.I.Y Fashion & Style - StumbleUpon.
Paper Quilling Numbers in Ideas for kids crafts - StumbleUpon.