
Design Improvised: My Insanely Awesome DIY Outdoor Rug! How awesome is this rug?

Am I insane for making it? I did ask myself that a few times during the process in the midst of running through four cans of spray paint and a roll of masking tape, but I am pretty excited about the end result! With just a few materials you can end up with a one-of-a-kind rug for under $50 and a few hours of work: I would've never come up with this rug if it hadn't been for the great results we got from our DIY chevron doormats at the last Design Improvised DIY Night.
Who knew it would be so easy to transform a rug with just masking tape and spray paint? I initially thought I would apply the same chevron pattern as the doormats, but I pretty quickly realized I would indeed be insane to attempt that the taping work would take forever on such a large surface. Supplies for DIY Outdoor Rug How to Make Your Outdoor Rug For the taping, I laid the rug out in my living room and started free-handing (no measuring needed!) Now for the fun part, bring on the spray paint! Make: Cocktail Umbrella Lantern. The wizards at Etsy Labs show us how to EASILY make a cocktail umbrella lantern for our next 'outdoor soiree', BUT it's so cute, you'll want to hang it INSIDE.
The project is reminiscent of Heather Wells's cocktail umbrella lamp, but this version requires less sophisticated materials. Here's the rundown: 20 to 40 cocktail umbrellasa white paper lanterna base for the lanternlight cord & bulbglue gun and sticksa scissors For the entire tute, including a video, follow this jump to Etsy. Tagged : How-To, cocktail, lamp, umbrella, DIY. DIY Confetti Dipped Balloons. *A quick note: Thank you all so much for your patience as I switched Studio DIY over to it’s schnazy new server.

We still have a few little kinks to work out, so bear with me just a bit more, but I just couldn’t hold back the confetti and balloons any longer! Now back to our regularly scheduled programming… After I covered my shoes and my purse in confetti, I just started confetti-dipping everything. No really, everything. And one of those victims of my obsession was.. you guessed it, balloons! Balloons* Gold Foil Confetti (I bought a big bag of it from the party store. *If you are filling your balloons with helium, so they float, you’ll need to make sure you do not add too much confetti to the balloons or they won’t be able to stay up! Take your inflated balloon and paint on the decoupage glue to the bottom of it. The confetti stays on pretty well with just those steps, but for extra security you can also add another layer of the decoupage glue overtop of your confetti and let it dry. Glitter Feathers for Entertaining!A Ruffled Life. A couple weeks ago you may have caught me on Studio 5 chatting with the fabulous Brooke Walker about these sexy little glittered feather drink stirrers and glitter-dipped coasters.
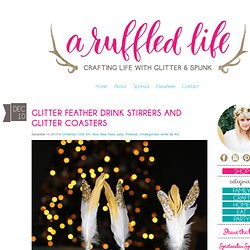
It seems like everywhere you look people are dipping things in glitter! Glitter-dipped bows, glitter-dipped shoes, and even edible glitter-dipped desserts. Clearly I am on board with this glitter apocalypse. Yes…glitter is the new Zombie??? Sometimes a trend is just too adorable and too hot to not join in on the fun. . - White feathers - Cork coasters - White craft glue (like Elmer’s glue) DIY Fresh Flower Honeycomb Party Decor. By Kelly on Apr 18, 2013 You didn’t think I’d get through the Garden Party series without a little honeycomb love, did ya?
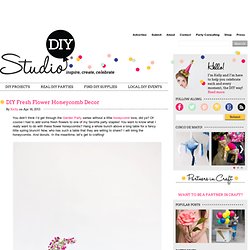
Of course I had to add some fresh flowers to one of my favorite party staples! You want to know what I really want to do with these flower honeycombs? Hang a whole bunch above a long table for a fancy little spring brunch! Now, who has such a table that they are willing to share? Dear anemones, you own my heart. Honeycombs (These are 8″ ones from Shop Sweet Lulu) Variety of Fresh Flowers (I used anemones, ranunculus and boronia) Washi Tape String or Twine (for hanging) Paperclips (For closing the honeycombs) Select a few pretty blooms and arrange them however you please. If there isn’t already a string for hanging on your honeycomb, attach one now. …and carefully open the honeycomb around it. Hang and enjoy! DIY Giant Crepe Paper Roses.
Happy Monday, folks!
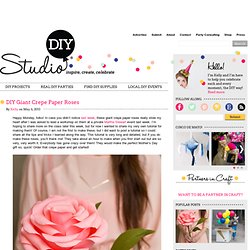
In case you didn’t notice last week, these giant crepe paper roses really stole my heart after I was asked to lead a workshop on them at a private Martha Stewart event last week. I’m hoping to share more on the class later this week, but for now I wanted to share my very own tutorial for making them! Of course, I am not the first to make these, but I did want to post a tutorial so I could share all the tips and tricks I learned along the way. This tutorial is very long and detailed, but if you do make these roses, you’ll thank me! They take about an hour to make when you first start out but are so very, very worth it. Doublette Crepe Paper (Cream Pink, Pink Apricot and Bubblegum for my petals and the Pale Olive and Deep Olive for my leaves) Templates (Download them here on Martha Stewart and enlarge to your desired size.
Craft Glue Round Pencil Cutting Out Your Crepe Paper You will need: Begin by cutting everything out as listed above.