

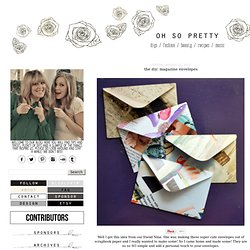
DIY Star Lantern. MAGAZINE ENVELOPES. 18K+ Well I got this idea from our friend Nina.
DIY Chan Luu Bracelet. My goal this holiday season was to really try my best to make some homemade gifts.

So far I’m doing pretty well with my wreath, some burlap covered candles, some personalized coasters and this past weekend I gave a try at some jewelry. You may have noticed how wrap bracelets are everywhere lately. Chan Luu bracelets are extremely popular these days. They come in singles and also in wraps. Easy Folded Gift Boxes - Cosmo Cricket. UPDATE: If you came here from Pinterest, we later updated our readers with more examples and a video tutorial... it's much easier to follow!
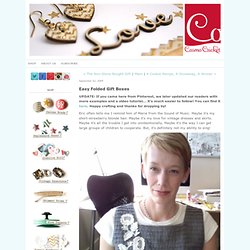
You can find it here. Happy crafting and thanks for dropping by! Eric often tells me I remind him of Maria from the Sound of Music. Maybe it's my short-strawberry blonde hair. Maybe it's my love for vintage dresses and skirts. So, it's a little ironic that I lead the children's choir at my church. Once a year we combine the two choirs for the Sunday services as the main event. It just doesn't seem like enough, but I made several thank-you's yesterday for my friends that helped my little ones sing so well, I swear I could hear them all the way in Minnesota. Here' the first one I made. To make the box, take a full sheet of paper and mark it at 6" on two opposing sides. Then fold edges in to match up with the marks. Now measure and mark at 5" and 7" on the folded edges. Fold as shown below. How To: Make Typographic Gift Wrap & Man Made DIY.
This year, I vowed to only make or buy handmade holiday gifts for my friends and family, and I've kept to it so far.
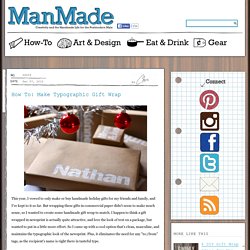
But wrapping these gifts in commercial paper didn't seem to make much sense, so I wanted to create some handmade gift wrap to match. I happen to think a gift wrapped in newsprint is actually quite attractive, and love the look of text on a package, but wanted to put in a little more effort. DIY Lunchable Jars {Guest Post} Hello everyone, my name is Kayla and I run SayNotSweetAnne.com.
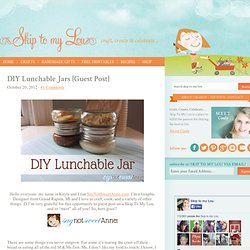
I’m a Graphic Designer from Grand Rapids, MI and I love to craft, cook, and a variety of other things. ;D I’m very grateful for this opportunity to guest post on a Skip To My Lou, and to “meet” all of you! So, here goes!! There are some things you never outgrow. For some it’s tearing the crust off their bread or eating all of the red M & Ms first. What did surprise him, and me, is that I found nothing. 31 Insanely Easy And Clever DIY Projects. How to fold an origami star. Hey Look - Event styling, design inspiration, DIY ideas and more: PRETTY PACKAGING IDEAS.
I think my favorite part of gift-giving is wrapping the goods.

I really don't mind if the wrapping paper is being ripped off afterwards, I simply enjoy spending a lot of time and thought on making a present look as pretty as possible. Here's some cute and creative gift wrapping inspiration I found around the web: Washi tape ideas: Sweet Paul (left) and Tea For Joy (right) Lace gift wrapping: Sweet Paul, Colorful fabric packaging: Handmade Weddings (via Haystack Needle) Simple glitter ribbon on craft paper (Besotted Brand) & Colorful woven paper (Craftzine) Pretty doily wrapping - left: Facil Y Sencillo, right: A Creative Mint Confetti on double-sided tape: 3@12, Confetti dipping fun: Tokketok Left: rainbow yarn on craft paper (via babble), right: bunting, pom garlands and yarn (two shades of pink) Paper Illustrations, Gift boxes, Calendars, Stationery, Printables, Handmade cards. DIY Friendship Bracelet.
For several months now, we’ve been receiving emails requesting a friendship bracelet DIY.
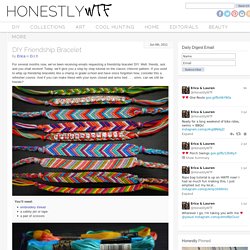
Well, friends, ask and you shall receive! Today, we’ll give you a step by step tutorial on the classic chevron pattern. If you used to whip up friendship bracelets like a champ in grade school and have since forgotten how, consider this a refresher course. And if you can make these with your eyes closed and arms tied . . . umm, can we still be friends? You’ll need:embroidery threada safety pin or tapea pair of scissors Start by cutting several strands of embroidery thread at about 24 inches each. Little guiding stars. Since the new year has started I’ve been trying to think of ways to be more kind to my self.
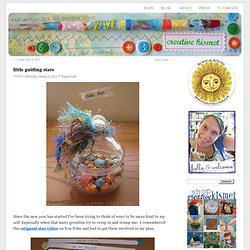
Especially when that nasty gremlins try to creep in and stump me. I remembered this origami star video on You Tube and had to get them involved in my plan. I thought it would be fun to make a whole bunch with kind words and “you are….” phrases inside. I made 60 of them, enough to last me the whole year if I open one a week, plus a few extra just in case. I used 12 x 12 inch scrapbook paper and cut 1/2 x 12″ strips, then followed the video HERE*. *UPDATE! Be Sociable, Share! Re-purposing: Tshirts into 5-strand-braided-headbands. I was walking through Target a few weeks ago and noticed this little knit fabric headband that was not just braided together…….but woven.
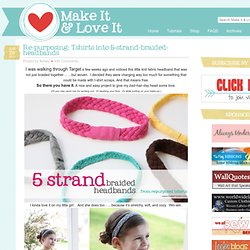
I decided they were charging way too much for something that could be made with t-shirt scraps. And that means free. So there you have it.