Diagrams, Crease Patterns, Books and More. Scratchboard Cards. I often get asked if making your own art materials saves money.
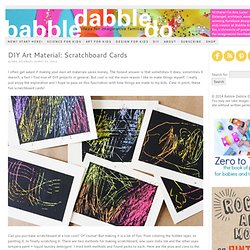
The honest answer is that sometimes it does, sometimes it doesn’t, a fact I find true of DIY projects in general. But cost is not the main reason I like to make things myself; I really just enjoy the exploration and I hope to pass on this fascination with how things are made to my kids. Case in point, these fun scratchboard cards! Can you purchase scratchboard at a low cost?
Of course! India Ink Pros:Covers the card evenly and quicklyLooks best when dryCons: You have to have India Ink on handThe ink gets used up quicklyThe final surface chips a little when scratched “Tempera paint + liquid detergent” Pros:Easy to pull together on a moment’s notice with everyday materialsScratches really easily and doesn’t chipCons:The mixture gets a little frothy so the coverage is unevenMultiple coats required In the end both methods work so pick which one is best for you! Materials Instructions. Straw Paper Rocket. Recently NASA stated that space shuttle Atlantis will be the last of the shuttle program, retiring the entire shuttle fleet to concentrate on sending probes further out to asteroids and Mars.
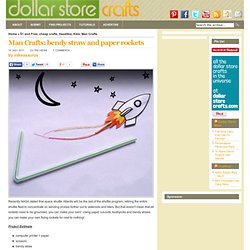
But that doesn't mean that all rockets need to be grounded, you can make your own! Using paper cut-outs, toothpicks and bendy straws you can make your own flying rockets for next to nothing! Project Estimate computer printer + paperscissorsbendy strawthreadtoothpickadhesive tape Total: Free! Start by surfing the web and finding images of the rockets you want to make. Choose your favourites and copy them into a photo or paint editing program, your computer probably has something that came preloaded. If you're unable to use a photo editing suite, don't worry, I got you covered. On the righ-hand side of this page is the version I used to make this project.
Print your rockets out on regular printer paper and then cut out each rocket shape. Next, cut different lengths of red, yellow and orange thread. '3D' Photo. I know you are invited to at least one wedding this summer.
Bring your camera. This is a neat way to present a special wedding picture. It's an old paper trick call a tunnel card. Picture 2 Candle. Years ago, I used this technique with rubber stamps to make the favors for my wedding.
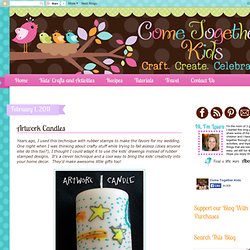
One night when I was thinking about crafty stuff while trying to fall asleep (does anyone else do this too?) , I thought I could adapt it to use the kids' drawings instead of rubber stamped designs. How To: Paper Butterfly Garland. This pretty paper butterfly garland is a sinch* to make, and it’s likely you have all the materials required sitting in your craft cupboard already.
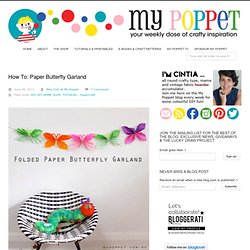
I made a prototype a while ago and thought I was a genius to invent this cute but simple design. Turns out that nothing is original and it’s been done before, but stringing the butterflies up to make a garland, totally me! (*means super easy) Photo Origami. Photo 2 Wood. DIY Paper Feathers. A few weeks ago I was helping my friend create her hat decoration for the Kentucky Derby party we were going to be attending together.
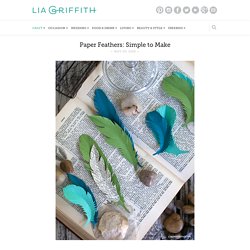
We made over-sized paper flowers in bright pinks and plums and added some huge paper feathers into the mix to finish the over-the-top look. Flapping Paper Butterfly. I had a baby so I’ve invited some fave guests to take over for me while I spend time with the little guy.
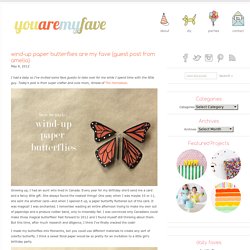
Today’s post is from super crafter and cute mom, Amelia of The Homebook. Growing up, I had an aunt who lived in Canada. Every year for my birthday she’d send me a card and a fancy little gift. She always found the neatest things! One year, when I was maybe 10 or 11, she sent me another card—and when I opened it up, a paper butterfly fluttered out of the card. I made my butterflies into Monarchs, but you could use different materials to create any sort of colorful butterfly. Materials: You’ll need heavy cardstock, 24 gauge wire, silicone rubber bands (I found mine in the hair aisle at Walgreens) needle-nose pliers, scissors, tape, a paintbrush, a black marker, and a white ink pen. Step 1: Measure and cut your wire. Step 2: Find the center of the longer wire. Step 5: Find the center of the shorter wire, and wrap it around the base of the paintbrush. Cardboard Guitar. ..Thank you, thank you, thank you for all of the sweet love (from this post).
I sure appreciated all of the lovely comments and well wishes for my new little baby girl……..as well as for our whole family. That sure made this momma feel great. Book Pot. The folk at Woman's Day tweaked my idea a lot, but here's the original (which I have to admit a like a lot more) and tutorial: I haven't refabbed a book in ages ... but on Friday a friend shared a link to this designer "book shaped flower pot" and wondered if she could make it herself.
I said... um, yes! Then I scoured my office for materials and here's how it went :) I obviously wanted to make this entirely upcycled. This meant a book otherwise destined for a landfill. 1. Book Mobiles. 2 years ago, I took an art class where our project was to make altered book art.
One of my friends actually introduced me to these. We would sit and fold book pages for what seemed like hours. Paper Models. Origami Toys. Printables. Marble Mice.