A little experiment. TUTORIAL - How To Use PEPAKURA For Costume Building - Part 6 - (Filling and Sanding Tips) Herói de papel. Vasilhas de jornal e revista - Bowls of newspaper and magazines. Cesto grande de jornal. Desktop Lamp simple. 1) I first drew the Overall shape of the lamp that I wanted to create. This was done in Autodesk Inventor 2012. To begin, start a new part which is labeled as an .Ipt file. Inventor automatically knows that you want to start with a sketch, You can then use a combination of the line tool, arch tool, circle tool or whatever you need to get the profile shape you want.
When your happy with it, click finish sketch on the upper right hand side and then go the extrusion comm and under the model tab. 2) I then created a sketch on the surface of the first extrusion by right clicking on the face of the extrusion and choosing the new sketch. 3)For the lamp head I simply started a new sketch off the same feature that I created my previous sketch and drew the shape that I wanted to Revolve. 4. That was it on the modeling side, On to the fun stuff, 123D Make and laser cutting.
FINAL STEPS. If you were using a different armature wire, like 3/16", then you would use a 3/16th drill bit. Don't try to use the wrong bit (go out and buy one if you don't have it already) or the armature wire won't fit snug and will wobble and give you problems later on! Another reason you want the wire to fit snug is to avoid gluing it down since you want to be able to remove your sculpture once its done to then place it onto a more permanent base for displaying or for molding purposes. Using my reference I can continue posing the wire until I'm satisfied (or close enough) the pose I'm after. It is normal to tweak the pose during the clay stages as well, which is why you want to use an armature that is sturdy, yet flexible enough, to allow tweaks as during the clay stage.
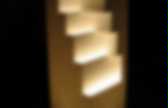
Optional step: Using Apoxie Sculpt putty (non-toxic epoxy putty made for artists: cures to a rock hard surface in a few hours!) I proceed to place it on the wire to act like "bones". Well that's about it! Finish. Geometric Cut Paper Table Lamp. Japanese lamp from recycled materials. A cheap but attractive paper "shoji" style lamp that uses mostly recycled parts and is easy to put together. DISCLAIMER 1: The overall design (and possibly the whole idea) of this lamp was influenced by atarax's shoji lamp Instructable. The motif on the side was influenced by Nick Falzone's superb Sangaku and Yuugou case mods. I did not steal either of their ideas. DISCLAIMER 2: This is probably one of the safer non-computer Instructables I've written.
However, hot glue is hot, scissors are pointy, bamboo can give nasty splinters and this Instructable involves wiring a mains lightbulb socket. DISCLAIMER 3: Yes, I got the parts images from Google image search because I built this thing before taking the photos, and couldn't be bothered taking photos of a light socket and corrugated cardboard. Laced Paracord Hanging Chair.